Lincoln Navigator: Wipers and Washers / Rear Window Washer Jet. Removal and Installation
Removal
NOTE: Removal steps in this procedure may contain installation details.
-
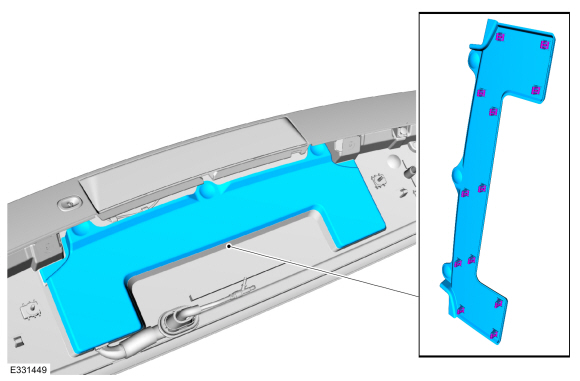
Remove the rear spoiler.
Refer to: Rear Spoiler (501-08 Exterior Trim and Ornamentation, Removal and Installation).
-
Remove the cover.
 |
-
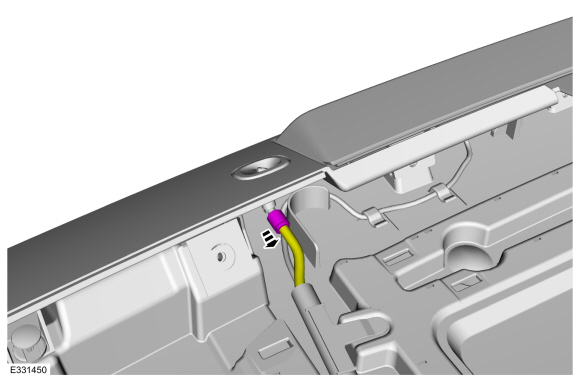
Disconnect the rear window washer jet fluid hose.
 |
-
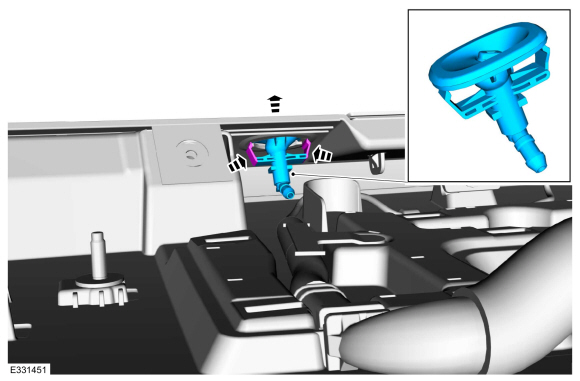
Depress the locking tabs and remove the rear window washer jet.
 |
Installation
-
To reinstall, reverse the removal procedure.
 Rain Sensor. Removal and Installation
Removal
Remove the trim cover.
Detach the clips and lower the trim cover.
Disconnect the passenger airbag deactivation module electrical connector and remove the trim cover...
 Rear Window Wiper Motor. Removal and Installation
Special Tool(s) /
General Equipment
Interior Trim Remover
Removal
NOTE:
Removal steps in this procedure may contain installation details...
Other information:
Lincoln Navigator 2018-2026 Workshop Manual: Intake Manifold. Removal and Installation
Removal Disconnect the battery ground cable. Refer to: Battery Disconnect and Connect (414-01 Battery, Mounting and Cables, General Procedures). Remove the EGR cooler. Refer to: Exhaust Gas Recirculation (EGR) Cooler (303-08 Engine Emission Control - 3...
Lincoln Navigator 2018-2026 Workshop Manual: Specifications
Lubricants, Fluids, Sealers and Adhesives Item Specifications Motorcraft® Premium Long-Life Grease / XG-1-E1 ESA-M1C75-B 2WD (Two-Wheel Drive) U-joint Operating Angles Item Front U joint Center U joint Rear U joi..
Categories
- Manuals Home
- 4th Gen Lincoln Navigator Service Manual (2018 - 2026)
- Brake Service Mode Activation and Deactivation. General Procedures
- Vehicle Dynamics Control Module (VDM). Removal and Installation
- Transmission Fluid Drain and Refill. General Procedures
- Windshield Washer Pump. Removal and Installation
- Neutral Flat Tow Activation and Deactivation. General Procedures
Wheel to Hub Runout Minimization. General Procedures
Check
NOTE: Wheel-to-hub optimization is important. Clearance between the wheel and hub can be used to offset or neutralize the Road Force® or run-out of the wheel and tire assembly. For every 0.001 inch of wheel-to-hub clearance, the Road Force® can be affected between 1 and 3 pounds depending on the tire stiffness.
NOTE: The example below illustrates how the clearance between the wheel and the hub can be used to offset the high spot of radial run-out or Road Force®. Following the procedure will make sure of the best optimization.
Position the wheel and tire assembly on the vehicle so that the high spot location of radial run-out or Road Force® is at the 6 o'clock position and