Lincoln Navigator: Rear Climate Control / Rear Evaporator. Removal and Installation
Removal
NOTICE: During the removal or installation of components, cap, tape or otherwise appropriately protect all openings and tubes/fittings to prevent the ingress of dirt or other contamination. Remove caps, tape and other protective materials prior to installation.
NOTE: Removal steps in this procedure may contain installation details.
-
Remove the rear climate control housing.
Refer to: Rear Climate Control Housing (412-02 Rear Climate Control, Removal and Installation).
-
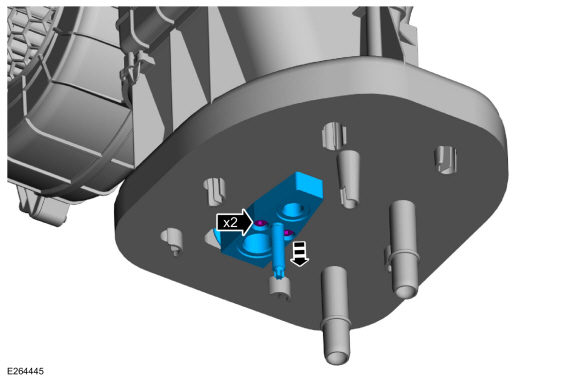
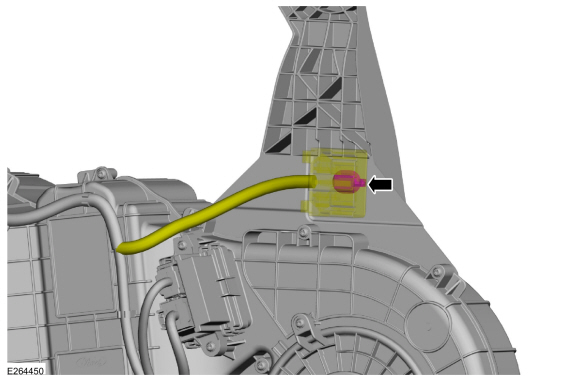
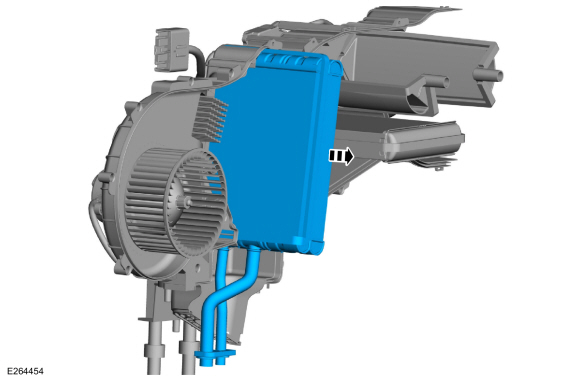
Remove the bolts and the rear thermostatic expansion valve.
-
Make sure to cover any open ports to prevent debris from entering the system.
Torque: 71 lb.in (8 Nm)
-
Make sure to cover any open ports to prevent debris from entering the system.
 |
-
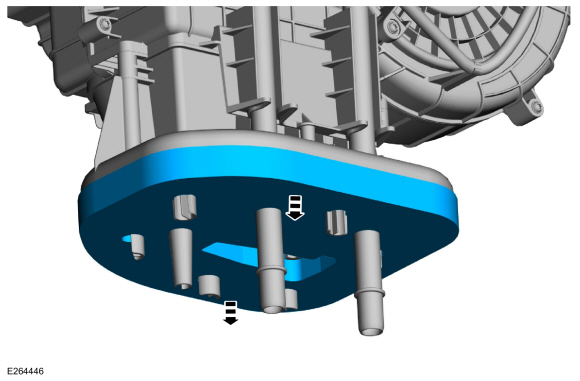
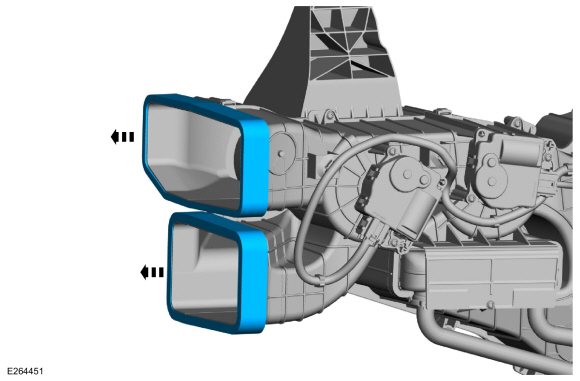
Remove the seal.
 |
-
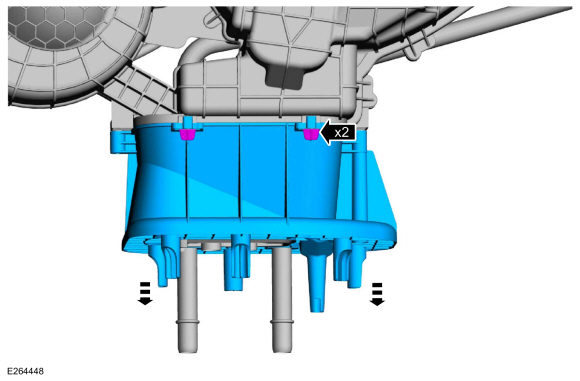
Remove the retainers.
 |
-
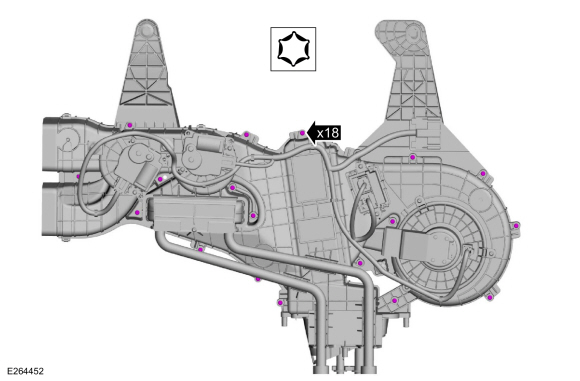
Release the clips and remove the flange housing.
 |
-
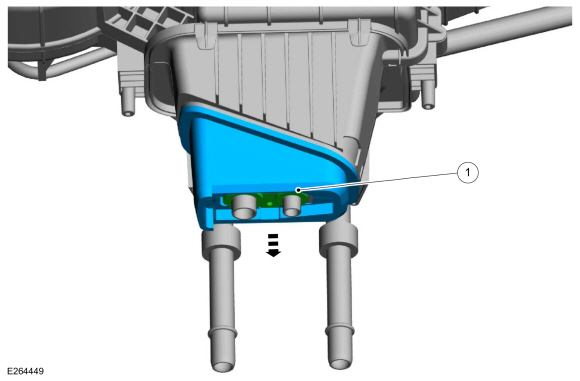
Remove the seal.
 |
-
Detach the wiring harness.
 |
-
Remove the seals.
 |
-
Remove the retainers.
 |
-
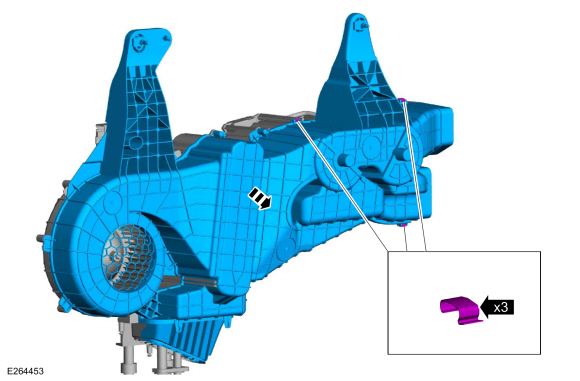
Remove the clips and separate the rear climate control housing.
 |
-
Remove the rear evaporator.
 |
Installation
-
To install, reverse the removal procedure.
-
NOTICE: Only use the specified material to lubricate the seals.
Install and lubricate new O-ring seals. Refer to the appropriate Specifications in Group 412.
-
Lubricate the refrigerant system with the correct amount
of clean PAG oil. Refer to the appropriate Refrigerant Oil Adding
procedure in Group 412.
 Rear Climate Control Housing. Removal and Installation
Removal
NOTICE:
During the removal or installation of components, cap, tape
or otherwise appropriately protect all openings and tubes/fittings to
prevent the ingress of dirt or other contamination...
 Rear Evaporator Rear Outlet and Inlet Line. Removal and Installation
Special Tool(s) /
General Equipment
Grinder
Removal
NOTICE:
During the removal or installation of components, cap, tape
or otherwise appropriately protect all openings and tubes/fittings to
prevent the ingress of dirt or other contamination...
Other information:
Lincoln Navigator 2018-2026 Workshop Manual: Turbocharger Bypass Valve. Removal and Installation
Removal NOTE: When removing any turbocharger air intake system components, make sure to cover any open ports to prevent debris from entering the system. The turbocharger compressor vanes can be damaged by even the smallest particles. All components need to be inspected and cleaned prior to installation or reassembly...
Lincoln Navigator 2018-2026 Workshop Manual: Video Display. Removal and Installation
Special Tool(s) / General Equipment Interior Trim Remover Removal NOTE: Driver seat shown, passenger seat similar. NOTE: Seat shown out of vehicle for clarity. On both sides. Detach the front seat backrest assembly from the backrest module retainers...
Categories
- Manuals Home
- 4th Gen Lincoln Navigator Service Manual (2018 - 2026)
- Head Up Display (HUD) Module Calibration. General Procedures
- Identification Codes. Description and Operation
- All Terrain Control Module (ATCM). Removal and Installation
- Front Seat. Removal and Installation
- Power Running Board (PRB). Diagnosis and Testing
Rear Stabilizer Bar Link. Removal and Installation
Removal
NOTE: Removal steps in this procedure may contain installation details.
With the vehicle in NEUTRAL, position it on a hoist.Refer to: Jacking and Lifting (100-02 Jacking and Lifting, Description and Operation).
NOTE: Use the hex-holding feature to prevent the stud from turning while removing the nut.
Remove and discard the 2 rear stabilizer bar link nuts and remove the rear stabilizer bar link.Torque: 46 lb.ft (63 Nm)
