Lincoln Navigator: Interior Trim and Ornamentation / Loadspace Trim Panel. Removal and Installation
Special Tool(s) / General Equipment
| Interior Trim Remover |
Removal
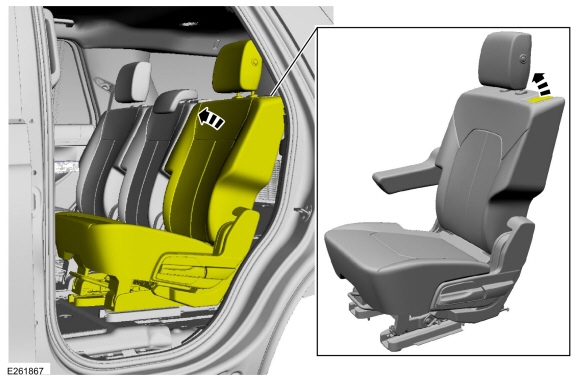
NOTE: LH shown, RH similar.
NOTE: Long wheelbase shown, short wheelbase similar.
NOTE: Removal steps in this procedure may contain installation details.
-
Remove the C-pillar trim panel.
Refer to: C-Pillar Trim Panel (501-05 Interior Trim and Ornamentation, Removal and Installation).
-
Remove the appropriate D-pillar trim panel.
Refer to: D-Pillar Trim Panel - Short Wheelbase (501-05 Interior Trim and Ornamentation, Removal and Installation).
Refer to: D-Pillar Trim Panel - Long Wheelbase (501-05 Interior Trim and Ornamentation, Removal and Installation).
-
Remove the third row seat.
Refer to: Third Row Seat (501-10C Third Row Seats, Removal and Installation).
-
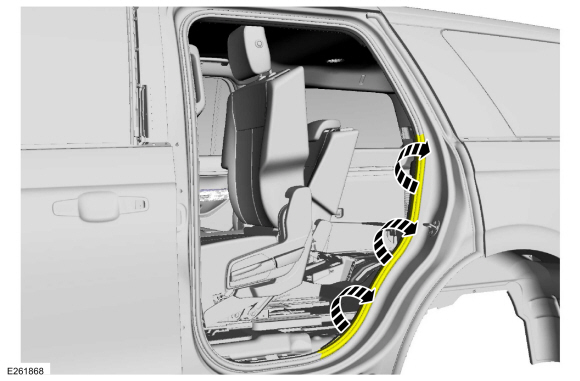
Position the second row seat forward.
 |
-
Position the rear door weatherstrip aside.
 |
-
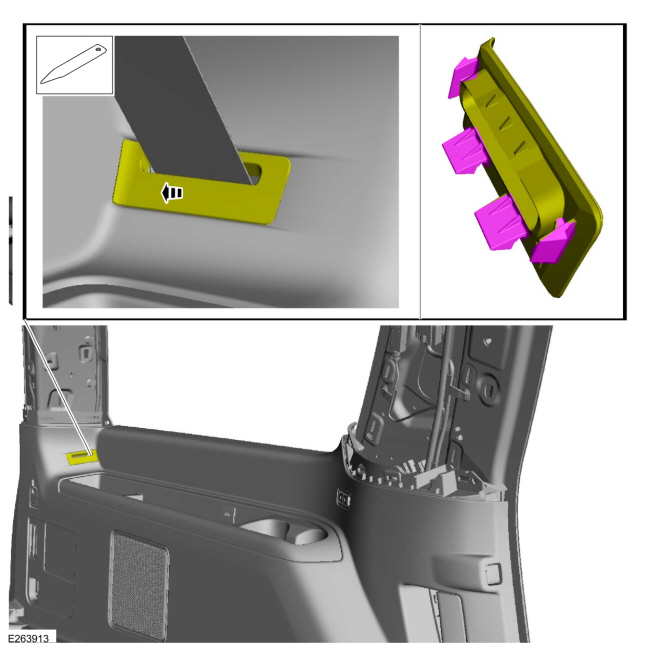
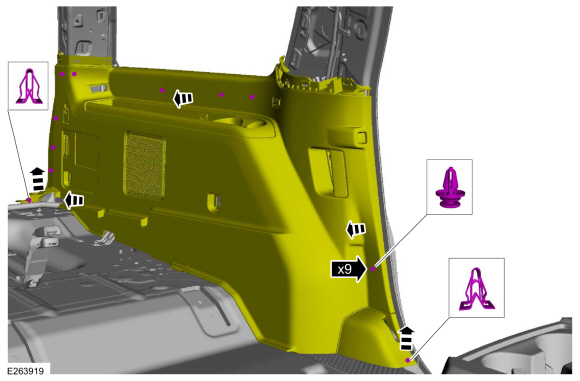
Remove the loadspace trim panel screw cover and the screws.
Use the General Equipment: Interior Trim Remover
 |
Long wheel base
-
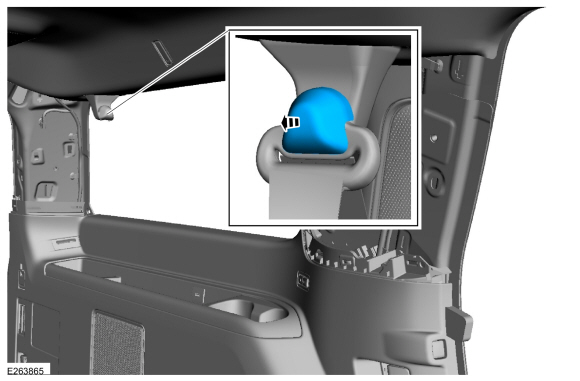
Remove the anchor bolt and position the third row outer seatbelt retractor aside.
Torque: 30 lb.ft (40 Nm)
 |
-
Remove the third row seatbelt retractor D-ring bolt cover.
 |
-
Remove the third row outer seatbelt retractor D-ring bolt.
Torque: 30 lb.ft (40 Nm)
 |
-
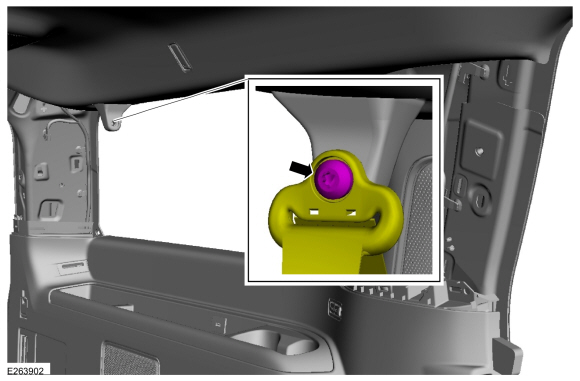
Release the tabs and position the third row outer seatbelt retractor guide aside.
Use the General Equipment: Interior Trim Remover
 |
All vehicles
-
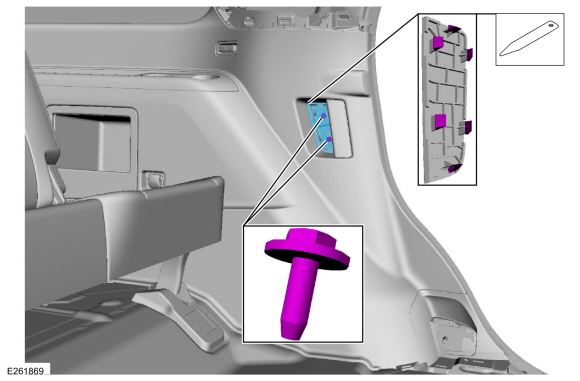
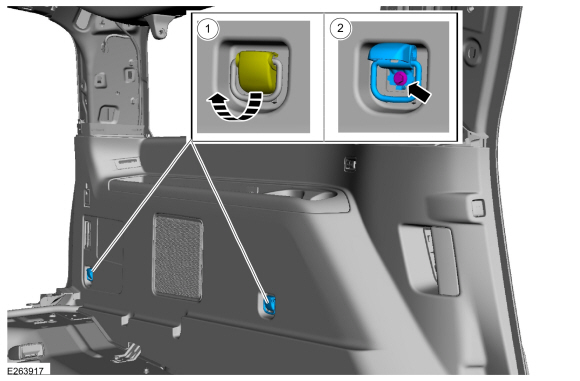
Remove the interior tie down hooks.
-
Position the interior tie down hook bolt cover up.
-
Remove the bolt.
-
Position the interior tie down hook bolt cover up.
 |
-
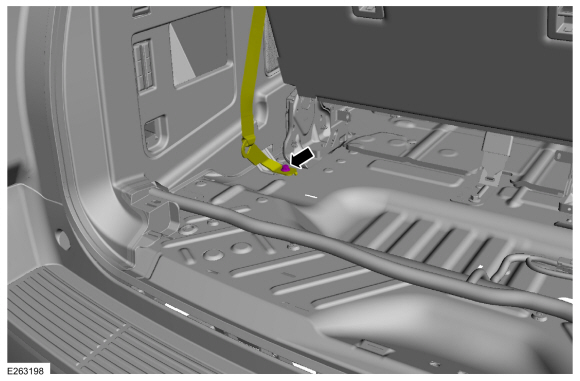
Release the loadspace trim panel clips.
 |
-
Remove the loadspace trim panel.
-
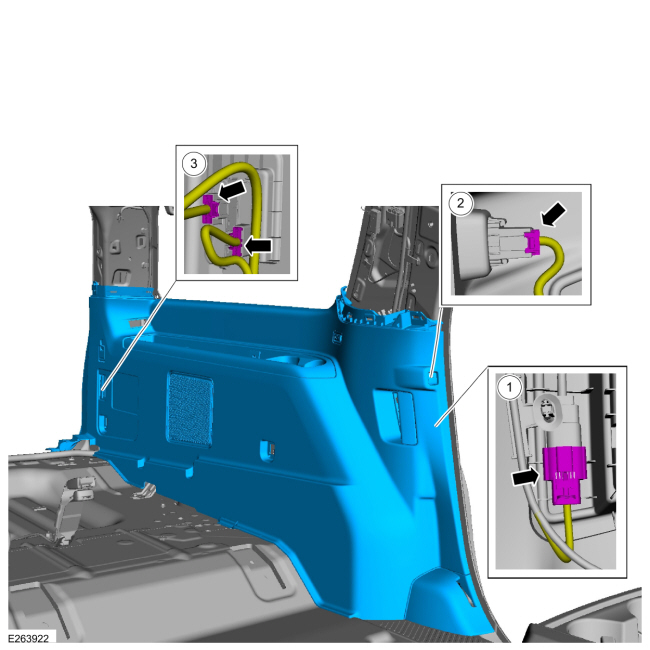
Disconnect the third row seat control switch and USB charging port jumper wire electrical connector.
-
Disconnect the second row single seat easy entry fold switch electrical connector.
-
LH side only.
Disconnect the second and third row power fold seat control switch electrical connectors.
-
Disconnect the third row seat control switch and USB charging port jumper wire electrical connector.
 |
Installation
-
NOTE: During installation, make sure the seatbelt webbing is not twisted and seatbelts and buckles are accessible to the occupants.
To install, reverse the removal procedure.
-
Transfer parts as necessary.
-
Transfer parts as necessary.
-
Check the active restraint system for correct operation.
Refer to: Seatbelt Systems (501-20A Seatbelt Systems, Diagnosis and Testing).
 Liftgate Trim Panel. Removal and Installation
Removal
Release the clips and remove the liftgate upper middle trim panel.
NOTE:
LH shown, RH similar...
 Rear Door Trim Panel. Removal and Installation
Special Tool(s) /
General Equipment
Pick Hook
Removal
Release the clips and remove the rear door handle trim cover...
Other information:
Lincoln Navigator 2018-2026 Workshop Manual: Condenser. Removal and Installation
Removal NOTICE: During the removal of components, cap, tape or otherwise appropriately protect all openings to prevent the ingress of dirt or other contamination. Remove protective materials prior to installation. NOTE: Removal steps in this procedure may contain installation details...
Lincoln Navigator 2018-2026 Workshop Manual: Module Configuration - System Operation and Component Description. Description and Operation
System Operation Programmable Module Installation (PMI) PMI is a diagnostic scan tool process which configures settings in a new module. Data used for the PMI process is automatically downloaded from the original module and stored when a diagnostic scan tool session is started...
Categories
- Manuals Home
- 4th Gen Lincoln Navigator Service Manual (2018 - 2026)
- Liftgate Trim Panel. Removal and Installation
- Brake Service Mode Activation and Deactivation. General Procedures
- Identification Codes. Description and Operation
- Telematics Control Unit (TCU) Module. Removal and Installation
- SYNC Module [APIM]. Removal and Installation
Axle Tube Bearing. Removal and Installation
Special Tool(s) / General Equipment
 205-123
(T78P-1177-A)
205-123
(T78P-1177-A)
Installer, Axle Shaft Oil Seal
 308-047
(T77F-1102-A)
308-047
(T77F-1102-A)
Remover, Bearing Cup Slide Hammer