Lincoln Navigator: Body Closures / Liftgate Alignment. General Procedures
Inspection
-
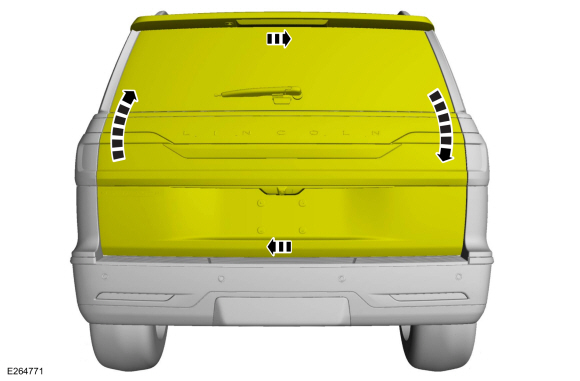
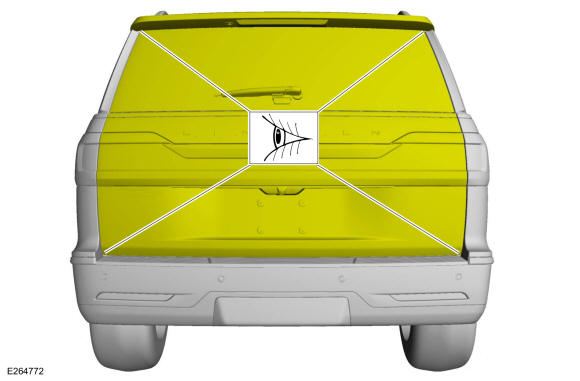
Check liftgate-to-body dimensions.
Refer to: Body and Frame (501-26 Body Repairs - Vehicle Specific Information and Tolerance Checks, Description and Operation).
Adjustment
All alignments
-
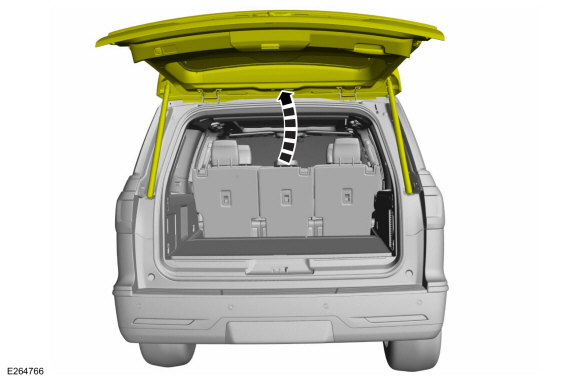
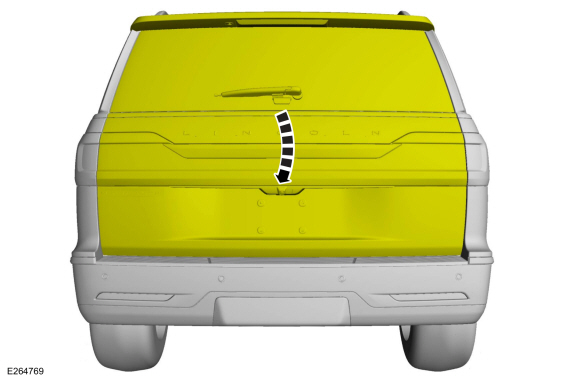
Open the liftgate.
-
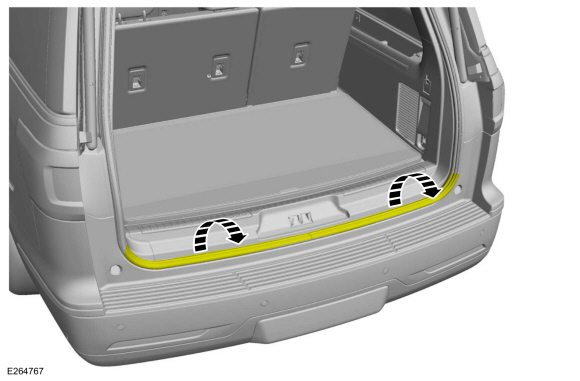
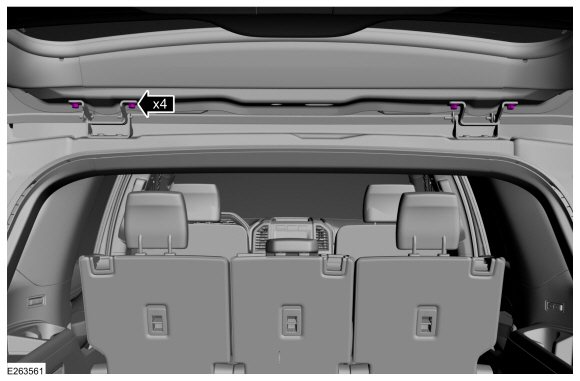
Position aside the liftgate weatherstrip.
-
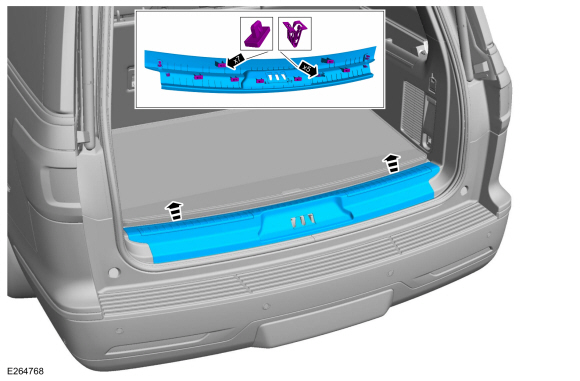
Release the clips and remove the liftgate scuffplate trim panel.
-
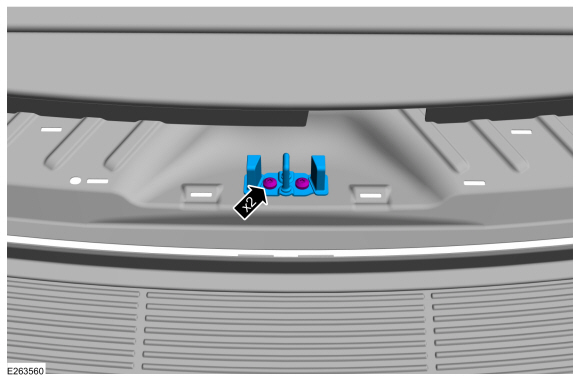
Remove the liftgate striker.
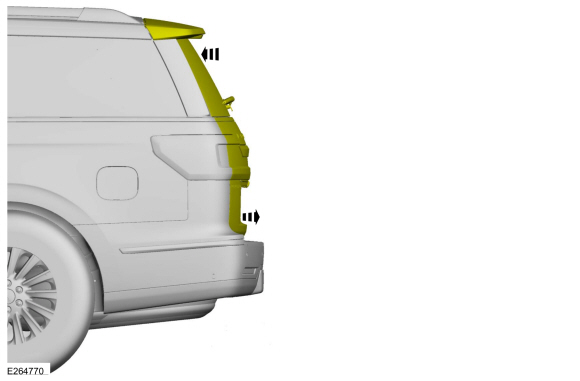
Liftgate left and right, up and down alignment
-
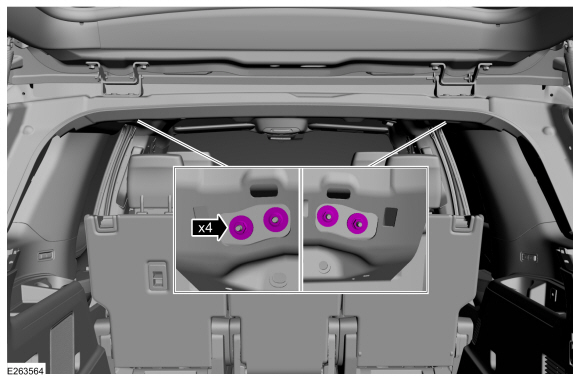
Loosen the bolts to permit movement of the liftgate.
-
Carefully close the liftgate.
-
Adjust the liftgate to specification.
Refer to: Body and Frame (501-26 Body Repairs - Vehicle Specific Information and Tolerance Checks, Description and Operation).
-
Carefully open the liftgate.
-
Tighten the bolts.
Torque:
18 lb.ft (25 Nm)
Liftgate in and out alignment
-
Remove the D-Pillar trim panel.
Refer to: D-Pillar Trim Panel - Short Wheelbase (501-05 Interior Trim and Ornamentation, Removal and Installation).
Refer to: D-Pillar Trim Panel - Long Wheelbase (501-05 Interior Trim and Ornamentation, Removal and Installation).
-
Loosen the nuts to permit movement of the liftgate.
-
Set the liftgate rubber stoppers to nominal
position.The tab on the stopper should touch the liftgate surface.
-
Carefully close the liftgate.
-
Adjust the liftgate to specification.
Refer to: Body and Frame (501-26 Body Repairs - Vehicle Specific Information and Tolerance Checks, Description and Operation).
-
Carefully open the liftgate.
-
Tighten the nuts.
Torque:
17 lb.ft (23 Nm)
All alignments
-
Install the liftgate striker.
Torque:
18 lb.ft (25 Nm)
-
Inspect the body-to-liftgate door dimensions.
Refer to: Body and Frame (501-26 Body Repairs - Vehicle Specific Information and Tolerance Checks, Description and Operation).
-
Install the removed components.
-
If equipped.
Carry out the power liftgate initialization.
Refer to: Power Liftgate Initialization (501-03 Body Closures, General Procedures).
Inspection
Inspect the hood-to-body dimensions.
Refer to: Body and Frame (501-26 Body Repairs - Vehicle Specific Information and Tolerance Checks, Description and Operation)...
Initialization
Disconnect the battery or remove the RGTM fuse(s).
Refer to: Battery Disconnect and Connect (414-01 Battery, Mounting and Cables, General Procedures)...
Other information:
Activation
NOTICE:
This procedure should only be used to temporarily place the
transmission in Neutral during certain service procedures when the
engine cannot crank. Do not tow the vehicle on road in this mode.
Failure to follow this instruction will result in transmission damage...
Special Tool(s)
MASTERTECH MTS-4000 ANALYZER257-00018
EngineEAR107-R2100Chassis EarsJSP97170 Squeak And Rattle Kit164-R4900
Ultrasonic Diagnostic ToolTRATP-9367
Diagnostic Theory
The shortest route to an accurate diagnosis results from:
System knowledge, including comparison with a known good sy..

 Hood Alignment. General Procedures
 Power Liftgate Initialization. General Procedures
 205-123
(T78P-1177-A)
205-123
(T78P-1177-A)
 308-047
(T77F-1102-A)
308-047
(T77F-1102-A)