Lincoln Navigator: Front Seats / Front Seat Track Motor. Removal and Installation
Special Tool(s) / General Equipment
| Electric Drill |
Removal
NOTE: Driver seat shown, passenger seat similar.
-
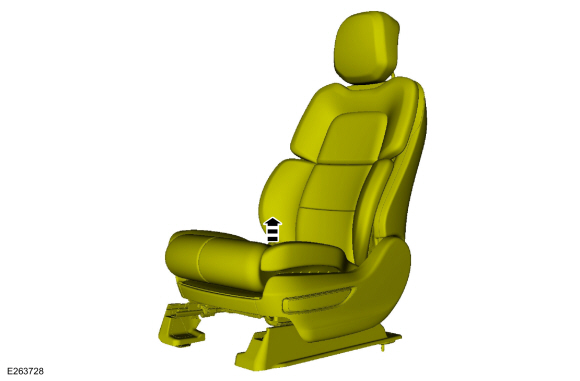
NOTE: Positioning the seat fully upward provides access to service the seat track motor with the seat in the vehicle.
Raise the front seat to the full upward position.
 |
-
Depower the SRS .
Refer to: Supplemental Restraint System (SRS) Depowering (501-20B) .
-
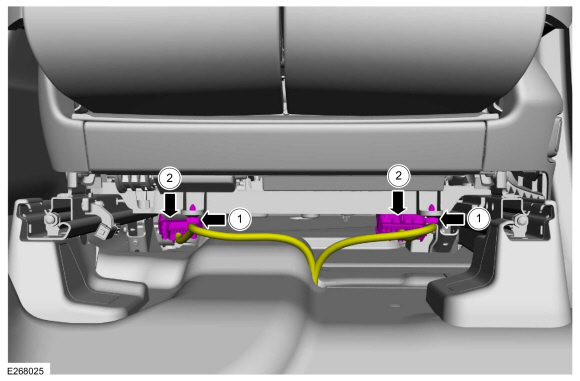
Disconnect the front seat harness electrical connector(s).
-
Detach the wiring harness pin-type retainer(s).
-
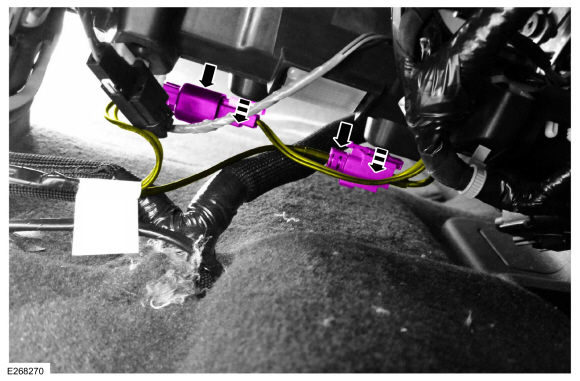
Disconnect the electrical connector(s).
-
Detach the wiring harness pin-type retainer(s).
 |
-
If equipped with video display.
Detach and disconnect the video display electrical connectors.
 |
-
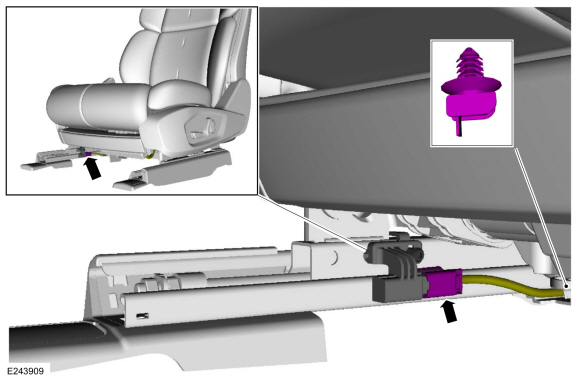
Disconnect the seat position sensor electrical connector and detach the wiring harness retainer.
 |
-
NOTE: Seat components are removed for clarity.
NOTE: Seat track wiring harness take-outs vary with seat option content. Note the wiring harness routing, attachment points and connections to the horizontal seat motor and bracket for installation.
Disconnect the electrical connectors, detach the wiring harness retainers and position the wiring harnesses aside.
 |
-
Disconnect the electrical connector and remove the lamp.
 |
-
Detach the electrical connectors and the wiring harness retainers.
 |
-
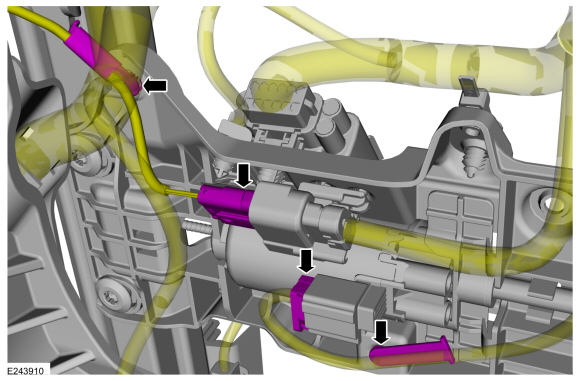
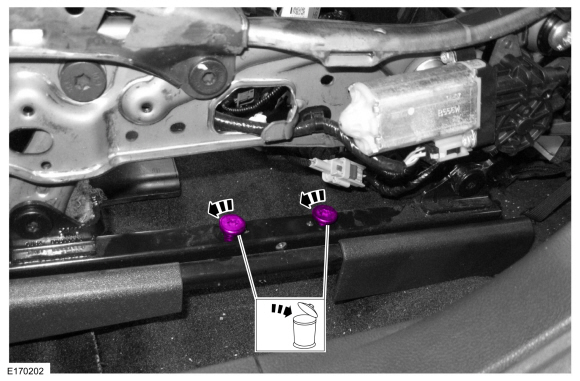
NOTE: Front seat components and wiring harnesses are removed for clarity.
Remove the bolts and the seat track motor.
 |
Installation
All seats
-
NOTE: Typical front seat track shown, other seat tracks similar.
NOTE: Use the bolts from the old front seat track motor.
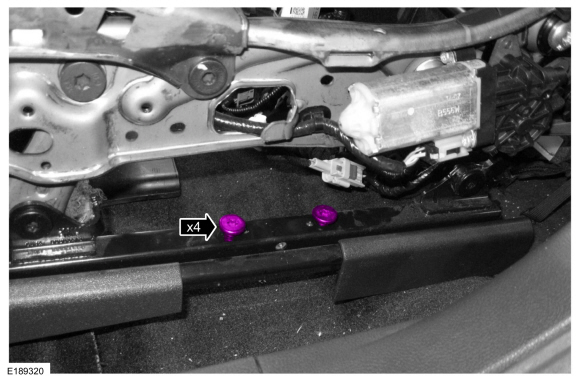
NOTE: Seat side shield removed for clarity.
On both sides.
Install the front seat track motor bolts.
Torque: 21 lb.ft (28 Nm)
 |
-
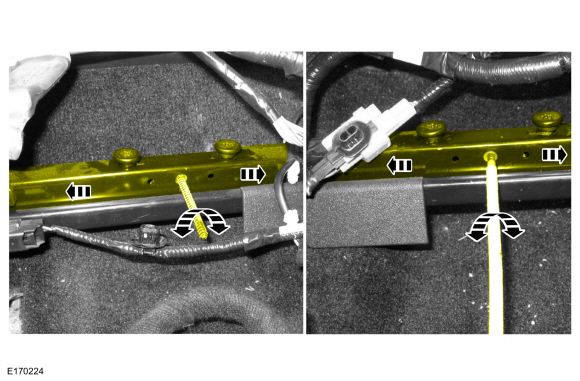
NOTICE: When using a drill to move the front seat track, do not move the seat track to its forward or rearward end of travel stops, otherwise a new front seat track must be installed.
NOTE: Typical front seat track shown, other seat tracks similar.
NOTE: Be sure to drive the seat track evenly or the track will bind during movement.
NOTE: Rotate the cables using 2 drills operating at similar speeds to most efficiently position the seat track.
Insert the original front seat track motor drive cables and drive the gearbox and seat track uniformly until the rear edge of the upper and lower seat tracks are aligned.
Use the General Equipment: Electric Drill
 |
-
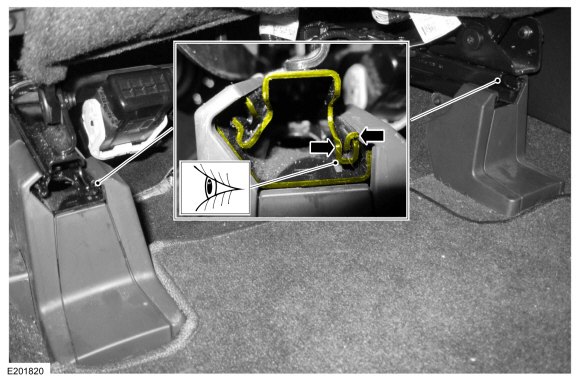
NOTE: Typical seat track shown, other seat tracks similar.
The rear edges of the upper and lower seat track rails must align with each other on both sides of the seat.
 |
-
NOTE: Typical seat track shown, other seat tracks similar.
NOTE: Seat side shield removed for clarity.
On both sides.
Remove the front seat track motor bolts.
 |
-
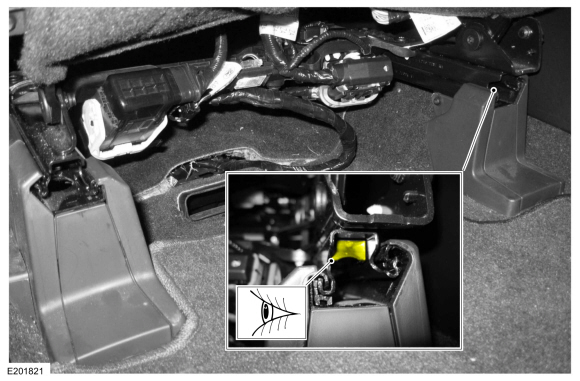
NOTE: Typical seat track shown, other seat tracks similar.
NOTE: Install a new seat track if the block is not in place.
Verify the block is in place at the rear of the inboard seat track rail.
 |
-
NOTE: Typical seat track shown, other seat tracks similar.
To aid installation.
Pull the long drive cable on the new front seat track motor assembly out of the sheathing.
 |
-
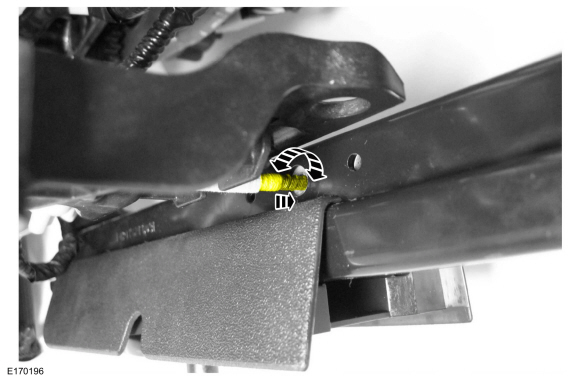
NOTE: Typical front seat track motor shown, other front seat track motors similar.
Insert the long drive cable into the seat track gearbox.
 |
-
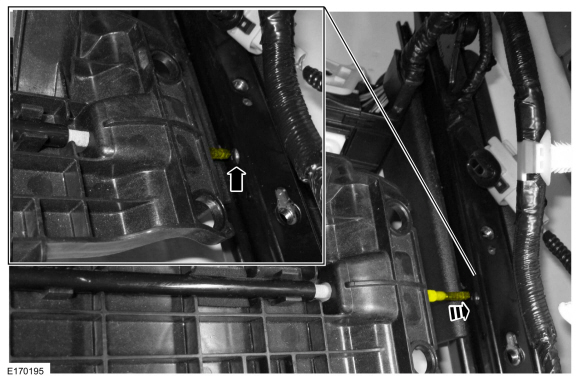
NOTE: Typical seat track shown, other seat tracks similar.
Rotate the long drive cable to verify engagement to seat track gearbox.
 |
-
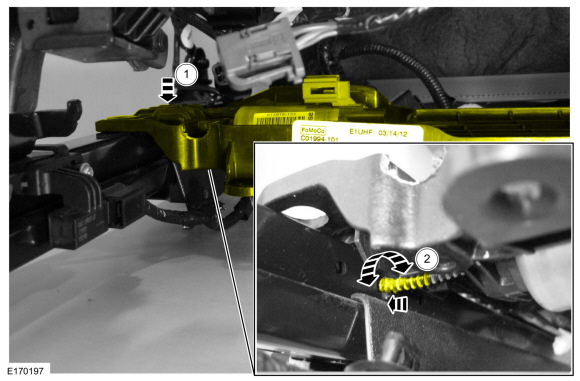
NOTICE: Do not severely bend the short drive cable during installation or damage to the cable will occur.
NOTE: Typical front seat track motor shown, other seat track motors similar.
Insert the short drive cable into the seat track gearbox.
-
Position the seat track motor while inserting the short cable into the seat track gearbox.
-
Rotate the short drive cable to verify engagement to the seat track gearbox.
-
Position the seat track motor while inserting the short cable into the seat track gearbox.
 |
-
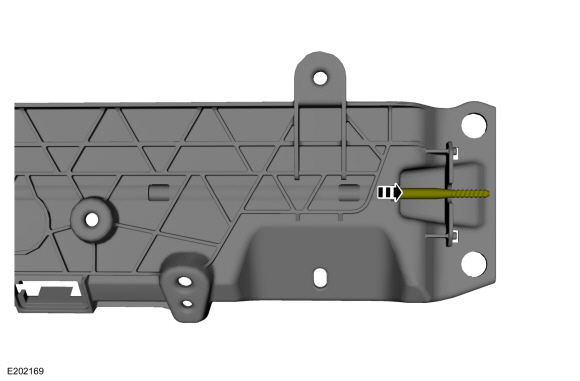
NOTICE: Do not cross-thread the bolts, they are load-bearing. If the bolts are cross-threaded, a new seat track must be installed.
NOTE: Seat track components and wiring harness are removed for clarity.
Install the seat track motor and install the new bolts in the sequence shown.
Torque: 21 lb.ft (28 Nm)
 |
-
Attach the electrical connectors and wiring harness retainers.
|
-
Install the lamp and connect the electrical connector.
 |
-
NOTE: Seat components are removed for clarity.
Connect the electrical connectors and attach the wiring harness retainers.
|
-
Connect the seat position sensor electrical connector and detach the wiring harness retainer.
|
-
If equipped with video display.
Attach and connect the video display electrical connectors.
|
-
Connect the front seat harness electrical connector(s).
-
Attach the wiring harness pin-type retainer(s).
-
Connect the electrical connector(s).
-
Attach the wiring harness pin-type retainer(s).
|
-
Repower the SRS .
Refer to: Supplemental Restraint System (SRS) Repowering (501-20B) .
Seats with memory
-
Operate the front seat track horizontal motor in
both directions through the full range of travel to set soft stops and
avoid a premature stopping point occurrence after the vehicle is
returned to the customer.
 Front Seat Track. Removal and Installation
Removal
NOTE:
Removal steps in this procedure may contain installation details.
Remove the front seat backrest.
Refer to: Front Seat Backrest (501-10A Front Seats, Removal and Installation)...

Other information:
Lincoln Navigator 2018-2026 Workshop Manual: Positive Crankcase Ventilation (PCV) Valve. Removal and Installation
Removal NOTE: Removal steps in this procedure may contain installation details. Remove the engine appearance cover retainers, release the engine appearance cover from the rear retainers and then remove the engine appearance cover. Refer to: Crankcase Ventilation Tube (303-08 Engine Emission Control - 3.5L EcoBoost (272kW/3..
Lincoln Navigator 2018-2026 Workshop Manual: Wipers and Washers - System Operation and Component Description. Description and Operation
System Operation System Diagram E363825 *.sttxt { visibility: hidden; } *.stcallout { visibility: visible; } 1 Wiper relay 2 BJB 3 Rain Sensor 4 Rear Wiper Motor 5 Winds..
Categories
- Manuals Home
- 4th Gen Lincoln Navigator Service Manual (2018 - 2026)
- Vehicle Dynamics Control Module (VDM). Removal and Installation
- Identification Codes. Description and Operation
- Head Up Display (HUD) Module Calibration. General Procedures
- Front Seat. Removal and Installation
- Front Bumper Cover. Removal and Installation
Rear Drive Axle and Differential. Diagnosis and Testing
Symptom Chart(s)
Diagnostics in this manual assume a certain skill level and knowledge of Ford-specific diagnostic practices.
REFER to: Diagnostic Methods (100-00 General Information, Description and Operation).
Symptom Chart - Differential
Symptom Chart - Differential
Condition Actions Axle overheating GO to Pinpoint Test A Broken gear teeth on the ring gear or pinion GO to Pi