
Lincoln Navigator: Wipers and Washers / Windshield Washer Reservoir. Removal and Installation
Special Tool(s) / General Equipment
| Fluid Suction Gun |
Materials
| Name | Specification |
|---|---|
| Motorcraft® Premium Windshield Wash Concentrate with Bitterant ZC-32-B2 |
WSS-M14P19-A |
Removal
NOTE: Removal steps in this procedure may contain installation details.
-
Open the windshield washer reservoir lid.
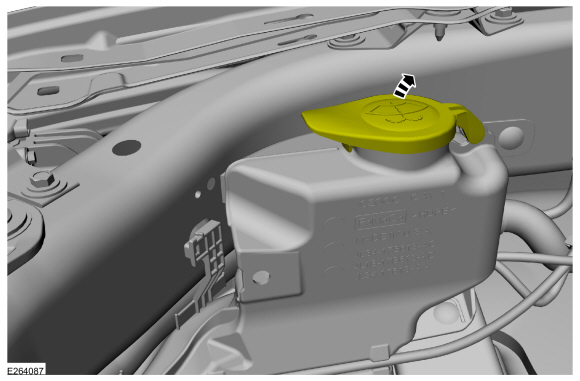 |
-
Siphon the windshield washer fluid.
Use the General Equipment: Fluid Suction Gun
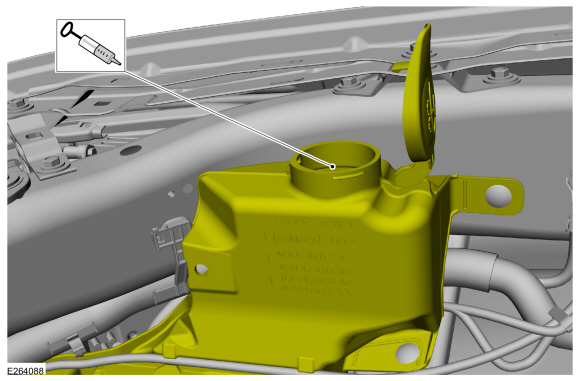 |
-
Remove the battery tray.
Refer to: Battery Tray (414-01 Battery, Mounting and Cables, Removal and Installation).
-
-
Detach the hose from the windshield washer reservoir.
-
Remove the bolt.
Torque: 133 lb.in (15 Nm)
-
Detach the pin-type retainers.
-
Detach the hose from the windshield washer reservoir.
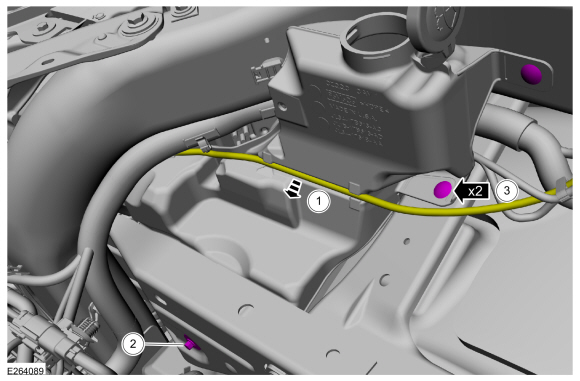 |
-
Remove the RH fender splash shield.
Refer to: Fender Splash Shield (501-02 Front End Body Panels, Removal and Installation).
-
Disconnect the washer pump and fluid level sensor electrical connectors.
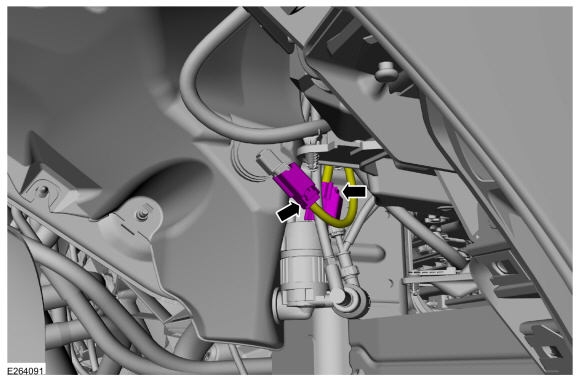 |
-
Detach the washer pump hoses.
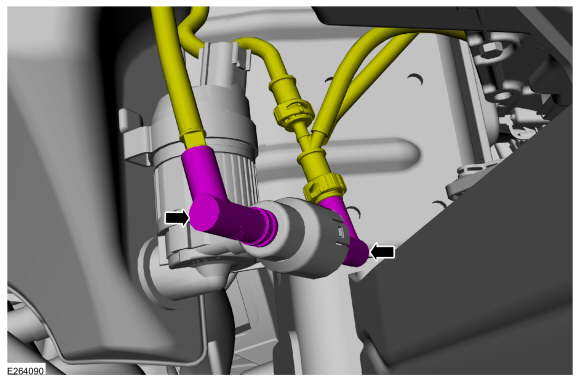 |
-
Remove the windshield washer reservoir.
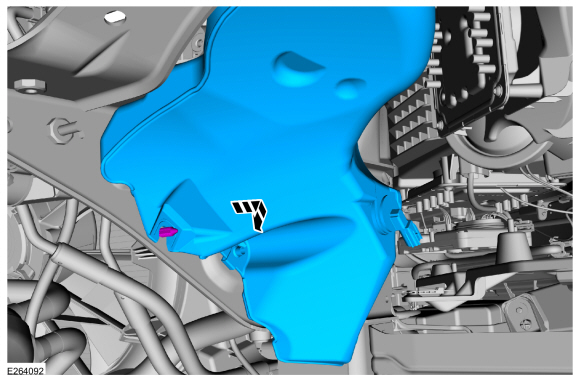 |
Installation
NOTICE: Do not operate the washer pump prior to filling the windshield washer reservoir. Failure to follow this instruction may result in premature pump failure.
-
To install, reverse the removal procedure.
Material: Motorcraft® Premium Windshield Wash Concentrate with Bitterant / ZC-32-B2 (WSS-M14P19-A)
 Windshield Washer Pump. Removal and Installation
Special Tool(s) /
General Equipment
Fluid Suction Gun
Materials
Name
Specification
Motorcraft® Premium Windshield Wash Concentrate with BitterantZC-32-B2
WSS-M14P19-A
Removal
Open the windshield washer reservoir lid...
 Windshield Wiper Motor. Removal and Installation
Removal
NOTE:
Removal steps in this procedure may contain installation details.
NOTE:
The hood is removed in this procedure for clarity.
Remove the cowl panel grill...
Other information:
Lincoln Navigator 2018-2026 Workshop Manual: Quick Release Coupling. General Procedures
Disconnect NOTICE: When reusing liquid or vapor tube connections, make sure to use compressed air to remove any foreign material from the connector retaining clip area before separating from the tube or damage to the tube or connector retaining clip may occur...
Lincoln Navigator 2018-2026 Workshop Manual: Rear View Mirrors. Diagnosis and Testing
Diagnostic Trouble Code (DTC) Chart Diagnostics in this manual assume a certain skill level and knowledge of Ford-specific diagnostic practices. REFER to: Diagnostic Methods (100-00 General Information, Description and Operation). Module DTC Description Action DDM B1163:11 Left Mirror Heater Output: Circuit Short To Ground GO to Pinpoint Test D DDM B1163:..
Categories
- Manuals Home
- 4th Gen Lincoln Navigator Service Manual (2018 - 2026)
- Identification Codes. Description and Operation
- Rear Bumper. Removal and Installation
- Transmission Fluid Drain and Refill. General Procedures
- Neutral Flat Tow Activation and Deactivation. General Procedures
- Body Control Module (BCM). Removal and Installation
Front Driveshaft. Removal and Installation
Special Tool(s) / General Equipment
Crimping ToolMaterials
Name Specification Motorcraft® Premium Long-Life GreaseXG-1-E1 ESA-M1C75-B
Removal
With the vehicle in NEUTRAL, position the vehicle on a hoist.Refer to: Jacking and Lifting (100-02 Jacking and Lifting, Description and Operation).
Remove the bolts and the transmission shield.
