
Lincoln Navigator: Climate Control System - General Information / Temperature Door Actuator. Removal and Installation
Removal
NOTE: Note the position of the components before removal.
-
-
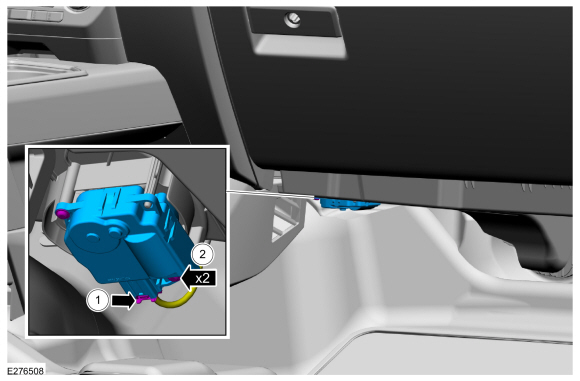
Disconnect the electrical connector.
-
Remove the retainers, the temperature door actuator and the cam.
-
Disconnect the electrical connector.
 |
-
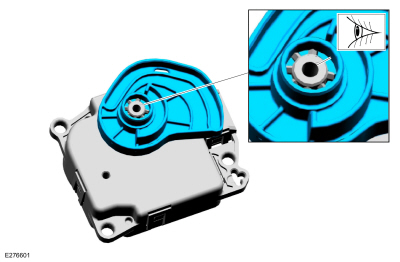
NOTE: This step is only necessary when installing a new component.
Remove the cam from the temperature door actuator.
 |
Installation
NOTE: Make sure that the components are installed to the position noted before removal.
-
NOTE: This step is only necessary when installing a new component.
Install and align the cam on the new temperature door actuator.
 |
-
-
Align the temperature door actuator and cam to the temperature door.
-
Install the temperature door actuator and cam on the climate control housing with the retainers.
-
Connect the electrical connector to the temperature door actuator.
-
Align the temperature door actuator and cam to the temperature door.
 |
 Sunload Sensor. Removal and Installation
Special Tool(s) /
General Equipment
Interior Trim Remover
Removal
NOTE:
Removal steps in this procedure may contain installation details...
 Thermostatic Expansion Valve. Removal and Installation
Removal
NOTICE:
During the removal or installation of components, cap, tape
or otherwise appropriately protect all openings and tubes/fittings to
prevent the ingress of dirt or other contamination...
Other information:
Lincoln Navigator 2018-2026 Workshop Manual: Battery Monitoring Sensor. Removal and Installation
Removal NOTE: When the battery is disconnected and connected, some abnormal drive symptoms may occur while the vehicle relearns its adaptive strategy. The vehicle may need to be driven to allow the PCM to relearn the adaptive strategy values...
Lincoln Navigator 2018-2026 Workshop Manual: Transmission. Removal and Installation
Special Tool(s) / General Equipment 307-346 (T97T-7902-A) Retainer, Torque ConverterTKIT-1998-LM (NavigatoR)TKIT-1997-F/FLM/LT Transmission Jack Materials Name Specification Motorcraft® Multi-Purpose Grease SprayXL-5-A ESB-M1C93-B Motorcraft® MERCON® ULV Automatic Transmission FluidXT-12-QULV WSS-M2C949-A, MERCON® ULV ..
Categories
- Manuals Home
- 4th Gen Lincoln Navigator Service Manual (2018 - 2026)
- Neutral Flat Tow Activation and Deactivation. General Procedures
- Vehicle Dynamics Control Module (VDM). Removal and Installation
- Power Running Board (PRB). Diagnosis and Testing
- Telematics Control Unit (TCU) Module. Removal and Installation
- Rear Bumper. Removal and Installation
Wheel to Hub Runout Minimization. General Procedures
Check
NOTE: Wheel-to-hub optimization is important. Clearance between the wheel and hub can be used to offset or neutralize the Road Force® or run-out of the wheel and tire assembly. For every 0.001 inch of wheel-to-hub clearance, the Road Force® can be affected between 1 and 3 pounds depending on the tire stiffness.
NOTE: The example below illustrates how the clearance between the wheel and the hub can be used to offset the high spot of radial run-out or Road Force®. Following the procedure will make sure of the best optimization.
Position the wheel and tire assembly on the vehicle so that the high spot location of radial run-out or Road Force® is at the 6 o'clock position and