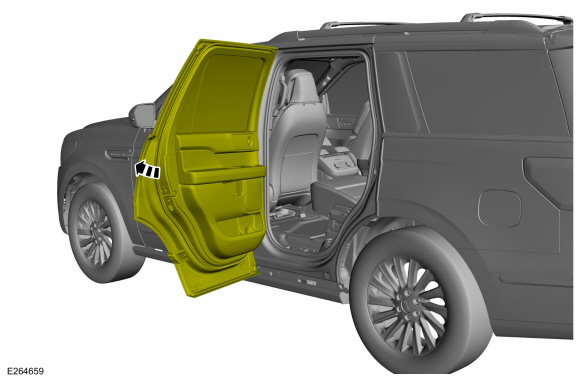
Lincoln Navigator: Body Closures / Rear Door. Removal and Installation
Special Tool(s) / General Equipment
| Door Lift |
Removal
NOTE: Removal steps in this procedure may contain installation details.
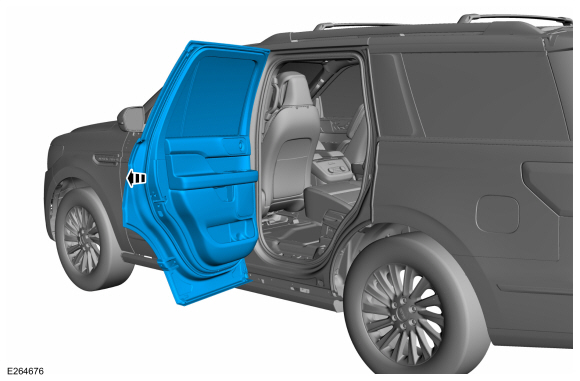
NOTE: LH side shown, RH side similar.
NOTE: Short wheelbase shown, long wheelbase similar.
-
Open the rear door.
 |
-
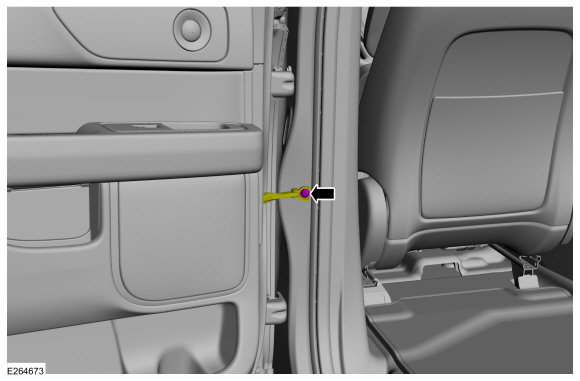
Remove the check arm bolt.
Torque: 17 lb.ft (23 Nm)
 |
-
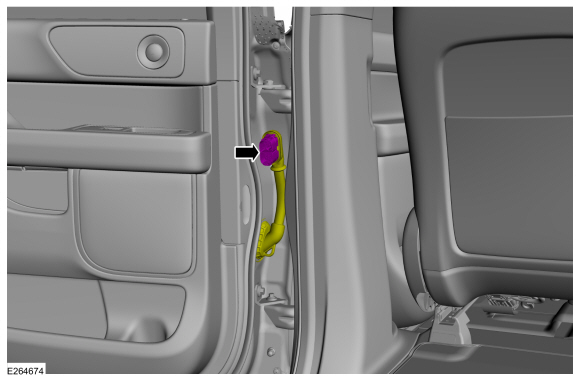
Disconnect the rear door electrical connector.
 |
-
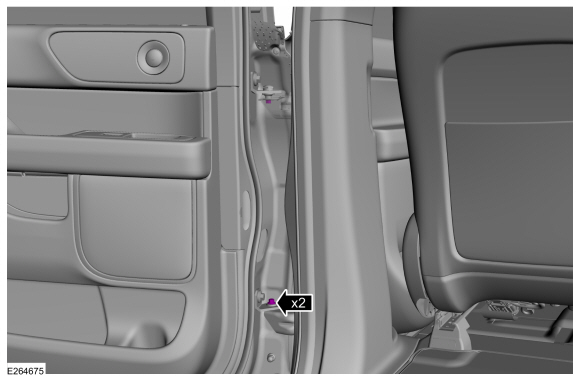
Remove the door hinge pivot bolts.
Use the General Equipment: Door Lift
Torque: 22 lb.ft (30 Nm)
 |
-
Remove the rear door.
Use the General Equipment: Door Lift
 |
Installation
-
To install, reverse the removal procedure.
-
NOTE: This step is only necessary when installing a new component.
Check the body-to-rear door dimensions. Align the door as necessary.
Refer to: Rear Door Alignment (501-03 Body Closures, General Procedures).
 |
 Power Liftgate Motor. Removal and Installation
Removal
NOTE:
Removal steps in this procedure may contain installation details.
NOTE:
LH side shown, RH side similar.
Remove the loadspace trim panel...
 Rear Door Check Arm. Removal and Installation
Removal
NOTE:
Removal steps in this procedure may contain installation details.
NOTE:
LH side shown, RH side similar.
NOTE:
Short wheelbase shown, long wheelbase similar...
Other information:
Lincoln Navigator 2018-2026 Workshop Manual: Roof Opening Panel Shield. Removal and Installation
Special Tool(s) / General Equipment Electric Drill Punch Vacuum Cleaner Removal NOTE: Removal steps in this procedure may contain installation details. Remove the roof opening panel fixed glass. Refer to: Roof Opening Panel Fixed Glass (501-17 Roof Opening Panel, Removal and Installation)...
Lincoln Navigator 2018-2026 Workshop Manual: Climate Control Tools and Equipment. General Procedures
Climate Control Tools and Equipment Use the correct adapters with the Rotunda approved A/C Tools. NOTE: The climate control tools and equipment listed are regionally required for Ford North America A/C service repairs. Make sure to use regionally approved A/C tools and equipment that are based on regional and/or environmental requirements...
Categories
- Manuals Home
- 4th Gen Lincoln Navigator Service Manual (2018 - 2026)
- All Terrain Control Module (ATCM). Removal and Installation
- Head Up Display (HUD) Module Calibration. General Procedures
- Transmission Fluid Level Check. General Procedures
- Transmission Fluid Drain and Refill. General Procedures
- Front Bumper Cover. Removal and Installation
Wheel to Hub Runout Minimization. General Procedures
Check
NOTE: Wheel-to-hub optimization is important. Clearance between the wheel and hub can be used to offset or neutralize the Road Force® or run-out of the wheel and tire assembly. For every 0.001 inch of wheel-to-hub clearance, the Road Force® can be affected between 1 and 3 pounds depending on the tire stiffness.
NOTE: The example below illustrates how the clearance between the wheel and the hub can be used to offset the high spot of radial run-out or Road Force®. Following the procedure will make sure of the best optimization.
Position the wheel and tire assembly on the vehicle so that the high spot location of radial run-out or Road Force® is at the 6 o'clock position and