Lincoln Navigator: Information and Entertainment System - General Information - Vehicles With: SYNC 4 / Rear Audio Control Module (RACM). Removal and Installation
Special Tool(s) /
General Equipment
Removal
-
NOTE:
If installing a new module, it is necessary to
upload the module configuration information to the scan tool prior to
removing the module. This information must be downloaded into the new
module after installation.
Using a diagnostic scan tool, begin the PMI process for the RACM following the onscreen instructions.
-
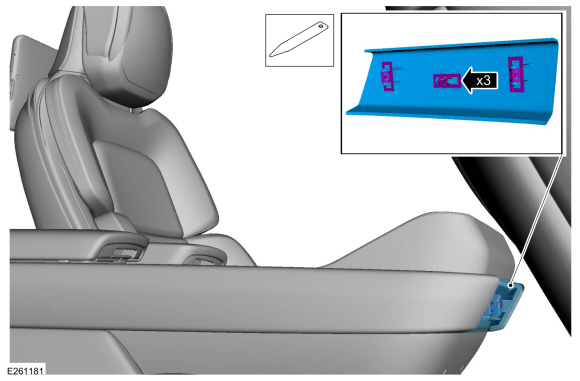
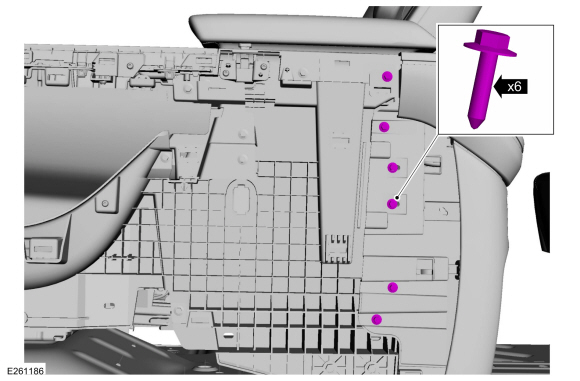
Release the clips and remove the front floor console trim panel.
Use the General Equipment: Interior Trim Remover
-
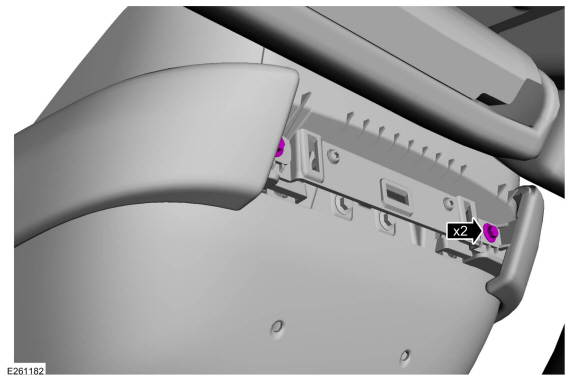
Remove the bolts.
-
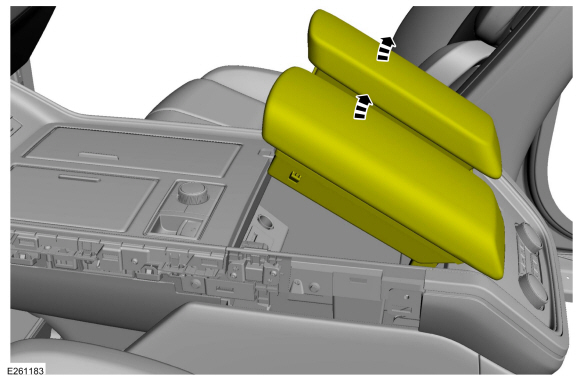
Position the floor console armrest.
-
On both sides
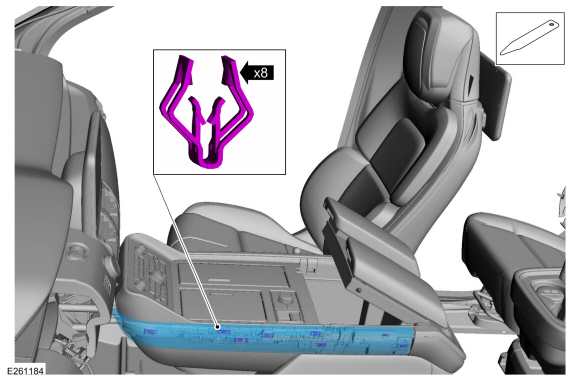
Release the clips and remove the floor console finish panel.
Use the General Equipment: Interior Trim Remover
-
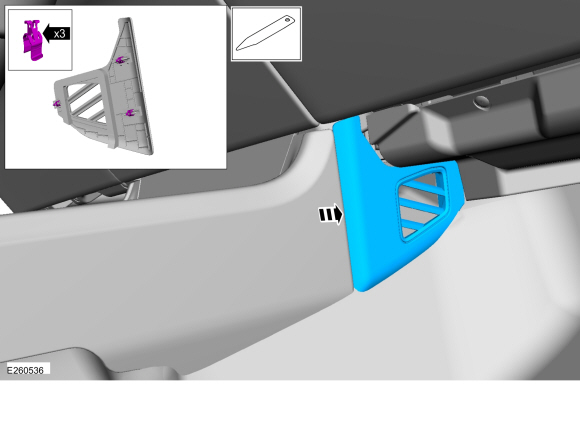
Remove the RH floor console vent cover.
Use the General Equipment: Interior Trim Remover
-
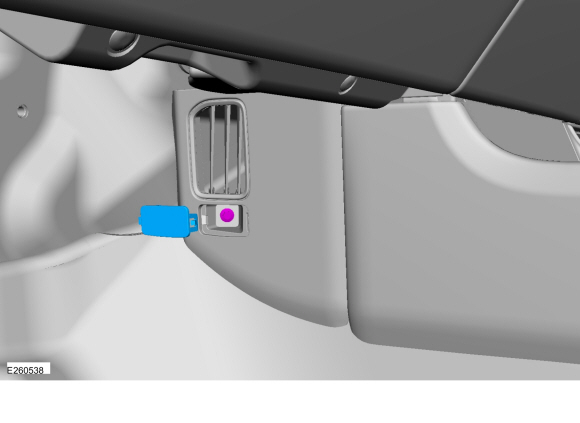
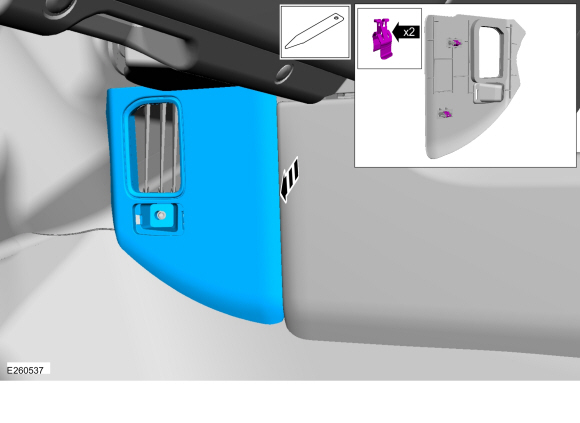
Remove the LH floor console vent bolt cover and bolt.
-
Remove the LH floor console vent.
Use the General Equipment: Interior Trim Remover
-
On both sides
Release the clips and remove the floor console side trim panel.
Use the General Equipment: Interior Trim Remover
-
NOTE:
Position the front seats as necessary to access the bolts.
Remove the bolts.
-
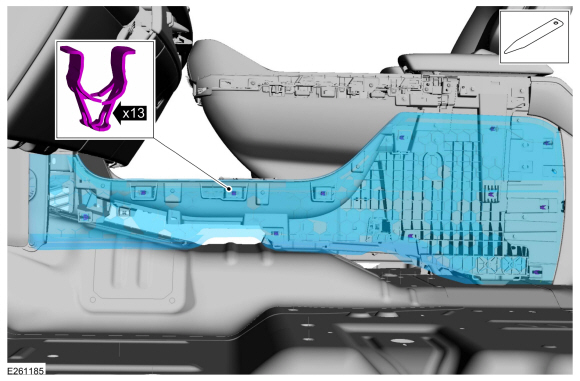
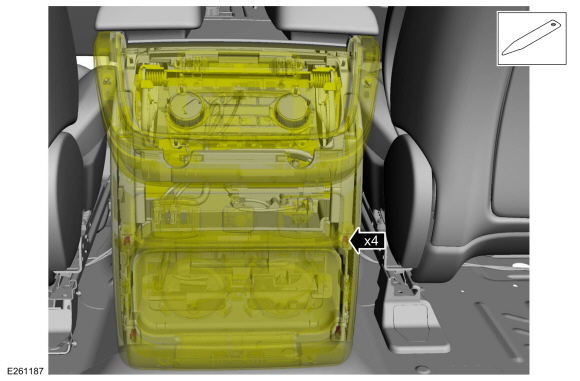
Release the clips and position the floor console rear trim panel out.
Use the General Equipment: Interior Trim Remover
-
Disconnect the electrical connectors and remove the floor console rear trim panel.
-
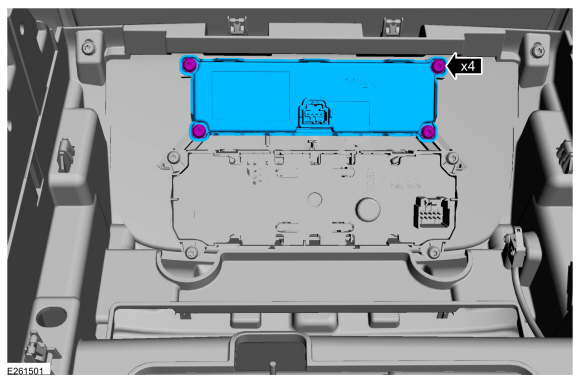
Remove the screws and the RACM .
Installation
-
To install, reverse the removal procedure.
-
NOTE:
Carry out this step only if the RACM is being replaced.
Using a diagnostic scan tool, complete the PMI process for the RACM following the on-screen instructions.
Removal
NOTE:
Removal steps in this procedure may contain installation details.
Lower the headliner.
Refer to: Headliner - Lowering (501-05 Interior Trim and Ornamentation, Removal and Installation)...
Removal
NOTE:
Removal steps in this procedure may contain installation details.
All door speakers
Remove the rear door trim panel...
Other information:
Removal
NOTE:
Removal steps in this procedure may contain installation details.
NOTE:
If installing a new module, it is necessary to
upload the module configuration information to the scan tool prior to
removing the module. This information must be downloaded into the new
module after installation...
Diagnostic Trouble Code (DTC) Chart
Diagnostics in this manual assume a certain skill level and knowledge of Ford-specific diagnostic practices. REFER to: Diagnostic Methods (100-00 General Information, Description and Operation).
Module
DTC
Description
Action
PCM
P0401:00
EGR 'A' Flow Insufficient Detected: No Sub Type Information
GO to Pinpoint Test HE
PC..

 Overhead Speaker. Removal and Installation
 Rear Door Speaker. Removal and Installation