Lincoln Navigator: Rear Drive Axle/Differential - Vehicles With: Ford 9.75 Inch Ring Gear / Hydraulic Control Unit (HCU). Removal and Installation
Materials
| Name | Specification |
|---|---|
| Motorcraft® MERCON® ULV Automatic Transmission Fluid XT-12-QULV |
WSS-M2C949-A, MERCON® ULV |
Removal
-
Using a diagnostic scan tool, carry-out the de-pressurization of the eLSD hydraulic system located in the FDRS under Toolbox.
-
Remove the rear axle assembly.
Refer to: Axle Assembly (205-02 Rear Drive Axle/Differential - Vehicles With: Ford 9.75 Inch Ring Gear, Removal and Installation).
-
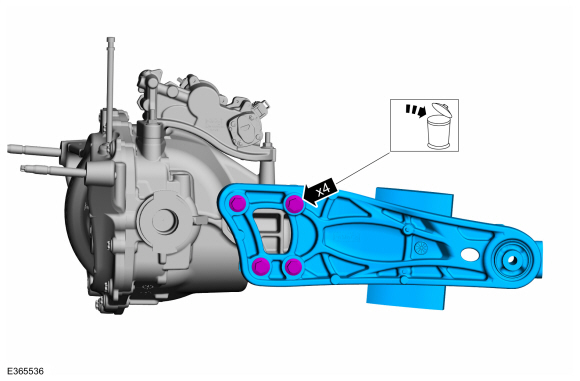
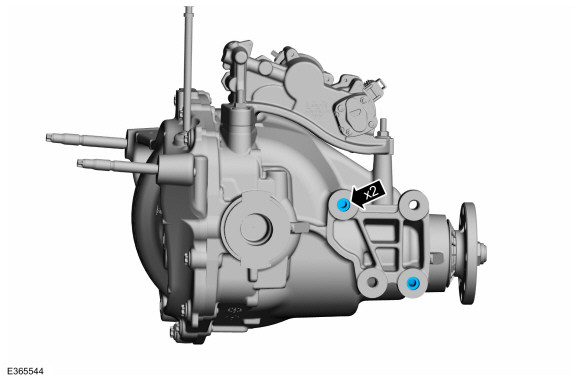
Remove and discard the torque arm bolts and remove the torque arm from the rear axle housing.
 |
-
Remove and discard the torque arm locating sleeves.
 |
-
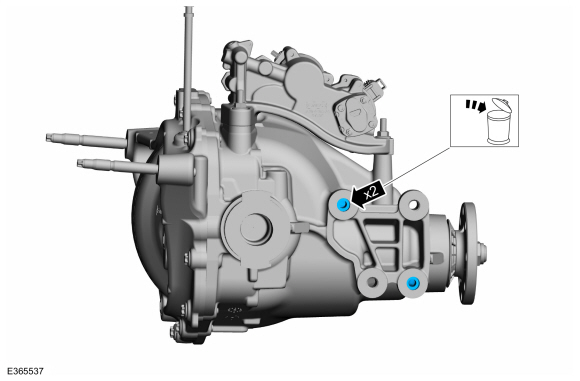
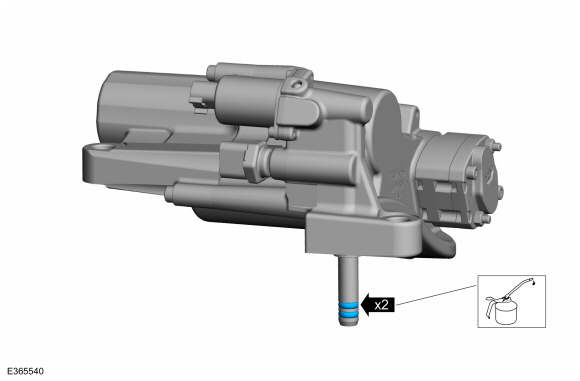
Remove the stud bolts and the HCU from the axle assembly.
 |
-
NOTE: The O-ring seals are to be reused unless damaged.
Clean and inspect the HCU hydraulic tube O-rings for damage and replace as necessary.
 |
-
Remove the differential housing cover.
Refer to: Differential Housing Cover (205-02 Rear Drive Axle/Differential - Vehicles With: Ford 9.75 Inch Ring Gear, Removal and Installation).
Installation
-
NOTE: Make sure the O-rings are installed correctly within the O-ring grooves.
Lubricate the HCU hydraulic tube O-rings with clean HCU fluid.
Material: Motorcraft® MERCON® ULV Automatic Transmission Fluid / XT-12-QULV (WSS-M2C949-A, ) (MERCON® ULV)
 |
-
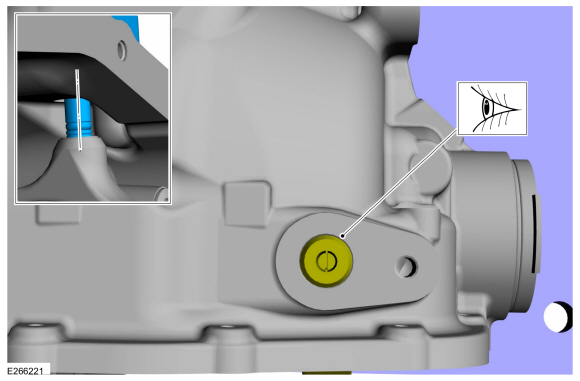
NOTE: Make sure the hydraulic actuator port is oriented in the axle access hole.
Verify the eLSD hydraulic actuator port is lined-up with the access hole on top of the axle.
 |
-
NOTE: Do not allow dirt or debris to fall into the access hole on top of axle, into the eLSD HCU port or the eLSD actuator port.
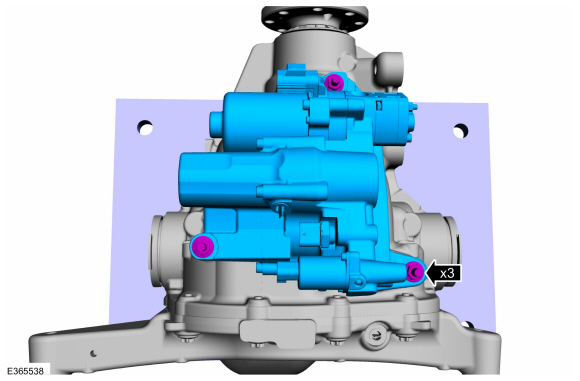
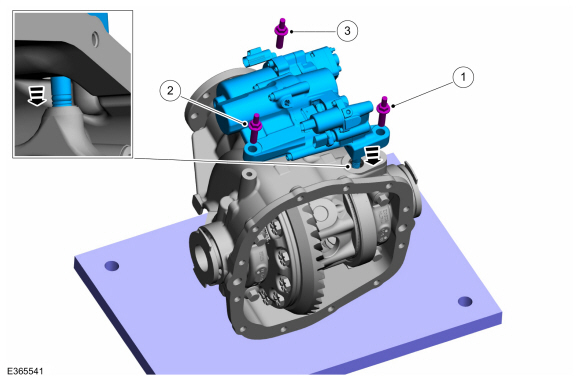
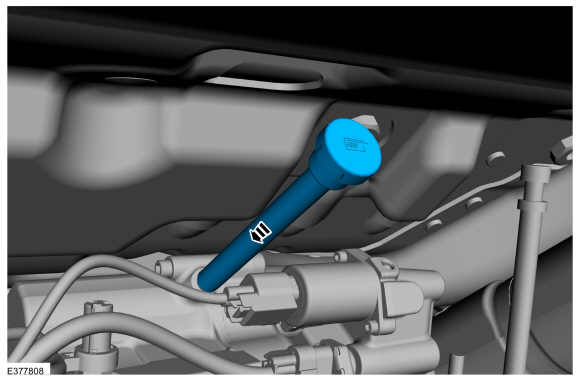
NOTE: Apply force to the eLSD HCU in the direction shown while tightening eLSD HCU mounting stud bolts.
Install the HCU to the axle assembly and stud bolts. Torque the HCU mounting bolts in the sequence shown.
Torque:
Stage 1: 44 lb.in (5 Nm)
Stage 2: 34 lb.ft (46 Nm)
 |
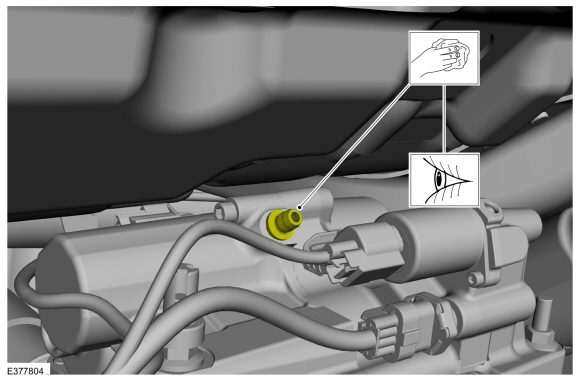
-
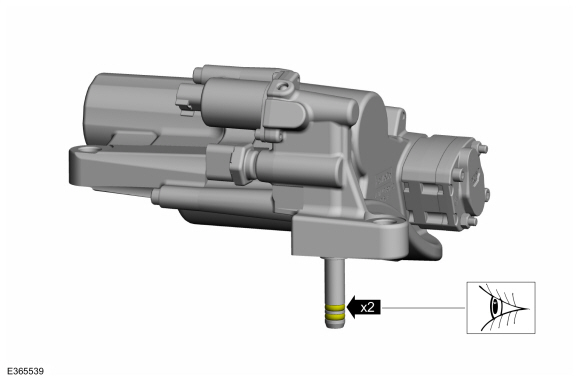
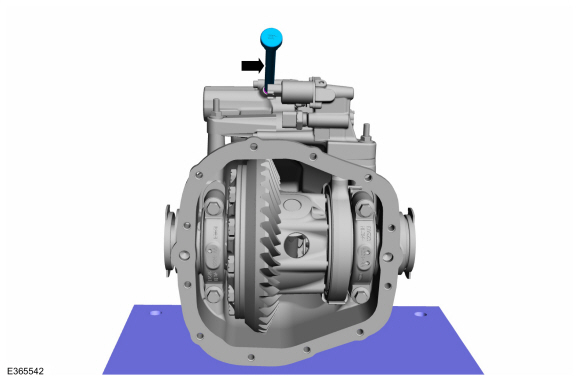
Remove the Gore Tex Vent tube from eLSD
HCU fluid fill port.
 |
-
Inspect and clean the RDU breather vent plug and ensure the same is fitted properly.
 |
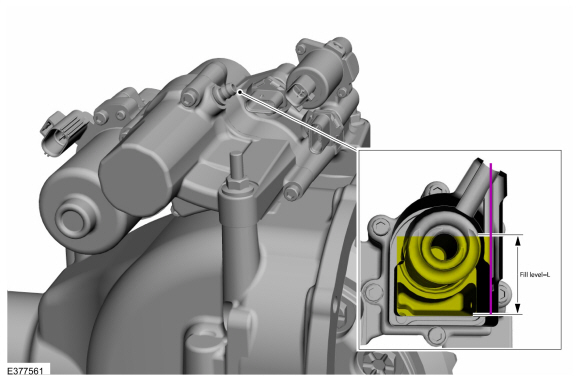
-
NOTE: The eLSD HCU to be level and in-vehicle position on the axle.
Fill the HCU with clean fluid as per specification.
Refer to: Specifications (205-02 Rear Drive Axle/Differential - Ford 9.75 Inch Ring Gear) .
Material: Motorcraft® MERCON® ULV Automatic Transmission Fluid / XT-12-QULV (WSS-M2C949-A, ) (MERCON® ULV)
 |
-
Install the differential housing cover.
Refer to: Differential Housing Cover (205-02 Rear Drive Axle/Differential - Vehicles With: Ford 9.75 Inch Ring Gear, Removal and Installation).
-
NOTE: Make sure that new components are installed.
Install the new torque arm locating sleeves.
 |
-
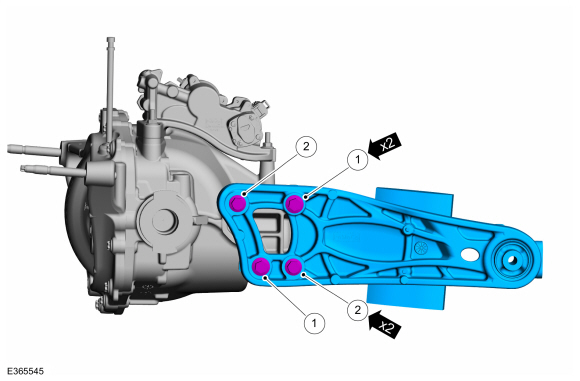
NOTE: The torque arm bolts must be tightened in the sequence below. If there is clearance in-between the head of the bolt and the torque arm, remove the torque arm bolts and reinstall following the sequence below.
Position the torque arm to the rear axle housing and install the new torque arm bolts hand tight.
Torque:
Tighten item 1 to : 20 lb.ft (27 Nm)
Tighten item 2 to : 150 lb.ft (203 Nm)
Tighten item 1 to : 150 lb.ft (203 Nm)
 |
-
Install the rear axle assembly.
Refer to: Axle Assembly (205-02 Rear Drive Axle/Differential - Vehicles With: Ford 9.75 Inch Ring Gear, Removal and Installation).
-
Inspect and clean the RDU breather vent plug and ensure the same is fitted properly.
|
-
Install the Gore Tex Vent tube to the eLSD
HCU fluid fill port.
 |
-
Using a diagnostic scan tool, carry-out the eLSD service initialization located in the FDRS under toolbox.
-
Check and top off the HCU with clean HCU fluid.
Refer to: Differential Fluid Level Check (205-02 Rear Drive Axle/Differential - Vehicles With: Ford 9.75 Inch Ring Gear, General Procedures).

 Rear Halfshaft Seal. Removal and Installation
Special Tool(s) /
General Equipment
205-907Handle, 32 DriverTKIT-2008DH-FLM
206-034
(T88P-20202-B)
Installer, Wheel Speed Sensor RingTKIT-1988-FLMTKIT-1988-LM
Feeler Gauge
Removal
NOTE:
Removal steps in this procedure may contain installation details...
Other information:
Lincoln Navigator 2018-2026 Workshop Manual: Specifications
Materials Name Specification Premium Long-Life Grease XG-1-E1 ESA-M1C75-B Motorcraft® SAE 75W-85 Premium Synthetic Hypoid Gear Lubricant XY-75W85-QL WSS-M2C942-A Motorcraft® Additive Friction Modifier XL-3 EST-M2C118-A Silicone Gasket and Sealant TA-29 ..
Lincoln Navigator 2018-2026 Workshop Manual: Low Voltage Differential Signalling (LVDS) Cable. Removal and Installation
Removal Remove the APIM . Refer to: Information and Entertainment System - Component Location (415-00 Information and Entertainment System - General Information - Vehicles With: SYNC 4, Description and Operation). Remove the FDIM . Refer to: Information and Entertainment System - Component Location (415-00 Information and Entertainment System - General..
Categories
- Manuals Home
- 4th Gen Lincoln Navigator Service Manual (2018 - 2026)
- Brake Service Mode Activation and Deactivation. General Procedures
- Body and Paint
- Rear Bumper. Removal and Installation
- Windshield Washer Pump. Removal and Installation
- Neutral Flat Tow Activation and Deactivation. General Procedures
Rear Stabilizer Bar Link. Removal and Installation
Removal
NOTE: Removal steps in this procedure may contain installation details.
With the vehicle in NEUTRAL, position it on a hoist.Refer to: Jacking and Lifting (100-02 Jacking and Lifting, Description and Operation).
NOTE: Use the hex-holding feature to prevent the stud from turning while removing the nut.
Remove and discard the 2 rear stabilizer bar link nuts and remove the rear stabilizer bar link.Torque: 46 lb.ft (63 Nm)
