Lincoln Navigator: Interior Trim and Ornamentation / Headliner - Lowering. Removal and Installation
Special Tool(s) /
General Equipment
| Flat-Bladed Screwdriver |
| Interior Trim Remover |
-
Remove the following items:
-
On both sides.
Remove the A-pillar trim panel.
Refer to: A-Pillar Trim Panel (501-05 Interior Trim and Ornamentation, Removal and Installation).
-
On both sides.
Remove the B-pillar trim panel.
Refer to: B-Pillar Trim Panel (501-05 Interior Trim and Ornamentation, Removal and Installation).
-
On both sides.
Remove the C-pillar trim panel.
Refer to: C-Pillar Trim Panel (501-05 Interior Trim and Ornamentation, Removal and Installation).
-
On both sides.
Remove the D-pillar trim panel.
Refer to: D-Pillar Trim Panel - Short Wheelbase (501-05 Interior Trim and Ornamentation, Removal and Installation).
Refer to: D-Pillar Trim Panel - Long Wheelbase (501-05 Interior Trim and Ornamentation, Removal and Installation).
-
On LH side.
Release the headliner wiring harness retainers and position the headliner wiring harness aside.
-
On RH side.
Release the headliner wiring harness retainers and position the headliner wiring harness aside.
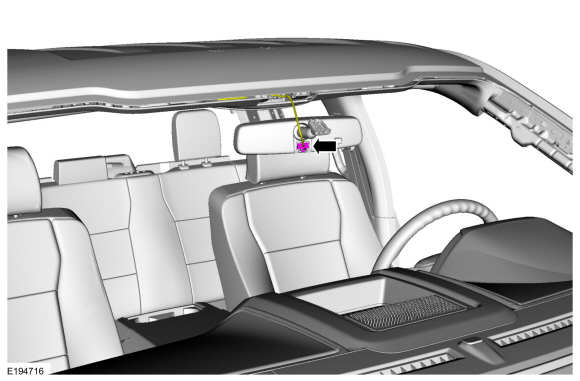
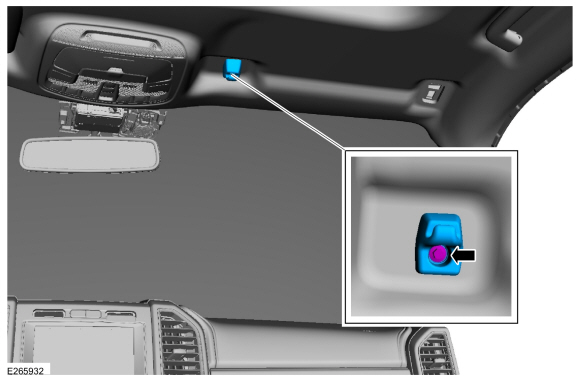
-
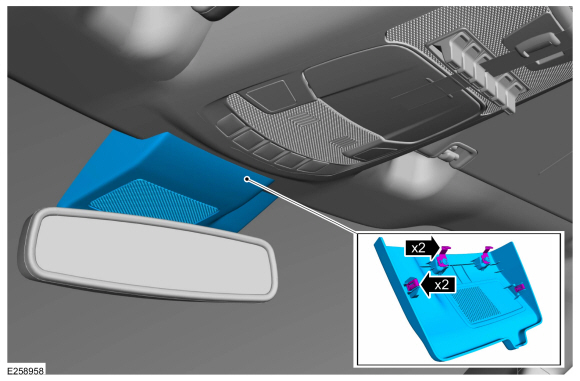
If equipped with IPMA .
Release the clips and remove the IPMA cover.
-
If equipped with IPMA .
Disconnect the IPMA and the rain sensor wiring harness electrical connectors.
-
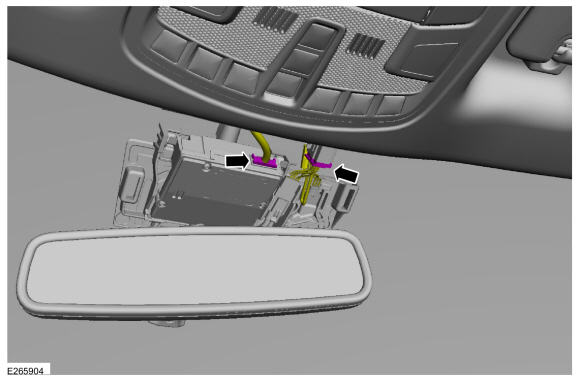
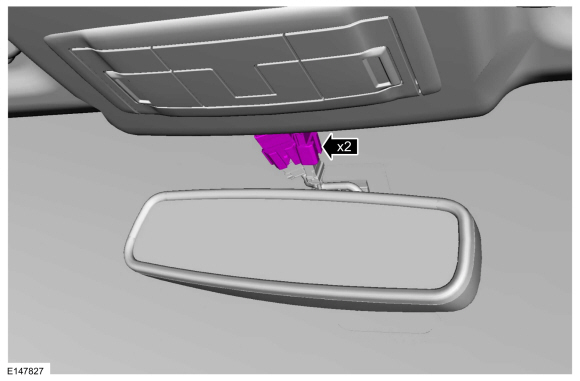
If equipped.
Disconnect the rear view mirror electrical connector.
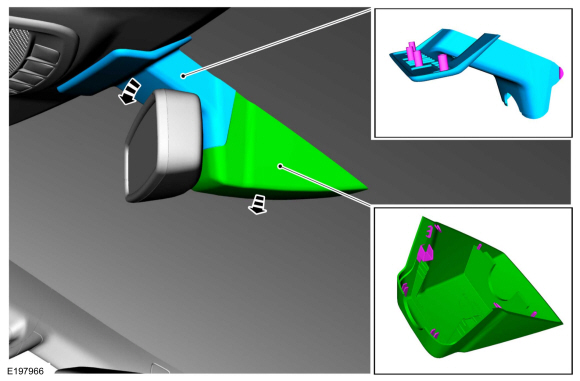
-
If equipped.
Release the clips and remove the rain sensor outer covers.
-
If equipped.
Disconnect the rain sensor electrical connectors.
-
NOTE:
RH shown, LH similar.
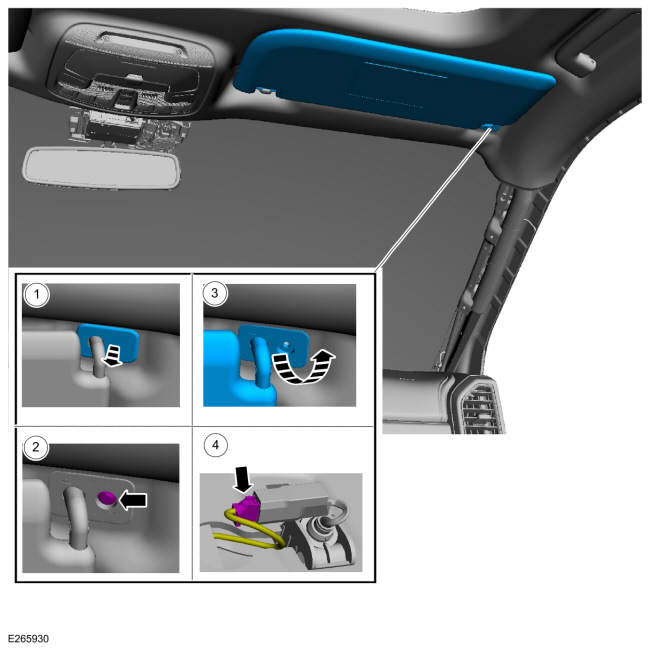
On both sides.
Remove the sun visor.
-
Remove the bolt cover.
-
Remove the bolt.
-
Remove the sun visor.
-
Disconnect the sun visor electrical connector.
-
NOTE:
RH shown, LH similar.
On both sides.
Remove the bolt and the sun visor clip.
-
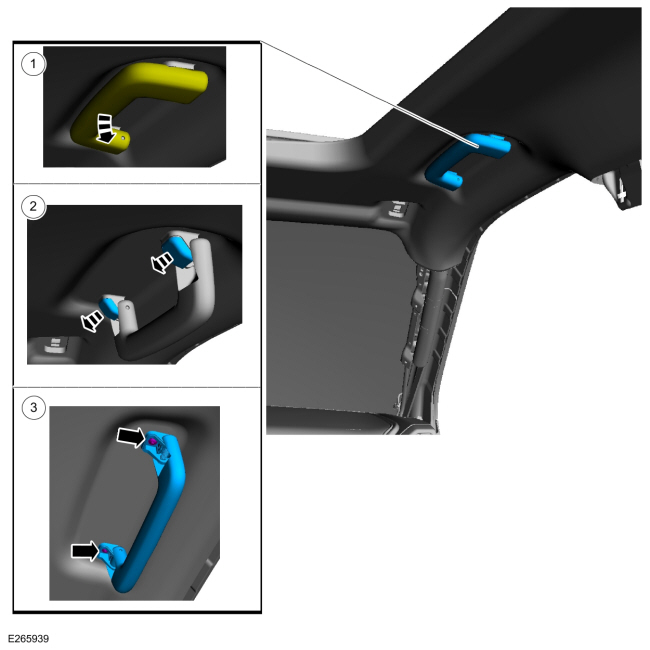
On RH side.
Remove the front passenger assist handle.
-
Position the front passenger assist handle down.
-
Remove the bolt covers.
-
Remove the bolts.
-
NOTE:
RH shown, LH similar.
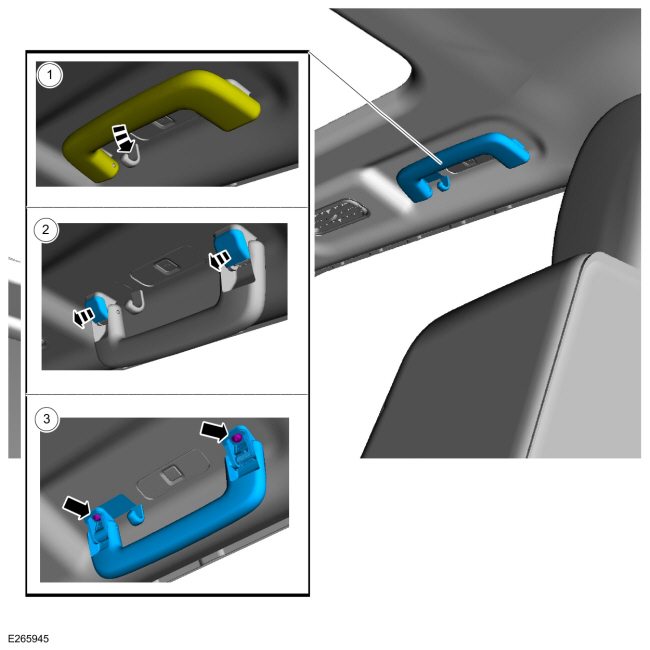
On both sides.
Remove the rear passenger assist handle.
-
Position the rear passenger assist handle down.
-
Remove the bolt covers.
-
Remove the bolts.
-
NOTE:
RH shown, LH similar.
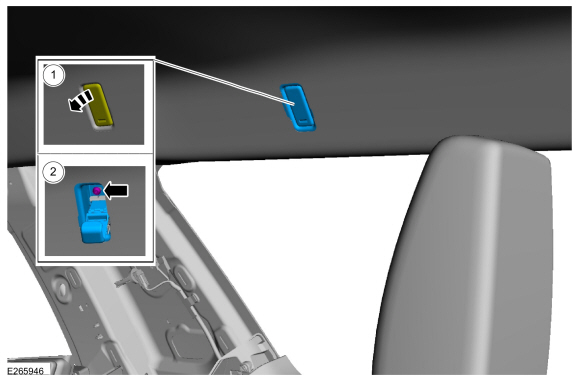
On both sides.
Remove the rear coat hook.
-
Position the rear coat hook down.
-
Remove the bolt.
-
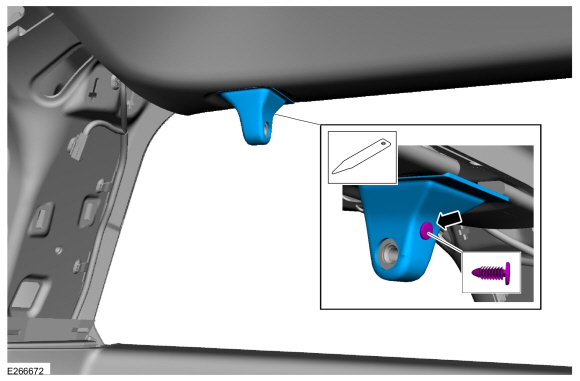
NOTE:
LH shown, RH similar.
On both side of vehicles equipped with long wheel base.
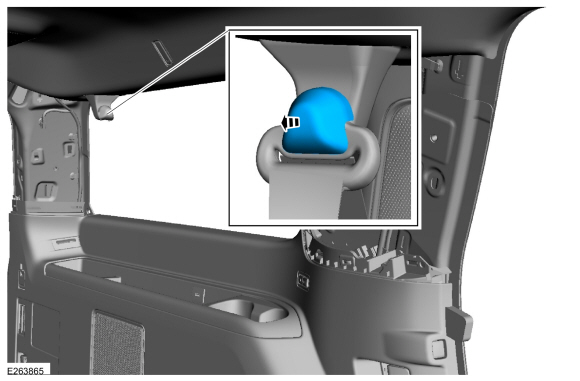
Remove the third row outer seatbelt retractor D-ring bolt cover.
-
NOTE:
LH shown, RH similar.
On both side of vehicles equipped with long wheel base.
Remove the third row outer seatbelt retractor D-ring bolt.
Torque:
30 lb.ft (40 Nm)
-
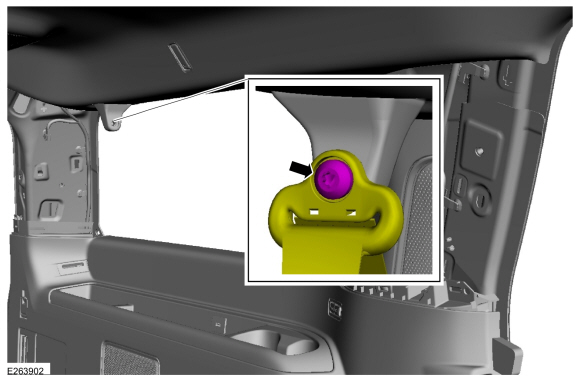
NOTE:
LH shown, RH similar.
On both side of vehicles equipped with long wheel base.
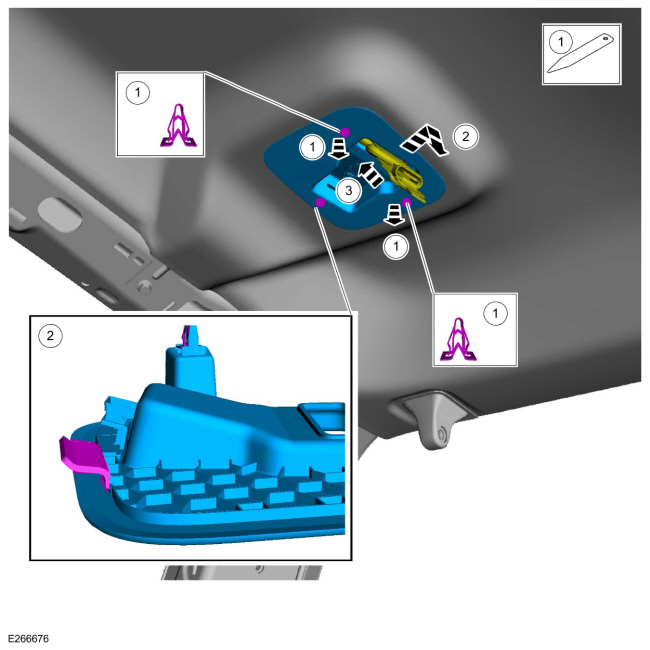
Remove the pin-type retainer and the third row outer seatbelt retractor bracket cover.
Use the General Equipment: Interior Trim Remover
-
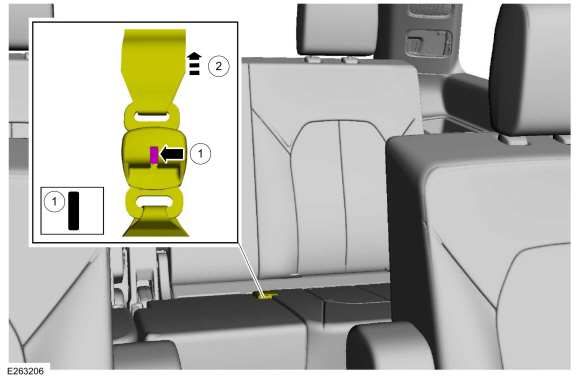
On vehicles equipped with long wheel base.
Disconnect the third row center seatbelt retractor from the third row center seatbelt retractor mini-buckle.
-
Press the release button.
Use the General Equipment: Flat-Bladed Screwdriver
-
Release the third row center seatbelt retractor.
-
Remove the third row center seatbelt retractor cover.
-
Release the clips.
Use the General Equipment: Interior Trim Remover
-
Slide cover forward and down to release the rear tab.
-
Feed the third row center seatbelt through.
-
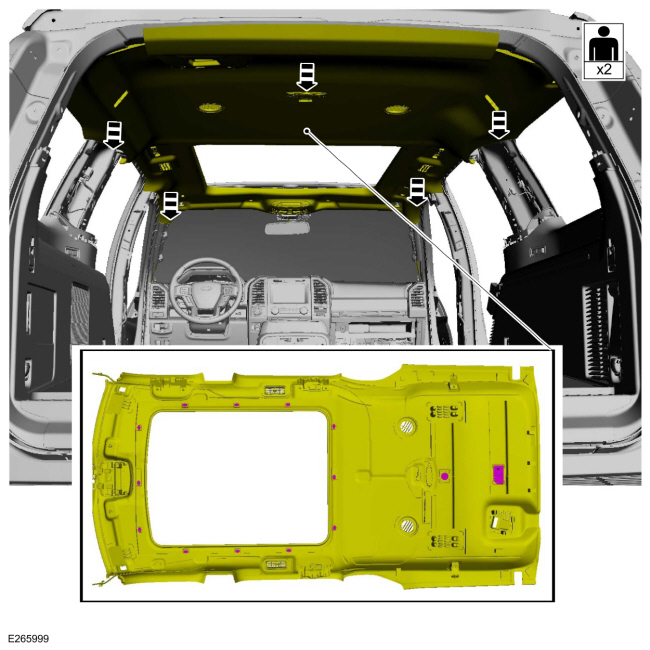
NOTE:
Long wheel base with roof opening panel shown, all others similar.
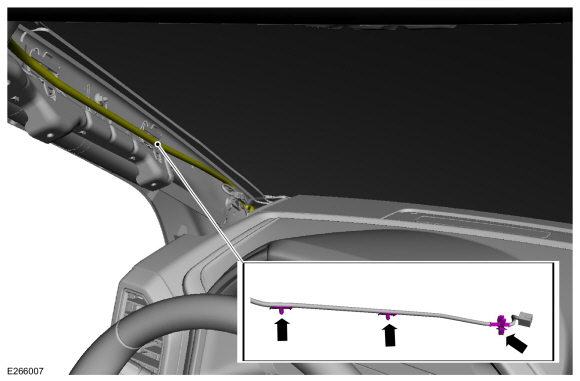
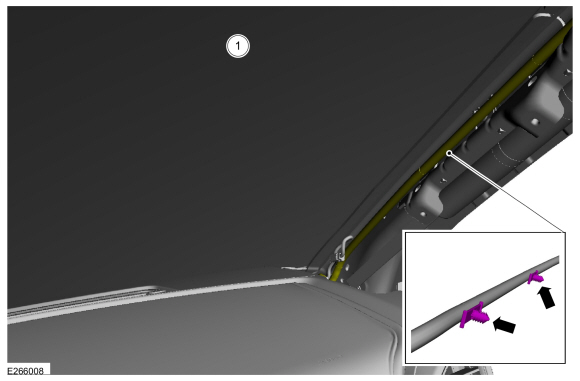
Release the magnets and lower the headliner.
Special Tool(s) /
General Equipment
Flat-Bladed Screwdriver
Interior Trim Remover
Materials
Name
Specification
3M™ Super-Fast Repair Adhesive04747
-
Removal
Remove the following items:
On both sides...
Removal
Release the clips and remove the liftgate upper middle trim panel.
NOTE:
LH shown, RH similar...
Other information:
Diagnostic Trouble Code (DTC) Chart
Diagnostics in this manual assume a certain skill level and knowledge of Ford-specific diagnostic practices. REFER to: Diagnostic Methods (100-00 General Information, Description and Operation).
Module
DTC
Description
Action
LDCMA
B124B:11
Left Daytime Running Light: Circuit Short To Ground
GO to Pinpoint Test A
LDCMA
B..
Removal
WARNING:
The following procedure prescribes critical repair steps
required for correct restraint system operation during a crash. Follow
all notes and steps carefully. Failure to follow step instructions may
result in incorrect operation of the restraint system and increases the
risk of serious personal injury or death in a crash.
NOTE:
Removal steps in this..
 Headliner. Removal and Installation
 Liftgate Trim Panel. Removal and Installation