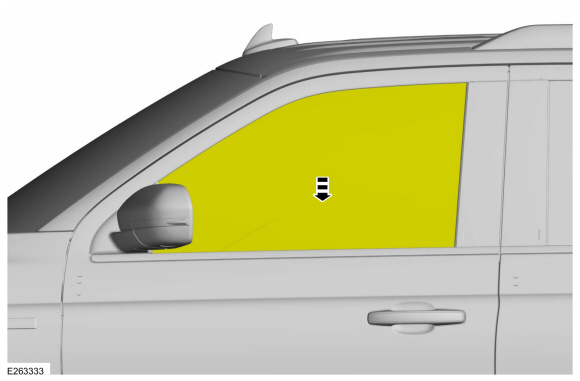
Lincoln Navigator: Exterior Trim and Ornamentation / Front Door Upper Moulding. Removal and Installation
Removal
NOTE: Removal steps in this procedure may contain installation details.
NOTE: LH side shown, RH side similar.
All vehicles
-
Lower the door window glass completely.
 |
-
Remove the exterior mirror.
Refer to: Exterior Mirror (501-09 Rear View Mirrors, Removal and Installation).
-
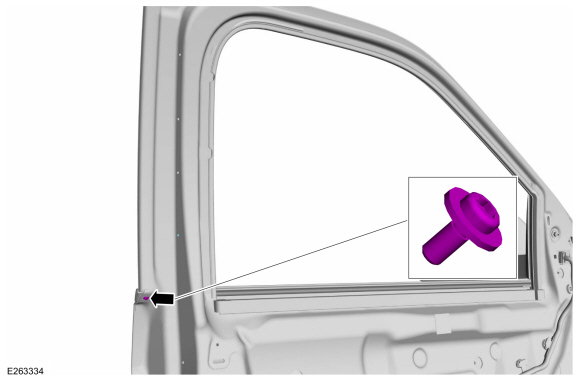
Remove the upper belt moulding screw at rear of the door.
Torque: 8 lb.in (0.9 Nm)
 |
-
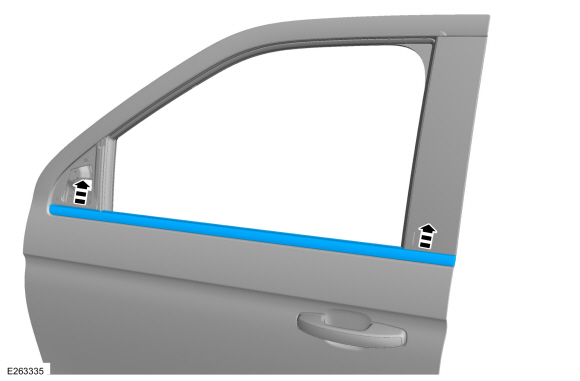
Using a non-marring trim tool, disengage the moulding from the channel in the door and remove the moulding.
 |
-
Position aside the glass run weatherstrip.
 |
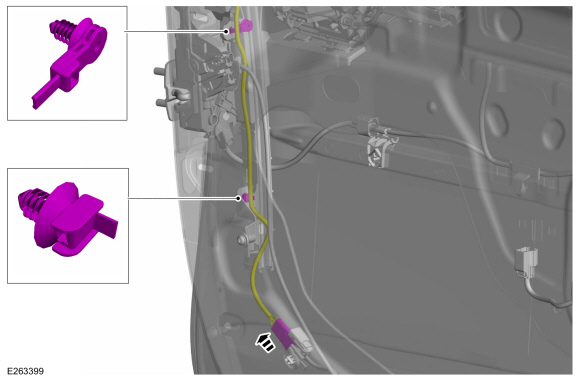
Vehicles With: Keyless Vehicle System
-
Remove the front door watershield.
 |
-
Disconnect the electrical connector, detach the
retainers. Route the wiring and connector towards top of door for
removal.
 |
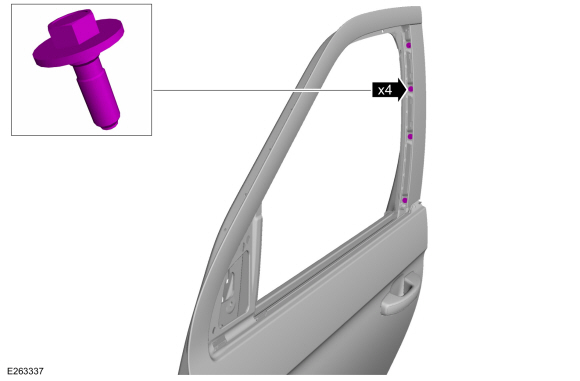
All vehicles
-
Remove the screws.
Torque: 13 lb.in (1.5 Nm)
 |
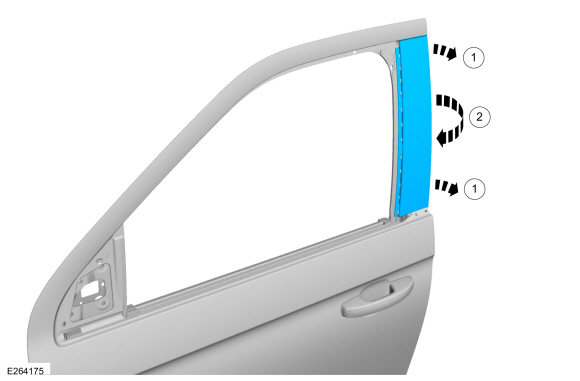
-
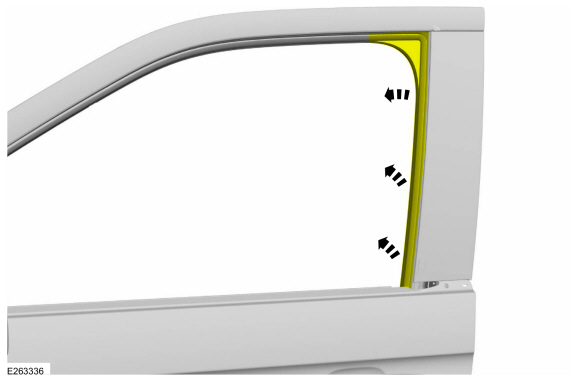
Detach the rear edge of the moulding from the door frame and pull the moulding outward to remove.
 |
Installation
-
To install, reverse the removal procedure.
 Front Door Moulding. Removal and Installation
Removal
NOTE:
LH side shown, RH side similar.
NOTE:
Removal steps in this procedure may contain installation details.
NOTICE:
To avoid damage to moulding, only use moderate force...
 Power Running Board (PRB). Removal and Installation
Removal
NOTE:
Removal steps in this procedure may contain installation details.
With the vehicle in NEUTRAL, position it on a hoist...
Other information:
Lincoln Navigator 2018-2026 Workshop Manual: Health and Safety Precautions. Description and Operation
General Service Warnings Review carefully the information below before beginning any repair. Following these warnings is a list of specific system warnings that must be reviewed before beginning work on any listed system. WARNING: Vehicles equipped with an automatic transmission and a Telematics Control Unit (TCU) have remote start technology and may start the eng..
Lincoln Navigator 2018-2026 Workshop Manual: Rocker Arm. Removal and Installation
Special Tool(s) / General Equipment 303-1633Remover, Roller Rocker FollowerTKIT-2014D-ROW3TKIT-2014D-FL_ROW 303-1633-01Remover, Roller Rocker Follower Removal NOTE: This procedure should be used when removing and replacing the clipped roller finger follower or hydraulic lash adjuster and the camshafts are not removed. LH side rocker arm ..
Categories
- Manuals Home
- 4th Gen Lincoln Navigator Service Manual (2018 - 2026)
- Body and Paint
- All Terrain Control Module (ATCM). Removal and Installation
- Neutral Flat Tow Activation and Deactivation. General Procedures
- Transmission Fluid Level Check. General Procedures
- Liftgate Trim Panel. Removal and Installation
Front Driveshaft. Removal and Installation
Special Tool(s) / General Equipment
Crimping ToolMaterials
Name Specification Motorcraft® Premium Long-Life GreaseXG-1-E1 ESA-M1C75-B
Removal
With the vehicle in NEUTRAL, position the vehicle on a hoist.Refer to: Jacking and Lifting (100-02 Jacking and Lifting, Description and Operation).
Remove the bolts and the transmission shield.