Lincoln Navigator: Instrument Panel and Console / Floor Console. Removal and Installation
Special Tool(s) / General Equipment
| Interior Trim Remover |
Removal
NOTE: Removal steps in this procedure may contain installation details.
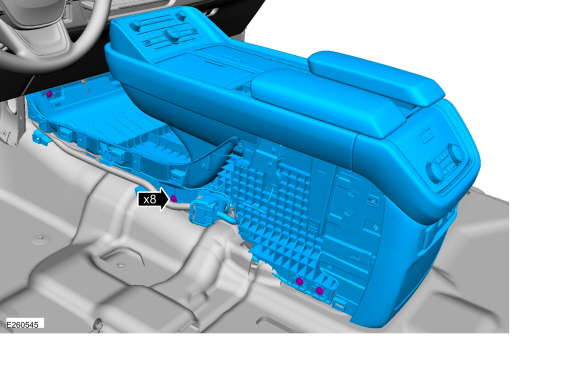
All vehicles or Front floor console
-
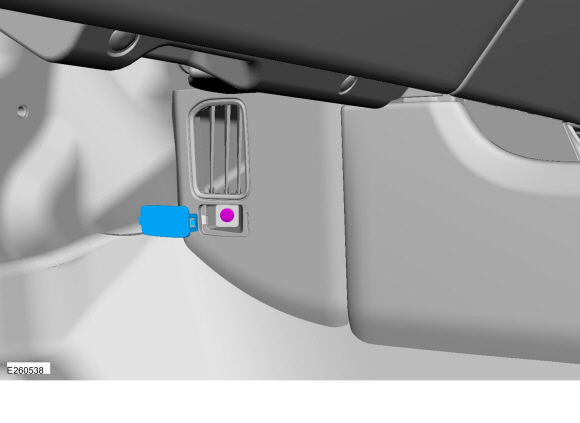
Remove the RH floor console vent cover.
Use the General Equipment: Interior Trim Remover
 |
-
Remove the LH floor console vent bolt cover and bolt.
 |
-
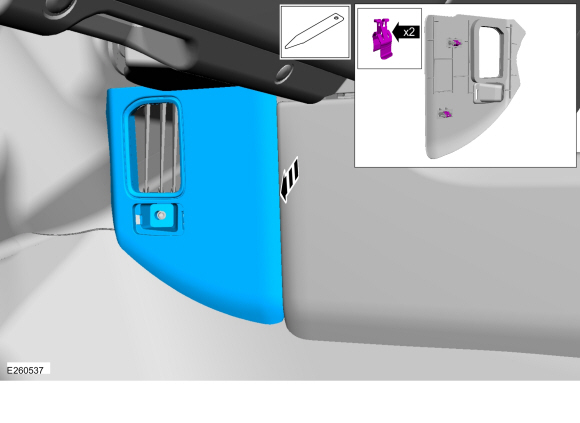
Remove the LH floor console vent.
Use the General Equipment: Interior Trim Remover
 |
-
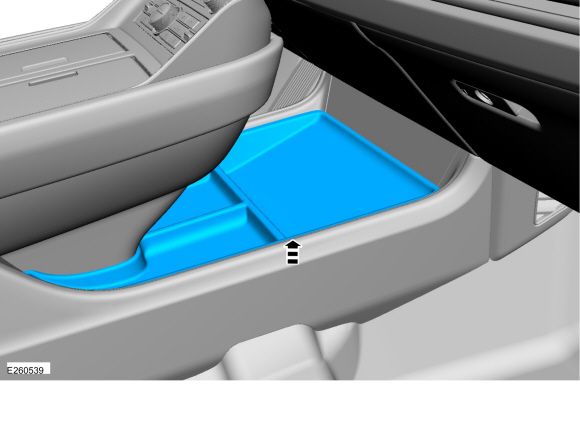
Remove the floor console lower matt.
 |
-
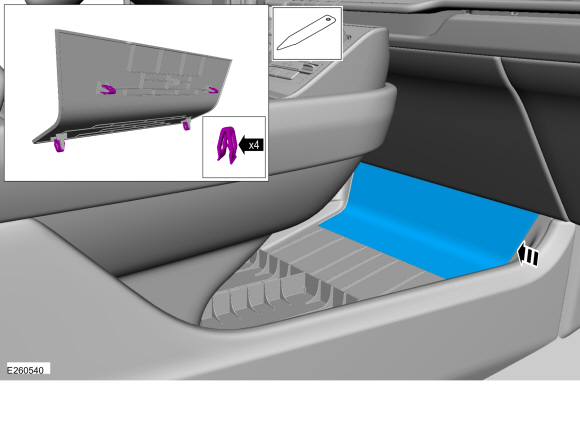
Release the clips and remove the floor console lower trim panel.
Use the General Equipment: Interior Trim Remover
 |
-
NOTE: Position the seat as required.
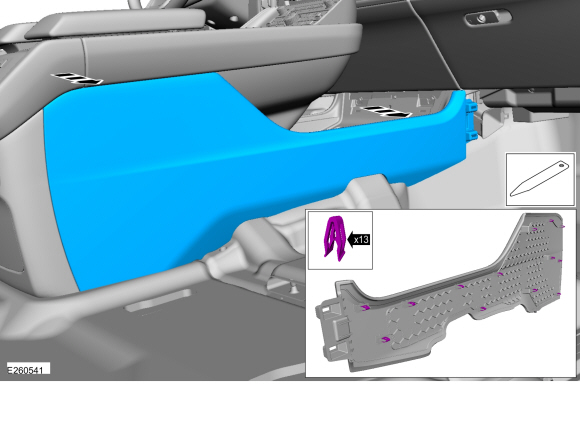
Release the clips and remove the RH floor console side finish panel.
Use the General Equipment: Interior Trim Remover
 |
-
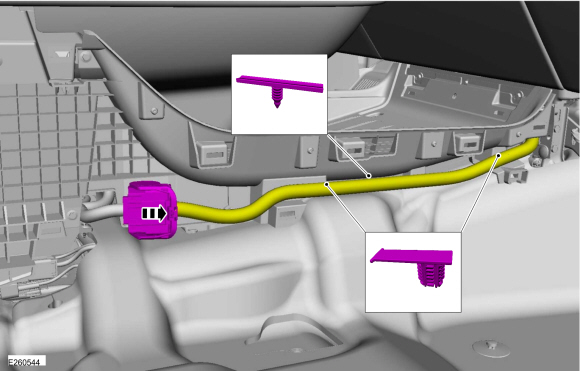
Disconnect the electrical connector, release the
harness retainers and position aside the harness at the floor console
lower RH side.
 |
-
NOTE: Position the seat as required.
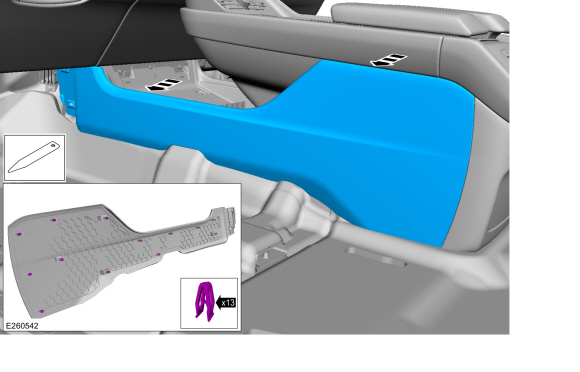
Release the clips and remove the LH floor console side finish panel.
Use the General Equipment: Interior Trim Remover
 |
-
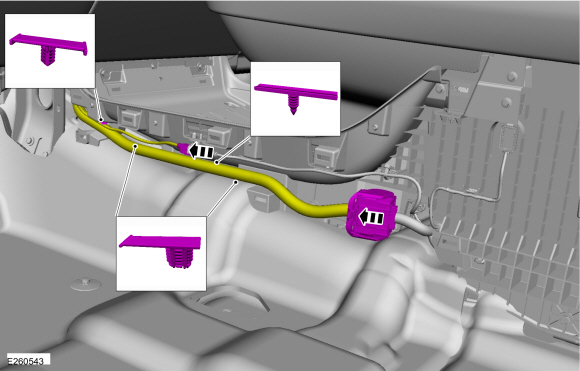
Disconnect the electrical connector, release the
harness retainers and position aside the harness at the floor console
lower LH side.
 |
-
Remove the bolts and the front floor console.
Torque: 48 lb.in (5.4 Nm)
 |
Rear floor console
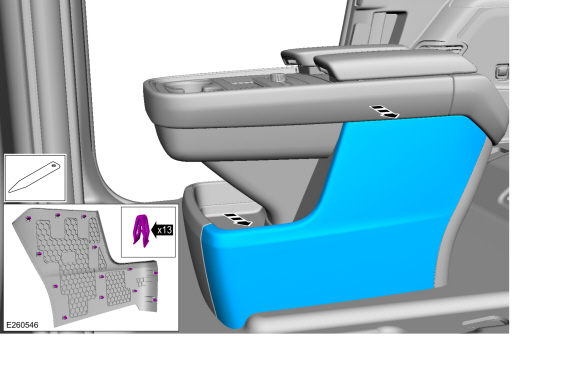
-
Release the clips and remove the LH floor console side finish panel.
Use the General Equipment: Interior Trim Remover
 |
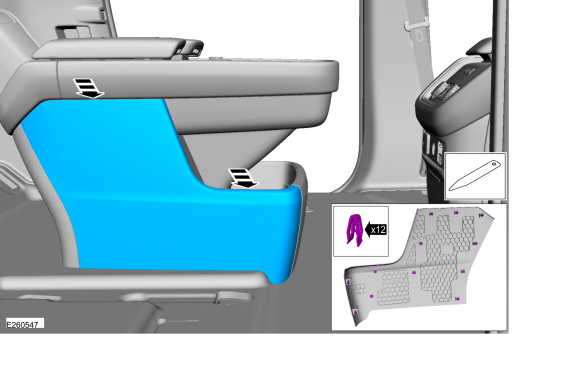
-
Release the clips and remove the RH floor console side finish panel.
Use the General Equipment: Interior Trim Remover
 |
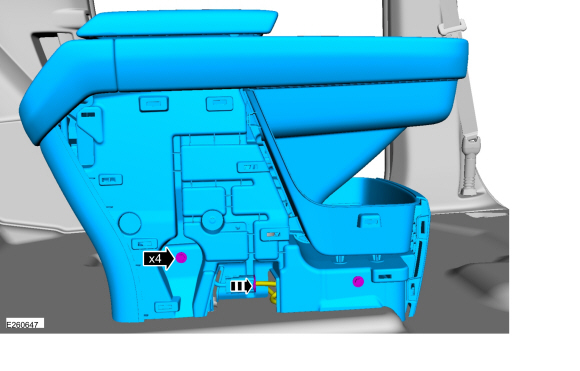
-
Remove the bolts and the rear floor console.
-
Disconnect the electrical connector.
Torque: 48 lb.in (5.4 Nm)
-
Disconnect the electrical connector.
 |
Installation
-
To install, reverse the removal procedure.
 Defrost Vent Trim Panel. Removal and Installation
Removal
Remove the A-pillar trim panels.
Refer to: A-Pillar Trim Panel (501-05 Interior Trim and Ornamentation, Removal and Installation)...
 Glove Compartment. Removal and Installation
Special Tool(s) /
General Equipment
Interior Trim Remover
Removal
NOTE:
Removal steps in this procedure may contain installation details...
Other information:
Lincoln Navigator 2018-2026 Workshop Manual: Passenger Side Register Air Discharge Temperature Sensor. Removal and Installation
Special Tool(s) / General Equipment Interior Trim Remover Removal NOTE: Removal steps in this procedure may contain installation details. Remove the sunload sensor and disconnect the electrical connector. Use the General Equipment: Interior Trim Remover Release the clips and remove the instrument panel c..
Lincoln Navigator 2018-2026 Workshop Manual: Bodyside Moulding. Removal and Installation
Removal NOTE: Removal steps in this procedure may contain installation details. NOTE: LWB (long wheel base) shown, SWB (short wheel base) similar. NOTE: RH side views shown, LH side similar. Using a non-marring trim tool, detach the push pin retainers and remove the bodyside moulding. Using a non-marring t..
Categories
- Manuals Home
- 4th Gen Lincoln Navigator Service Manual (2018 - 2026)
- Vehicle Dynamics Control Module (VDM). Removal and Installation
- Body and Paint
- Transmission Fluid Level Check. General Procedures
- Brake Service Mode Activation and Deactivation. General Procedures
- Rear View Mirrors - System Operation and Component Description. Description and Operation
Front Driveshaft. Removal and Installation
Special Tool(s) / General Equipment
Crimping ToolMaterials
Name Specification Motorcraft® Premium Long-Life GreaseXG-1-E1 ESA-M1C75-B
Removal
With the vehicle in NEUTRAL, position the vehicle on a hoist.Refer to: Jacking and Lifting (100-02 Jacking and Lifting, Description and Operation).
Remove the bolts and the transmission shield.