Lincoln Navigator: Front Drive Axle/Differential / Differential Carrier. Disassembly and Assembly
Special Tool(s) /
General Equipment
 |
205-386
(T97T-4205-D)
Gauge, Differential (Traction Lock)
TKIT-1998-LM (NavigatoR)
TKIT-1997-F/FLM/LT |
| Hydraulic Press |
| Punch |
| Copper Hammer |
| Bearing Separator |
Materials
| Name |
Specification |
Motorcraft® SAE 75W-85 Premium Synthetic Hypoid Gear Lubricant
XY-75W85-QL |
WSS-M2C942-A
|
DISASSEMBLY
-
Remove the differential carrier.
Refer to: Differential Carrier (205-03 Front Drive Axle/Differential, Removal and Installation).
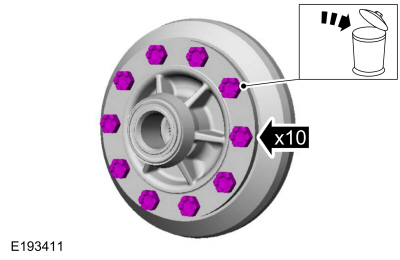
-
Remove and discard the differential ring gear bolts.
-
NOTICE:
Care should be taken not to damage the differential ring gear bolt hole threads.
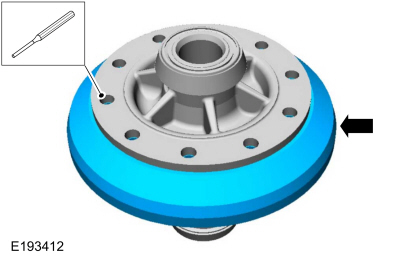
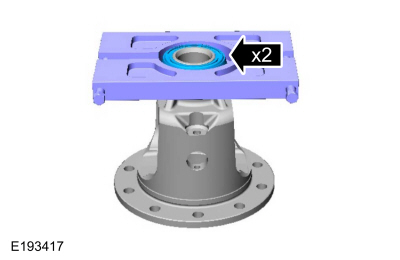
Using a brass punch and copper hammer, separate the ring gear from the differential case.
Use the General Equipment: Punch
Use the General Equipment: Copper Hammer
-
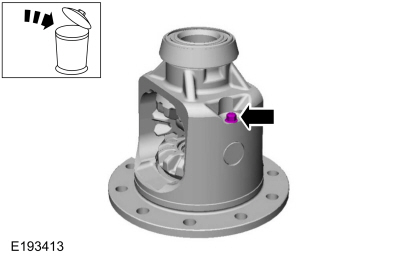
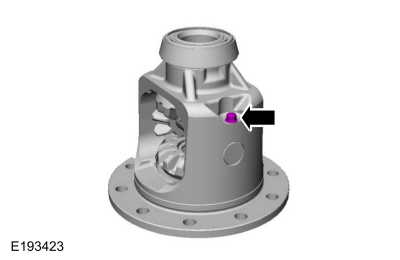
Remove and discard the differential pinion shaft bolt.
-
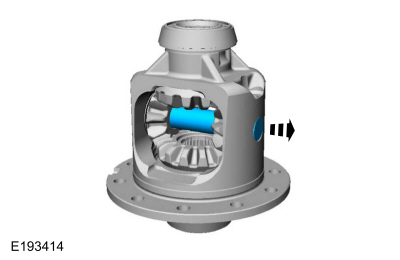
Remove the differential pinion shaft.
-
NOTE:
Do not over tighten the special tool.
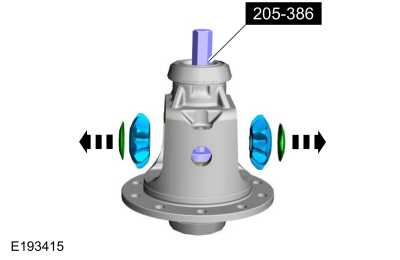
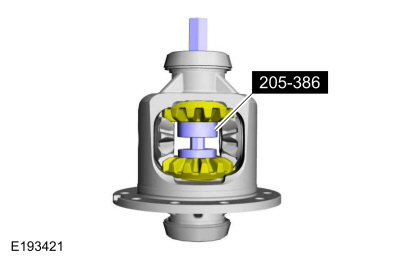
Using the special tool, compress the differential side gear wave washers.
Use Special Service Tool: 205-386
(T97T-4205-D)
Gauge, Differential (Traction Lock).
-
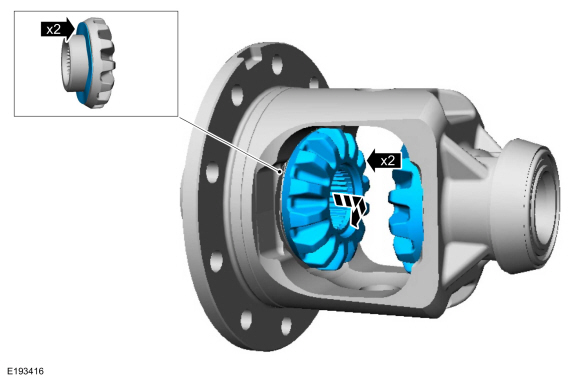
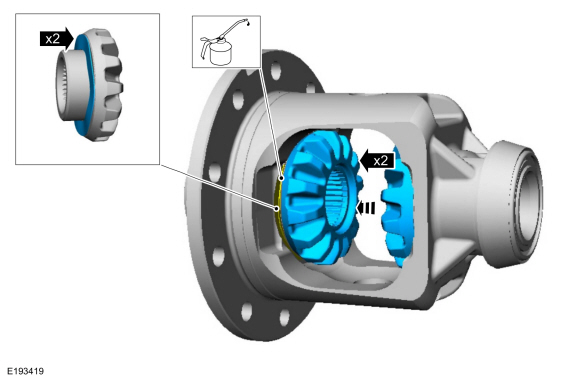
Remove the differential pinion thrust washers and the differential pinion gears.
-
NOTE:
Note the position of the differential side gear wave washer for reassembly.
Remove the differential side gear assemblies.
-
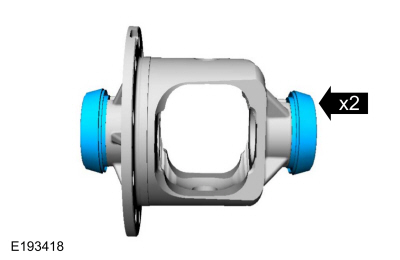
Using the general equipment: remove and discard the differential side bearings.
Use the General Equipment: Hydraulic Press
Use the General Equipment: Bearing Separator
ASSEMBLY
-
Using the general equipment; Install the new differential side bearings.
Use the General Equipment: Hydraulic Press
-
Install the differential side gears in the differential carriers.
-
Lubricate the differential wave washer with axle lubricant.
Material: Motorcraft® SAE 75W-85 Premium Synthetic Hypoid Gear Lubricant
/ XY-75W85-QL
(WSS-M2C942-A)
-
Install the differential wave washer on the differential side gear.
-
Install the differential side gear assemblies into differential carrier.
-
With the special tool installed, lubricate the
differential pinion thrust washers and the differential pinion gears
with axle lubricant and assemble them.
Use Special Service Tool: 205-386
(T97T-4205-D)
Gauge, Differential (Traction Lock).
Material: Motorcraft® SAE 75W-85 Premium Synthetic Hypoid Gear Lubricant
/ XY-75W85-QL
(WSS-M2C942-A)
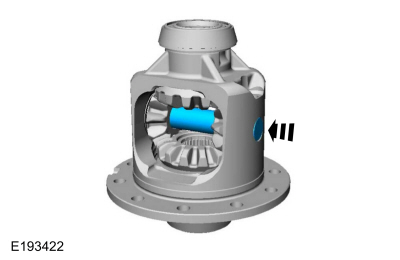
-
Using the special tool, rotate the differential pinion
gears to align with the differential pinion shaft bore and remove the
special tool.
Use Special Service Tool: 205-386
(T97T-4205-D)
Gauge, Differential (Traction Lock).
-
Install the differential pinion shaft.
-
NOTE:
If a new pinion shaft bolt is unavailable, coat the threads with sealer.
Install the new differential pinion shaft bolt.
Torque:
22 lb.ft (30 Nm)
-
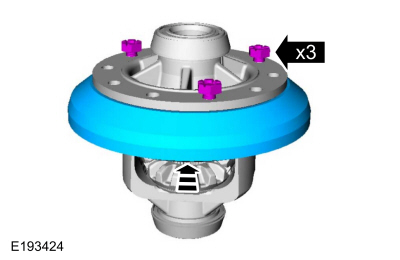
Install the ring gear onto the differential carrier.
Align the ring gear using 3 new bolts. Using the general equipment:
press the ring gear into place.
Use the General Equipment: Hydraulic Press
-
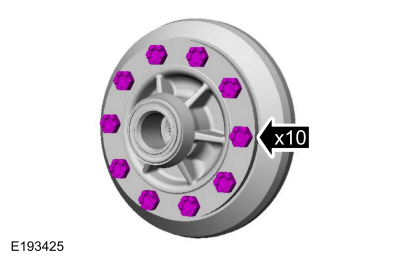
Install the remaining new ring gear bolts.
Torque:
94 lb.ft (128 Nm)
-
Install the differential carrier.
Refer to: Differential Carrier (205-03 Front Drive Axle/Differential, Removal and Installation).
Other information:
Special Tool(s) /
General Equipment
Flat Headed Screw Driver
Interior Trim Remover
Removal
Mirror assembly
Remove the interior front door trim panel.
Refer to: Front Door Trim Panel (501-05 Interior Trim and Ornamentation, Removal and Installation).
Disconnect the mirror wiring harness.
Disconnect the exterior mirr..
Removal
NOTICE:
Suspension fasteners are critical parts that affect the
performance of vital components and systems. Failure of these fasteners
may result in major service expense. Use the same or equivalent parts if
replacement is necessary. Do not use a replacement part of lesser
quality or substitute design. Tighten fasteners as specified.
Remove the wheel and t..