Lincoln Navigator: Second Row Seats / Second Row Seat. Removal and Installation
Removal
 WARNING:
The following procedure describes critical repair steps
required for correct seat component installation. Follow all notes and
steps carefully. Do not place any objects between the seat components
and the body of the vehicle, nor any objects within a joint internal to
the seat structure. Failure to follow step instructions may result in
incorrect operation of the seat components and increases the risk of
serious personal injury.
WARNING:
The following procedure describes critical repair steps
required for correct seat component installation. Follow all notes and
steps carefully. Do not place any objects between the seat components
and the body of the vehicle, nor any objects within a joint internal to
the seat structure. Failure to follow step instructions may result in
incorrect operation of the seat components and increases the risk of
serious personal injury.
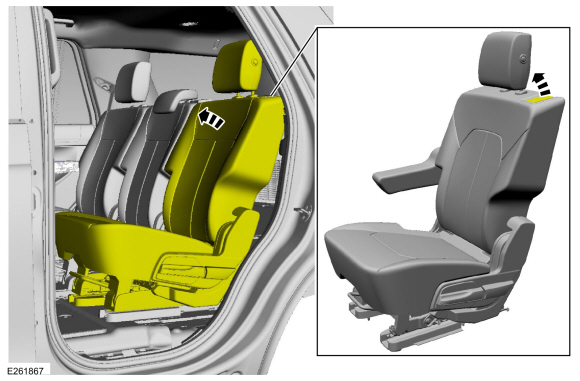
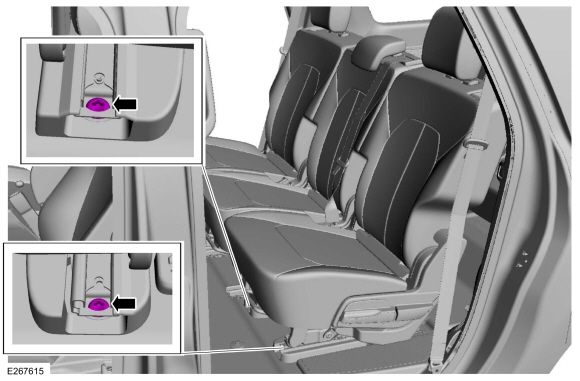
NOTE: LH second row seat shown, RH similar.
-
Position the rear door weatherstrip aside.
 |
-
Position the second row seat forward.
 |
-
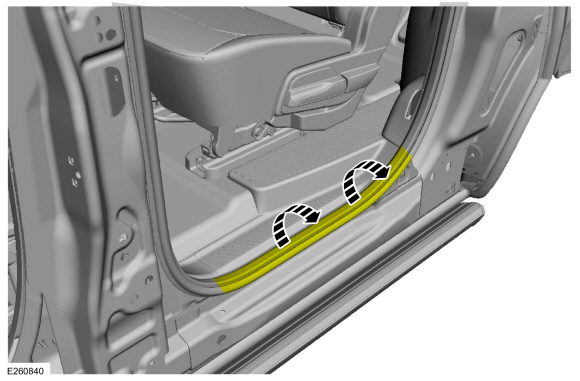
NOTE: Long wheelbase shown, short wheelbase similar.
Release the clips and remove the rear door scuff plate trim panel.
 |
-
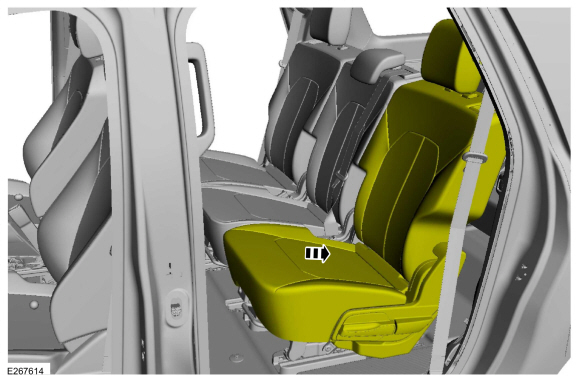
Move the seat to the full rearward position.
 |
-
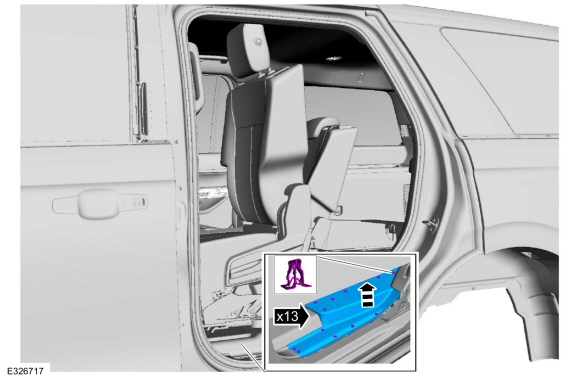
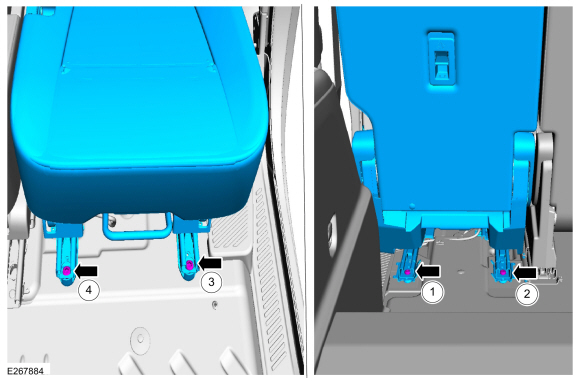
NOTE: Follow the unique instructions or graphics for this step in the installation.
Remove the second row seat front bolts.
 |
-
Move the seat to the full forward position.
 |
-
NOTE: Follow the unique instructions or graphics for this step in the installation.
Remove the second row seat rear bolts.
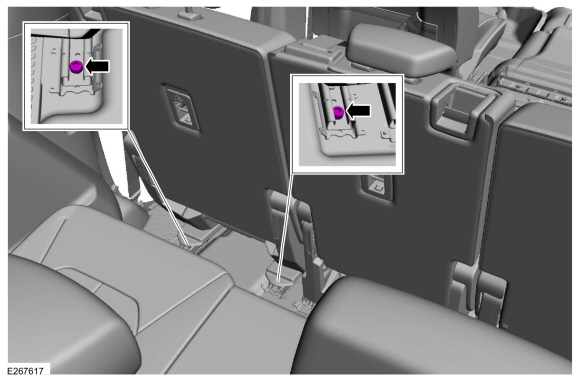 |
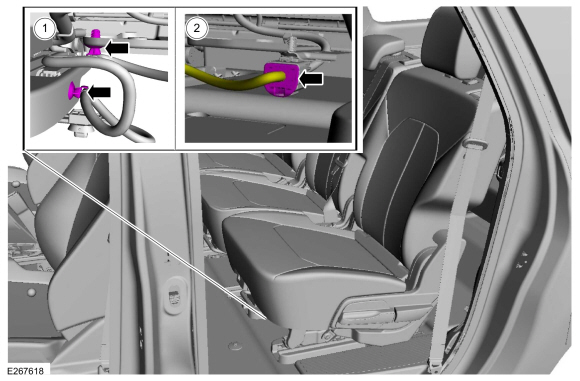
-
Disconnect the second row seat electrical connector.
-
Remove the floor wiring harness pin-type retainers.
-
Disconnect the electrical connector.
-
Remove the floor wiring harness pin-type retainers.
 |
-
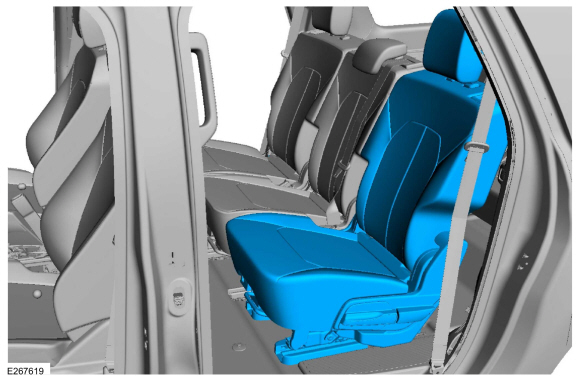
Remove the second row seat.
 |
Installation
-
To install, reverse the removal procedure.
-
Install the second row seat bolts in the following sequence.
-
Install the LH rear outboard bolt.
Torque: 35 lb.ft (47.5 Nm)
-
Install the RH rear inboard bolt.
Torque: 35 lb.ft (47.5 Nm)
-
Install the LH front outboard bolt.
Torque: 35 lb.ft (47.5 Nm)
-
Install the RH front inboard bolt.
Torque: 35 lb.ft (47.5 Nm)
-
Install the LH rear outboard bolt.
 |
 Second Row Center Seat Cushion Cover. Removal and Installation
Removal
NOTE:
Removal steps in this procedure may contain installation details.
Remove the second row center seat.
Refer to: Second Row Center Seat (501-10B Second Row Seats, Removal and Installation)...
 Second Row Seat Backrest Blower Motor. Removal and Installation
Special Tool(s) /
General Equipment
Interior Trim Remover
Removal
NOTE:
Right hand (RH) shown, left hand (LH) similar.
Remove the second row single seat backrest cover...
Other information:
Lincoln Navigator 2018-2026 Workshop Manual: Side Airbag. Removal and Installation
Special Tool(s) / General Equipment Interior Trim Remover Removal WARNING: The following procedure prescribes critical repair steps required for correct restraint system operation during a crash. Follow all notes and steps carefully...
Lincoln Navigator 2018-2026 Workshop Manual: Body Closures - Component Location. Description and Operation
Item Description 1 Liftgate anti-pinch switches 2 Power liftgate motors 3 RGTM 4 Hands-free liftgate actuation upper sensor (if equipped) 5 Hands-free liftgate actuation lower sensor (if equipped) 6 Hands-free liftgate actuation module (if equipped) 7 Power liftgate latch ..
Categories
- Manuals Home
- 4th Gen Lincoln Navigator Service Manual (2018 - 2026)
- Liftgate Trim Panel. Removal and Installation
- Rear View Mirrors - System Operation and Component Description. Description and Operation
- All Terrain Control Module (ATCM). Removal and Installation
- Head Up Display (HUD) Module Calibration. General Procedures
- Neutral Flat Tow Activation and Deactivation. General Procedures
Front Stabilizer Bar Link. Removal and Installation
Removal
NOTICE: Suspension fasteners are critical parts that affect the performance of vital components and systems. Failure of these fasteners may result in major service expense. Use the same or equivalent parts if replacement is necessary. Do not use a replacement part of lesser quality or substitute design. Tighten fasteners as specified.
NOTE: Removal steps in this procedure may contain installation details.
With the vehicle in NEUTRAL, position it on a hoist.Refer to: Jacking and Lifting (100-02 Jacking and Lifting, Description and Operation).
NOTICE: Do not use power tools to remove or install the stabilizer bar