Lincoln Navigator: Wheels and Tires / Wheel and Tire. Removal and Installation
Materials
| Name | Specification |
|---|---|
| Motorcraft® High Temperature Nickel Anti-Seize Lubricant XL-2 |
- |
Removal
-
With the vehicle in NEUTRAL, position it on a hoist.
Refer to: Jacking and Lifting (100-02 Jacking and Lifting, Description and Operation).
-
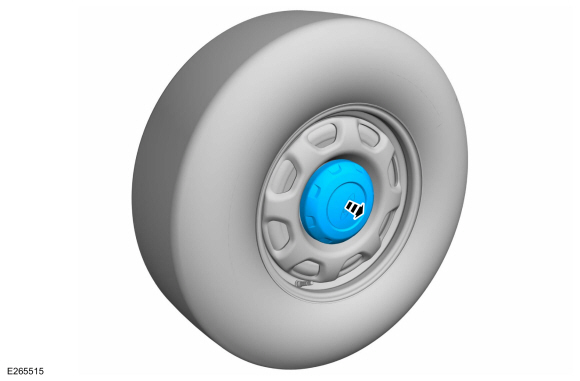
If equipped.
Remove the wheel cap.
 |
-
NOTICE: Do not use heat to loosen a seized wheel nut or damage to the wheel and wheel bearing can occur.
NOTICE: If equipped with full wheel cover with exposed wheel nuts, the wheel nuts must be removed prior to removing the wheel cover or damage to the wheel cover will occur.
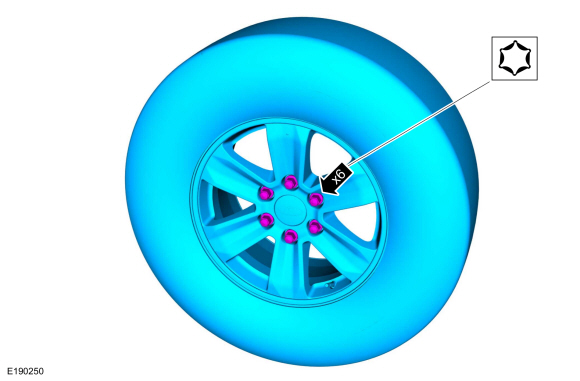
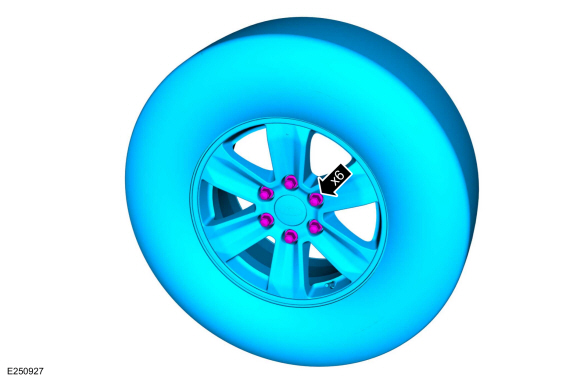
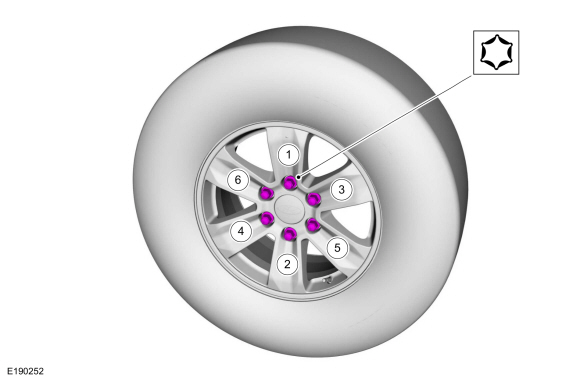
NOTE: Use metric hexagonal socket.
 |
Installation
-
 WARNING:
When a wheel is installed, always remove any
corrosion, dirt or foreign material present on the mounting surface of
the wheel and the mounting surface of the wheel hub, brake drum or brake
disc. Make sure that any fasteners that attach the rotor to the hub are
secured so they do not interfere with the mounting surfaces of the
wheel. Failure to follow these instructions when installing wheels may
result in the wheel nuts loosening and the wheel coming off while the
vehicle is in motion, which could result in loss of control, leading to
serious injury or death to vehicle occupant(s).
WARNING:
When a wheel is installed, always remove any
corrosion, dirt or foreign material present on the mounting surface of
the wheel and the mounting surface of the wheel hub, brake drum or brake
disc. Make sure that any fasteners that attach the rotor to the hub are
secured so they do not interfere with the mounting surfaces of the
wheel. Failure to follow these instructions when installing wheels may
result in the wheel nuts loosening and the wheel coming off while the
vehicle is in motion, which could result in loss of control, leading to
serious injury or death to vehicle occupant(s).
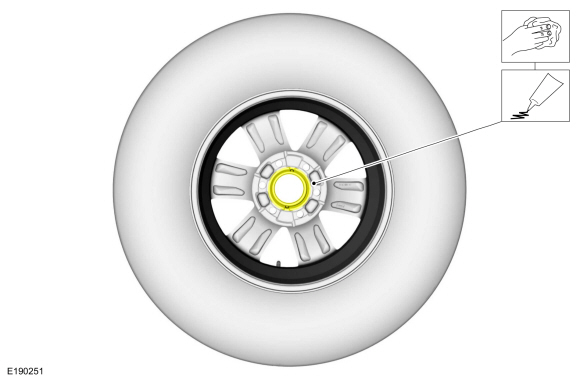
NOTICE: Make sure to apply a thin coat of anti-seize lubrication only to the interface between the wheel pilot bore and the hub pilot. Do not allow the anti-seize to make contact with the wheel-to-brake disc/drum mounting surface, wheel studs, wheel nuts, brake pads or brake disc friction surfaces or damage to components may occur.
Clean the mounting surfaces. Apply anti-seize lubrication.
Material: Motorcraft® High Temperature Nickel Anti-Seize Lubricant / XL-2
 |
-
NOTE: Only tighten the nuts finger tight at this stage.
Install the wheel and tire and install the wheel nuts.
 |
-
WARNING:
Retighten wheel nuts within 160 km (100 mi) after a
wheel is reinstalled. Wheels can loosen after initial tightening.
Failure to follow this instruction may result in serious injury to
vehicle occupant(s).
NOTICE: Failure to tighten the wheel nuts in a star/cross pattern can result in high brake disc runout, which accelerates the development of brake roughness, shudder and vibration.
NOTE: The wheel nut torque specification is for clean, dry wheel stud and wheel nut threads.
NOTE: Use metric hexagonal socket.
NOTE: Final tightening to be performed with vehicle resting on tires.
Tighten the wheel nuts
Torque: 150 lb.ft (204 Nm)
 |
-
If equipped.
Install the wheel cap.
 |
 Wheel to Tire Runout Minimization. General Procedures
Check
NOTICE:
Non-Hunter brand balancers will not include the Ford-approved procedure for match-mounting in their software.
NOTICE:
Other balancing procedures that exist on non-Hunter brand equipment are not Ford approved and should not be used...
 Wheel and Tire. Disassembly and Assembly
Special Tool(s) /
General Equipment
Wooden Block
DISASSEMBLY
NOTICE:
Failure to follow the instructions below may result in damage to the TPMS ...
Other information:
Lincoln Navigator 2018-2026 Workshop Manual: Shift Solenoids (SS). Removal and Installation
Materials Name Specification Motorcraft® MERCON® ULV Automatic Transmission FluidXT-12-QULV WSS-M2C949-A, MERCON® ULV Removal NOTE: If a new SS is installed, carry out the adaptive learning drive cycle procedure at the end of the repair...
Lincoln Navigator 2018-2026 Workshop Manual: Bluetooth Rear Interior Antenna. Removal and Installation
Special Tool(s) / General Equipment Interior Trim Remover Removal NOTE: LH (left hand) shown, RH (right hand) similar. Remove the loadspace trim panel. Refer to: Loadspace Trim Panel (501-05 Interior Trim and Ornamentation, Removal and Installation)...
Categories
- Manuals Home
- 4th Gen Lincoln Navigator Service Manual (2018 - 2026)
- Transmission Fluid Drain and Refill. General Procedures
- Telematics Control Unit (TCU) Module. Removal and Installation
- Power Running Board (PRB). Diagnosis and Testing
- Body and Paint
- Liftgate Trim Panel. Removal and Installation
Rear Drive Halfshafts. Diagnosis and Testing
Preliminary Inspection
Visually inspect the CV joints, housing, boots, and clamps for obvious signs of mechanical damage.If an obvious cause for an observed or reported concern is found, correct the cause (if possible) before proceeding to the next step
If the cause is not visually evident, verify the symptom and REFER to Symptom Chart: NVH.