Lincoln Navigator: Parking Aid - Vehicles With: Parking Aid Camera / Side Parking Aid Camera. Removal and Installation
Special Tool(s) / General Equipment
| Interior Trim Remover |
Removal
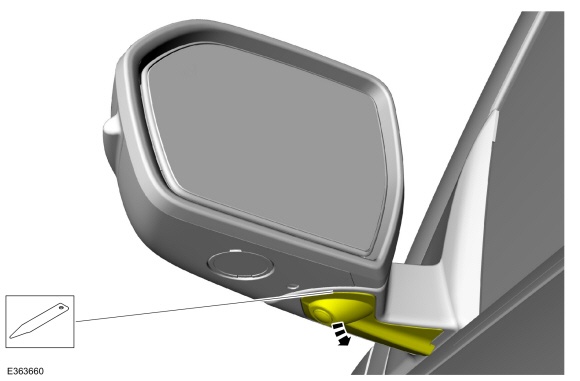
Flush mounted camera
-
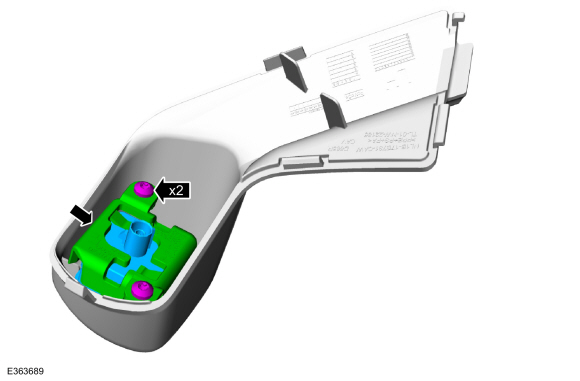
Release the tab and lower the side parking aid camera housing.
Use the General Equipment: Interior Trim Remover
 |
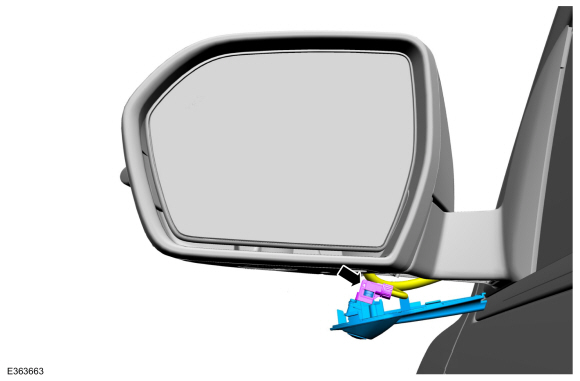
-
Disconnect the electrical connector and remove the camera and mounting plate as an assembly.
 |
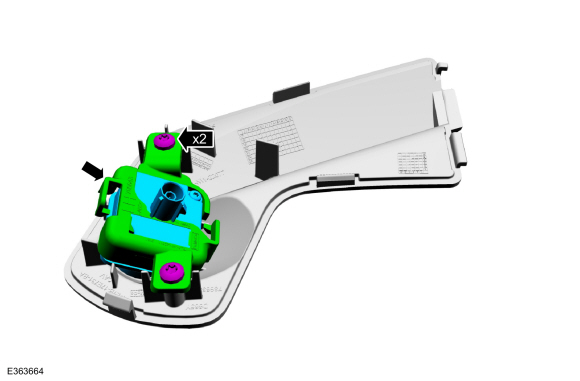
-
Remove the screws, the side park aid camera bracket and the side park aid camera.
 |
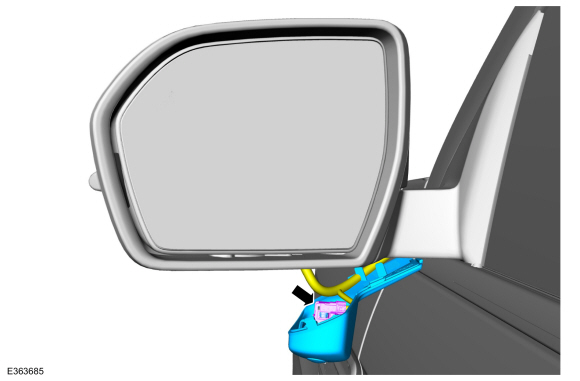
Extended mount camera
-
Release the tab and lower the side parking aid camera housing.
Use the General Equipment: Interior Trim Remover
 |
-
Disconnect the electrical connector and remove the camera and mounting plate as an assembly.
 |
-
Remove the screws, the side park aid camera bracket and the side park aid camera.
 |
Installation
-
To install, reverse the removal procedure.
-
Align the camera.
Refer to: 360 Degree View Camera Alignment (413-13B Parking Aid - Vehicles With: Parking Aid Camera, General Procedures).
 Rear Parking Aid Camera. Removal and Installation
Removal
NOTE:
Removal steps in this procedure may contain installation details.
Remove the reversing lamp.
Refer to: Reversing Lamp (417-01 Exterior Lighting, Removal and Installation)...

Other information:
Lincoln Navigator 2018-2026 Workshop Manual: Cylinder Head. Disassembly and Assembly of Subassemblies
Special Tool(s) / General Equipment 303-1249Valve Spring CompressorTKIT-2006UF-FLMTKIT-2006UF-ROW 303-1418Compressor, Valve SpringTKIT-2008ET-FLMTKIT-2008ET-ROW 303-1567Sizer, Teflon SealTKIT-2010C-FLM 303-300 (T87C-6565-A) Set, Valve Spring CompressorTKIT-1988-FESTIVAT88C-1000-STTKIT-1988-TRACERTKIT-2009TC-F 303-350 (T89P-6565-A) Com..
Lincoln Navigator 2018-2026 Workshop Manual: Body - Overview. Description and Operation
Insulation Insulation is used as a sound-deadener to reduce exterior road and powertrain noises from the interior of the vehicle. Mastic insulators are also used as insulation. Insulation is installed: under the roof. above and below the instrument panel. at the cowl side panels. over the front and rear floorpans. inside the B-, C- and D-pillar se..
Categories
- Manuals Home
- 4th Gen Lincoln Navigator Service Manual (2018 - 2026)
- Rear Bumper. Removal and Installation
- Transmission Fluid Level Check. General Procedures
- Front Bumper Cover. Removal and Installation
- Vehicle Dynamics Control Module (VDM). Removal and Installation
- All Terrain Control Module (ATCM). Removal and Installation
Rear Camber Adjustment. General Procedures
Special Tool(s) / General Equipment
Wheel Alignment SystemActivation
NOTICE: Suspension fasteners are critical parts that affect the performance of vital components and systems. Failure of these fasteners may result in major service expense. Use the same or equivalent parts if replacement is necessary. Do not use a replacement part of lesser quality or substitute design. Tighten fasteners as specified.
Using alignment equipment and the manufacturer's instructions, measure the rear camber.Use the General Equipment: Wheel Alignment System