Lincoln Navigator: Roof Sheet Metal Repairs / Roof Rear Frame. Removal and Installation
Special Tool(s) / General Equipment
| 6.5 mm Drill Bit | |
| Self-Piercing Rivet (SPR) Remover/Installer | |
| Belt Sander | |
| Blind Rivet Gun | |
| Locking Pliers |
Materials
| Name | Specification |
|---|---|
| Metal Bonding Adhesive TA-1, TA-1-B, 3M™ 08115, LORD Fusor® 108B, Henkel Teroson EP 5055 |
- |
| Seam Sealer TA-2-B, 3M™ 08308, LORD Fusor® 803DTM |
- |
Removal
NOTE: Aluminum body panels are highly receptive to heat transfer. With the extensive use of structural adhesives and non-structural sealers used in vehicle construction, the potential of heat transfer could impact adhesives and sealers in non-associated panels during the repair process. Many repairs areas that utilize structural adhesive may be separated after fastener removal by using a panel chisel along the joint/flange. Using heat not exceeding 425° F to loosen a bonded panel should only be done when all panels in the joint will be replaced and new adhesive applied.
-
Remove the roof outer panel.
Refer to: Roof Panel (501-28 Roof Sheet Metal Repairs, Removal and Installation).
Refer to: Roof Panel - Vehicles With: Roof Opening Panel (501-28 Roof Sheet Metal Repairs, Removal and Installation).
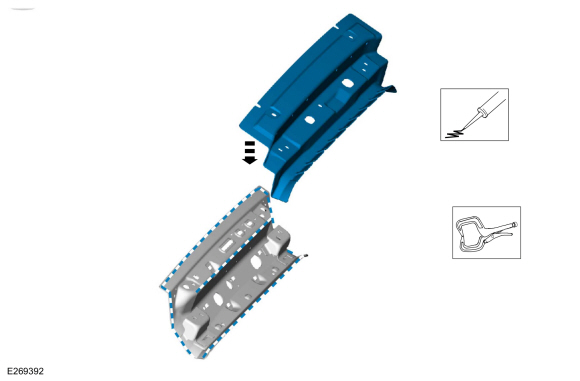
NOTE: Roof rear frame reinforcement is provided as 2 service parts (upper and lower), the following steps assume all components are to be replaced. Adjust to meet repair needs.
Assembly of the upper and lower rear frame is required when replacing entire component.-
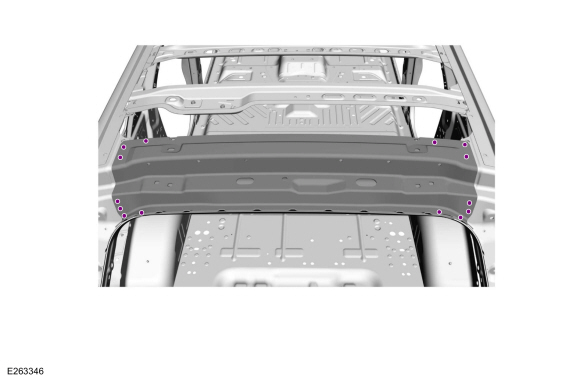
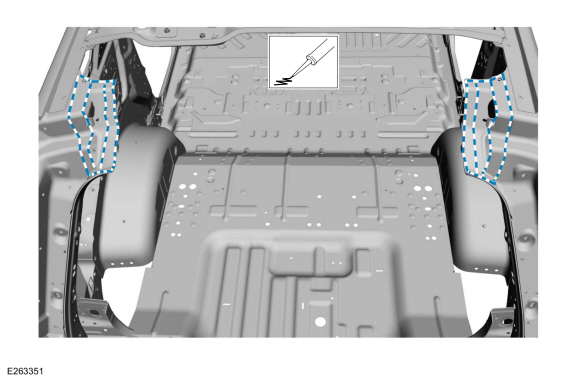
Remove the SPR fasteners.
Use the General Equipment: Self-Piercing Rivet (SPR) Remover/Installer
Use the General Equipment: Belt Sander
 |
-
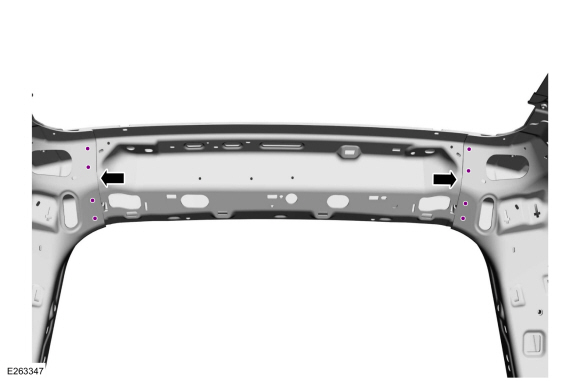
Remove the SPR fasteners.
Use the General Equipment: Self-Piercing Rivet (SPR) Remover/Installer
Use the General Equipment: Belt Sander
 |
-
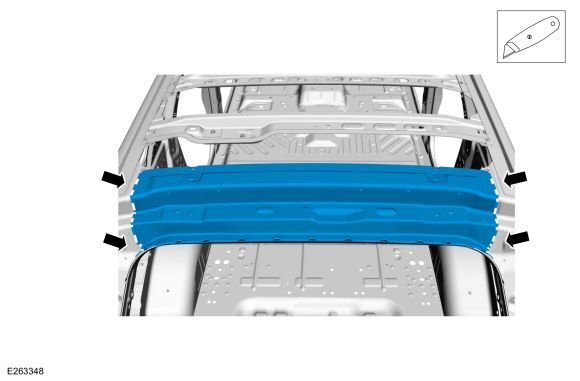
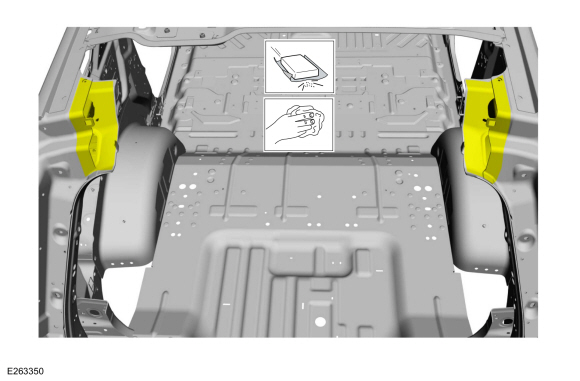
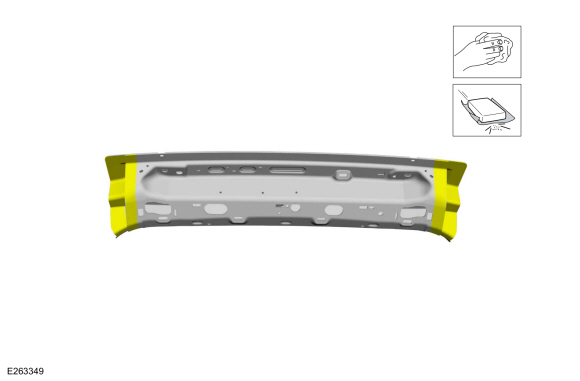
Break the adhesive bond and remove the roof rear frame.
 |
Installation
-
Apply adhesive to the mating surface, assemble and clamp the assembly.
Refer to: Joining Techniques (501-25 Body Repairs - General Information, General Procedures).
Use the General Equipment: Locking Pliers
Material: Metal Bonding Adhesive / TA-1, TA-1-B, 3M™ 08115, LORD Fusor® 108B, Henkel Teroson EP 5055
 |
-
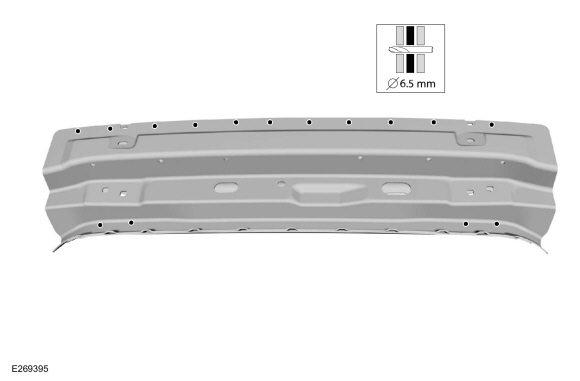
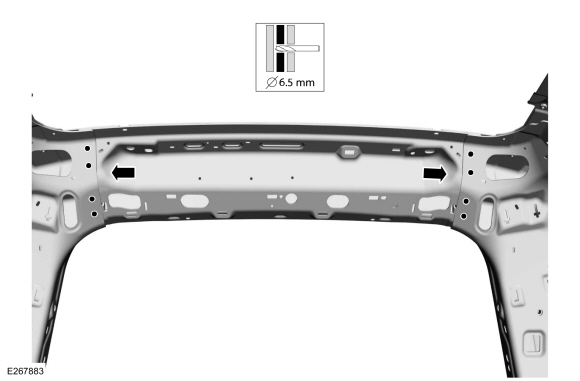
Drill for blind rivet fasteners.
Use the General Equipment: 6.5 mm Drill Bit
 |
-
NOTE: SPR fasteners may not be placed directly over original SPR location. They must be placed adjacent to original location matching original quantity.
NOTE: Blind or solid rivets may be used in place of SPR in the original SPR location after enlarging hole to 6.5 mm.
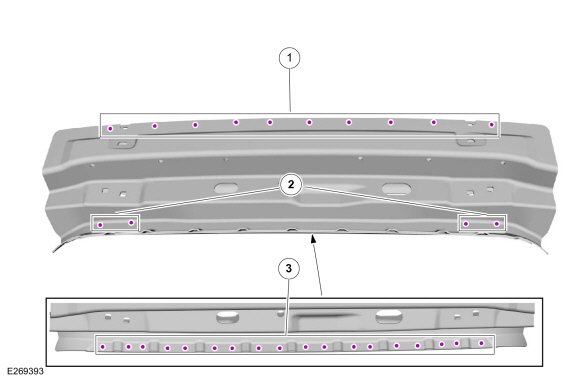
Install fasteners.
Use the General Equipment: Self-Piercing Rivet (SPR) Remover/InstallerItem SPR Number SPR Code Henrob® Mandrel Pro-Spot® Mandrel Blind Rivet Solid Rivet Rivnut® 1 - - - - W708777-S900C - - 2 W717182-S900 QE DG11-200/H SA-0400/SA-0402 - - - 3 W717186-S900 EN DG11-220/H SA-0400/SA-0402 - - -
 |
-
Install fasteners.
Use the General Equipment: Self-Piercing Rivet (SPR) Remover/InstallerItem SPR Number SPR Code Henrob® Mandrel Pro-Spot® Mandrel Blind Rivet Solid Rivet Rivnut® 1 W717186-S900 EN DG11-220/H SA-0400/SA-0402 - W790377-S900 -
 |
-
Sand using 80-120 grit sandpaper to remove all adhesive and clean.
 |
-
Sand the roof rear frame mating surfaces using 80 grit sandpaper to remove e-coat and clean.
 |
-
Apply adhesive.
Material: Metal Bonding Adhesive / TA-1, TA-1-B, 3M™ 08115, LORD Fusor® 108B, Henkel Teroson EP 5055
 |
-
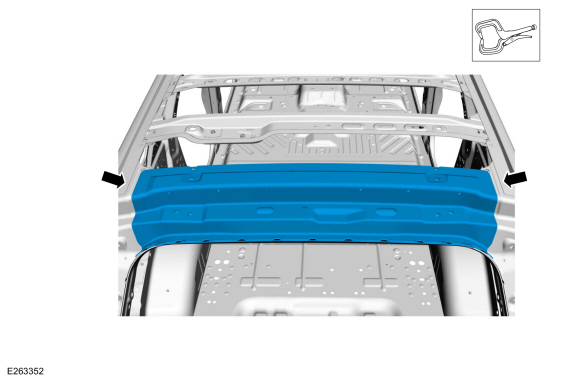
Install the rear roof frame and clamp in position.
Use the General Equipment: Locking Pliers
 |
-
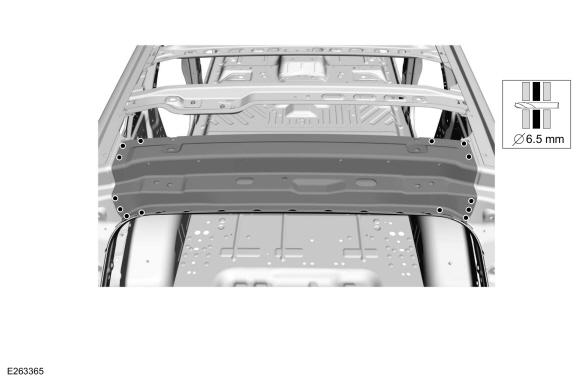
Drill holes for fasteners as indicated
Use the General Equipment: 6.5 mm Drill Bit
 |
-
Drill holes for fasteners as indicated
Use the General Equipment: 6.5 mm Drill Bit
 |
-
NOTE: SPR fasteners may not be placed directly over original SPR location. They must be placed adjacent to original location matching original quantity.
NOTE: Blind or solid rivets may be used in place of SPR in the original SPR location after enlarging hole to 6.5 mm.
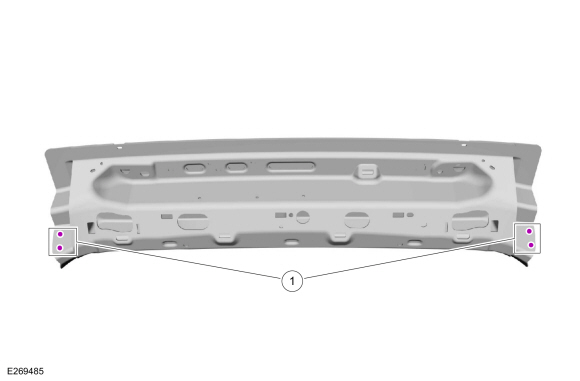
Install fasteners
Use the General Equipment: Blind Rivet GunItem SPR Number SPR Code Henrob® Mandrel Pro-Spot® Mandrel Blind Rivet Solid Rivet Rivnut® 1 - - - - W708777-S900C - - 2 - - - - W708778-S900C - - 3 - - - - W708777-S900C - - 4 W717183-S900 QE DG11-200H - - - -
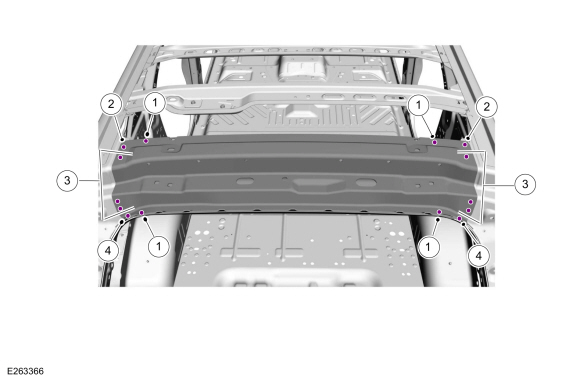 |
-
NOTE: SPR fasteners may not be placed directly over original SPR location. They must be placed adjacent to original location matching original quantity.
NOTE: Blind or solid rivets may be used in place of SPR in the original SPR location after enlarging hole to 6.5 mm.
Install fasteners
Use the General Equipment: Blind Rivet GunItem SPR Number SPR Code Henrob® Mandrel Pro-Spot® Mandrel Blind Rivet Solid Rivet Rivnut® 1 - - - - W708777-S900C W790377-S900 -
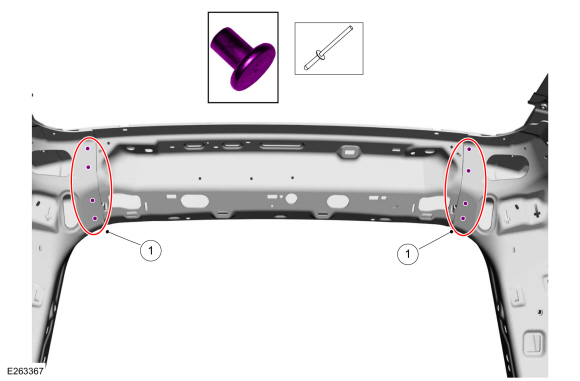 |
-
Sealing work: All areas must be sealed to production level.
Material: Seam Sealer / TA-2-B, 3M™ 08308, LORD Fusor® 803DTM
-
Sand and prime the entire repair area with a Ford approved paint system.
-
Refinish using a Ford approved paint system.
-
Restore corrosion protection.
Refer to: Corrosion Prevention (501-25 Body Repairs - General Information, General Procedures).
-
Install the roof outer panel.
Refer to: Roof Panel (501-28 Roof Sheet Metal Repairs, Removal and Installation).
Refer to: Roof Panel - Vehicles With: Roof Opening Panel (501-28 Roof Sheet Metal Repairs, Removal and Installation).

 Roof Reinforcement. Removal and Installation
Special Tool(s) /
General Equipment
6.5 mm Drill Bit
Self-Piercing Rivet (SPR) Remover/Installer
Belt Sander
Blind Rivet Gun
Locking Pliers
Materials
Name
Specification
Metal Bonding AdhesiveTA-1, TA-1-B, 3M™ 08115, LORD Fusor® 108B, Henkel Teroson EP 5055
-
Removal
NOTE:
The following procedure details re..
Other information:
Lincoln Navigator 2018-2026 Workshop Manual: Differential Bearings. Removal and Installation
Special Tool(s) / General Equipment 100-002 (TOOL-4201-C) Holding Fixture with Dial Indicator Gauge 205-001 (TOOL-4000-E) Spreader, Differential Carrier 205-005 (T53T-4621-C) Installer, Drive Pinion Bearing Cone 205-010 (T57L-4221-A2) Installer, Differential Side Bearing 205-024 (T67P-4616-A) Installer, Drive Pinion Bearin..
Lincoln Navigator 2018-2026 Workshop Manual: Bezel Diagnostics. General Procedures
Check NOTE: If there is a concern with one of the following components and Bezel Diagnostics cannot be accessed, obtain the module part number by referencing the label attached to the module. Inoperative ACM Inoperative (blank or does not power on) display unit (non-touchscreen display or touchscreen display) Inoperative radio control panel Inoperative ..
Categories
- Manuals Home
- 4th Gen Lincoln Navigator Service Manual (2018 - 2026)
- Head Up Display (HUD) Module Calibration. General Procedures
- Windshield Washer Pump. Removal and Installation
- Brake Service Mode Activation and Deactivation. General Procedures
- Transmission Fluid Level Check. General Procedures
- Body Control Module (BCM). Removal and Installation
Differential Case Runout Check. General Procedures
Special Tool(s) / General Equipment
 205-1016
Installer, Differential Bearing
TKIT-2014D-ROW2
TKIT-2014D-FL_ROW
 205-153
(T80T-4000-W)
205-153
(T80T-4000-W)
Handle
 205-D061
(D83T-4205-C2)
205-D061
(D83T-4205-C2)
Step Plate Dial Indicator Three Leg Puller Punch