Lincoln Navigator: Fuel Tank and Lines - 3.5L EcoBoost (272kW/370PS) / Fuel Tank Filler Pipe. Removal and Installation
Removal
NOTE: Removal steps in this procedure may contain installation steps.
-
With the vehicle in NEUTRAL, position it on a hoist.
Refer to: Jacking and Lifting (100-02 Jacking and Lifting, Description and Operation).
-
Disconnect the battery ground cable.
Refer to: Battery Disconnect and Connect (414-01 Battery, Mounting and Cables, General Procedures).
-
Drain the fuel tank.
Refer to: Fuel Tank Draining (310-00 Fuel System - General Information - 3.5L EcoBoost (272kW/370PS), General Procedures).
-
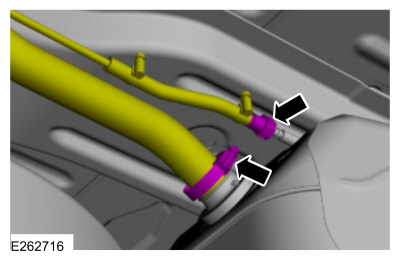
Release the clamp and position the fuel tank filler hose aside.
Torque: 44 lb.in (5 Nm)
-
Disconnect the fuel tank filler pipe vapor tube.
Refer to: Quick Release Coupling (310-00 Fuel System - General Information - 3.5L EcoBoost (272kW/370PS), General Procedures).
 |
-
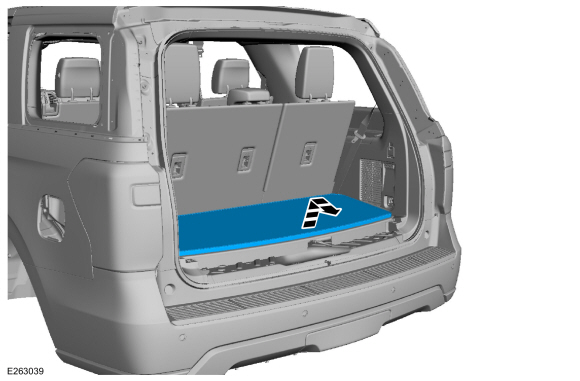
Remove the load floor cover.
 |
-
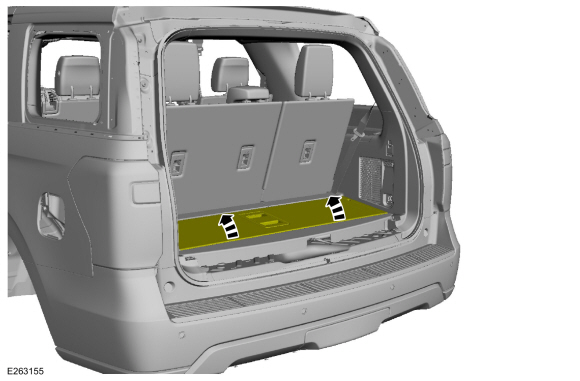
Position the load floor storage compartment cover up.
 |
-
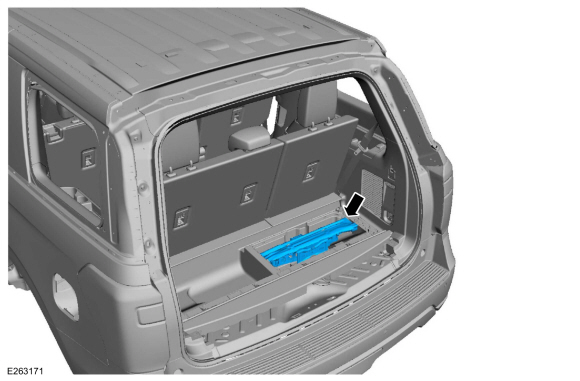
Remove the vehicle jack assembly.
 |
-
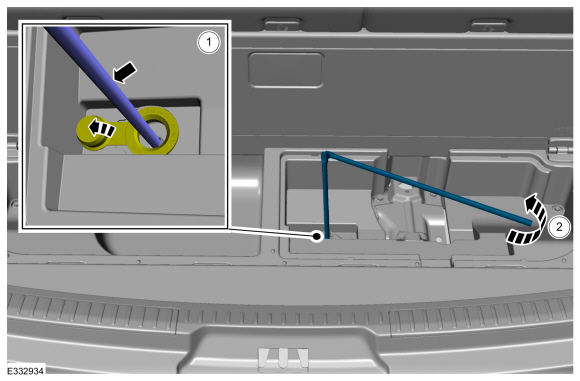
Remove the swivel wrench from the tool kit bag, open the
spare tire winch access plug at the bottom of the compartment for the
jack and tools tray.
-
-
Insert the swivel wrench through the access hole in the floor to engage the winch.
-
Turn the handle counterclockwise until the tire lowers to the ground and the cable is slightly slack.
-
Insert the swivel wrench through the access hole in the floor to engage the winch.
 |
-
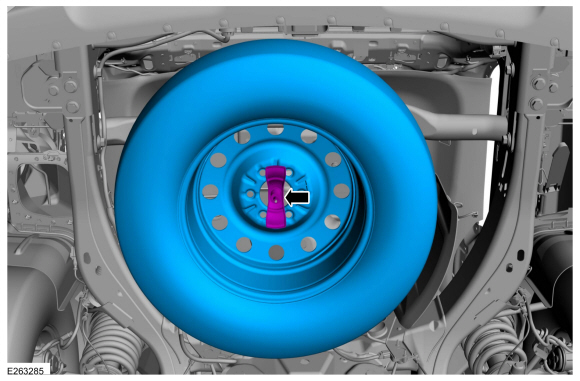
NOTE: Slide the retainer through the center of the spare tire wheel and remove the spare tire wheel.
Remove the spare wheel.
Torque: 59 lb.ft (80 Nm)
 |
-
Remove the bolts.
Torque: 133 lb.in (15 Nm)
 |
-
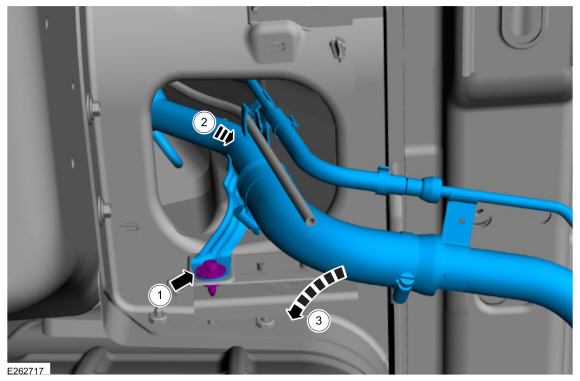
Remove the bolt and the fuel tank filler pipe.
Torque: 133 lb.in (15 Nm)
 |
Installation
-
To install, reverse the removal procedure.
 Fuel Tank. Removal and Installation
Special Tool(s) /
General Equipment
292-00004Fuel Tanker 100 GPM
Powertrain Jack
Wooden Block
Removal
NOTE:
If the fuel pump is operational, connect the fuel tanker
hose to the engine supply hose...

Other information:
Lincoln Navigator 2018-2026 Workshop Manual: Passive Anti-Theft System (PATS) Center Antenna. Removal and Installation
Special Tool(s) / General Equipment Interior Trim Remover Removal Release the clips and remove the floor console front trim panel. Use the General Equipment: Interior Trim Remover Remove the floor console finish panel bolts. Position the floor console armrest. ..
Lincoln Navigator 2018-2026 Workshop Manual: Engine - Overview. Description and Operation
Overview The 3.5L Ecoboost is a turbocharged engine which may also be described with these terms: GTDI - Gasoline Turbocharged Direct Injection DI - Direct Injection GT - Gasoline Turbocharged Ti-VCT TC - Twin independent Variable Camshaft Timing Turbocharged V6 - 6 cylinder engine 24V - 4 valves per cylinder 4V - 4 valves per cylinde..
Categories
- Manuals Home
- 4th Gen Lincoln Navigator Service Manual (2018 - 2026)
- Head Up Display (HUD) Module Calibration. General Procedures
- Transmission Fluid Level Check. General Procedures
- Identification Codes. Description and Operation
- Telematics Control Unit (TCU) Module. Removal and Installation
- Liftgate Trim Panel. Removal and Installation
Axle Tube Bearing. Removal and Installation
Special Tool(s) / General Equipment
 205-123
(T78P-1177-A)
205-123
(T78P-1177-A)
Installer, Axle Shaft Oil Seal
 308-047
(T77F-1102-A)
308-047
(T77F-1102-A)
Remover, Bearing Cup Slide Hammer