Lincoln Navigator: Engine Cooling - 3.5L EcoBoost (272kW/370PS) / Cooling Module. Removal and Installation
Special Tool(s) / General Equipment
| Hose Clamp Remover/Installer |
Removal
NOTE: Removal steps in this procedure may contain installation details.
-
With the vehicle in NEUTRAL, position it on a hoist.
Refer to: Jacking and Lifting (100-02 Jacking and Lifting, Description and Operation).
-
Drain the cooling system.
Refer to: Engine Cooling System Draining, Vacuum Filling and Bleeding (303-03 Engine Cooling - 3.5L EcoBoost (272kW/370PS), General Procedures).
-
Evacuate the A/C system.
Refer to: Air Conditioning (A/C) System Recovery, Evacuation and Charging (412-00 Climate Control System - General Information, General Procedures).
-
Remove the air cleaner outlet pipe.
Refer to: Air Cleaner Outlet Pipe (303-12 Intake Air Distribution and Filtering - 3.5L EcoBoost (272kW/370PS), Removal and Installation).
-
Remove the air cleaner.
Refer to: Air Cleaner (303-12 Intake Air Distribution and Filtering - 3.5L EcoBoost (272kW/370PS), Removal and Installation).
-
Remove the pin-type retainers and the upper radiator air deflector.
 |
-
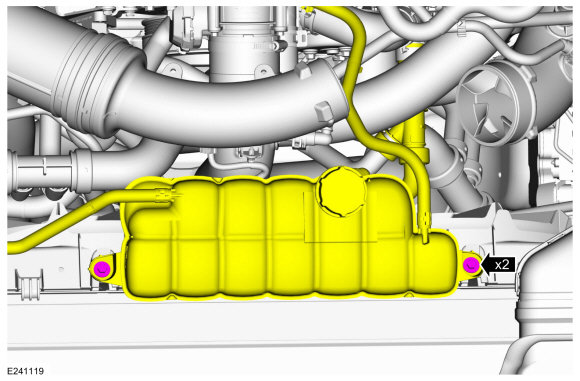
Remove the bolts and position the degas bottle aside.
Torque: 62 lb.in (7 Nm)
 |
-
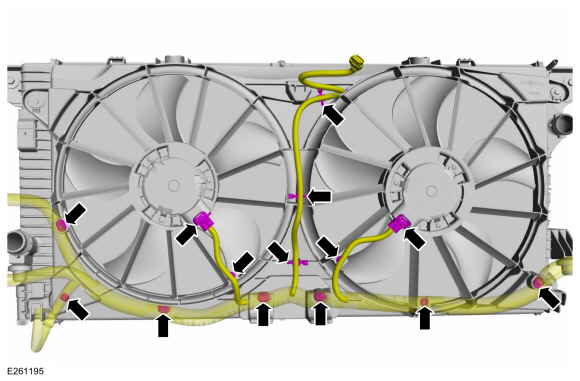
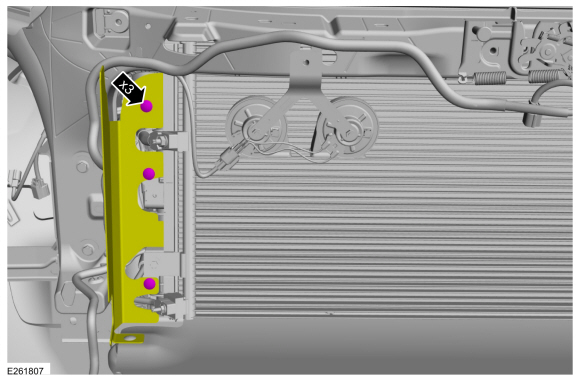
Disconnect the electrical connectors, detach the pin-type retainers and position the wiring harness aside.
 |
-
Remove the upper active grille shutter.
Refer to: Active Grille Shutter (501-02 Front End Body Panels, Removal and Installation).
-
-
Detach the cable from the mounting bracket.
-
Disconnect the hood latch release cable end.
-
Detach the cable from the mounting bracket.
 |
-
Remove the pin-type retainers and position the air deflector aside.
 |
-
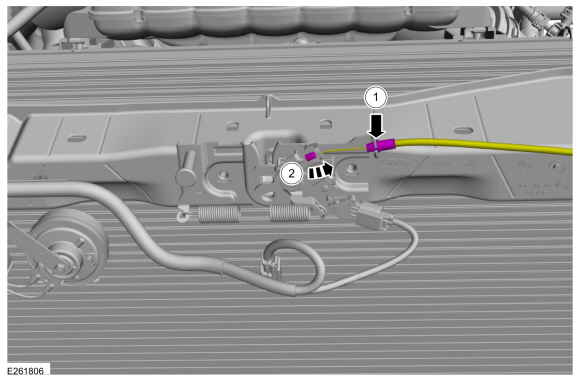
Detach the battery cable pin-type retainer.
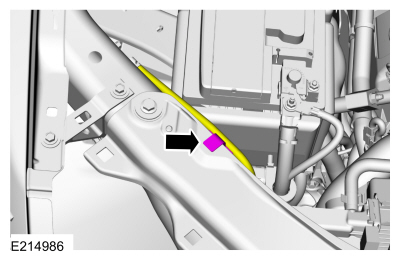 |
-
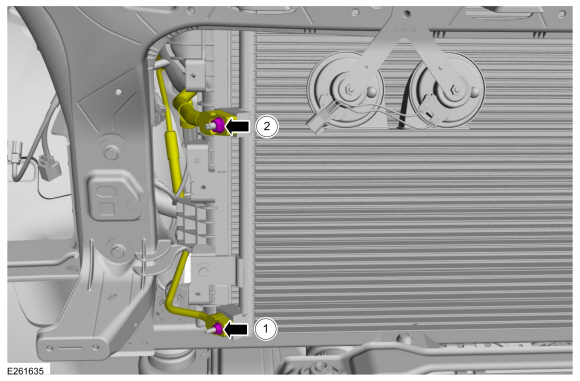
Disconnect the electrical connectors. Detach the wiring
harness retainers and position the wiring harness between the radiator
and the radiator grille support.
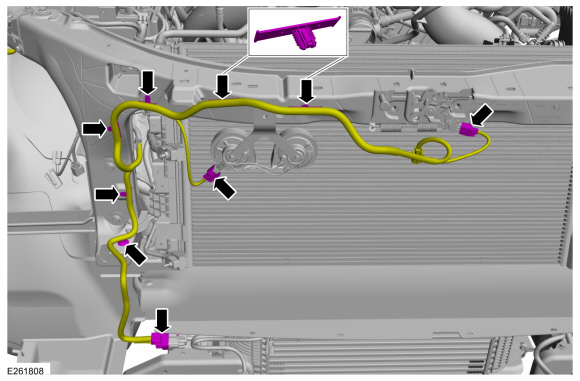 |
-
NOTICE: Make sure all openings are sealed.
Remove the condenser inlet and outlet nuts and disconnect the fittings.
Torque:
Stage 1: 71 lb.in (8 Nm)
Stage 2: 133 lb.in (15 Nm)
 |
-
Release the clamps and disconnect the upper radiator hose and the coolant hose.
Use the General Equipment: Hose Clamp Remover/Installer
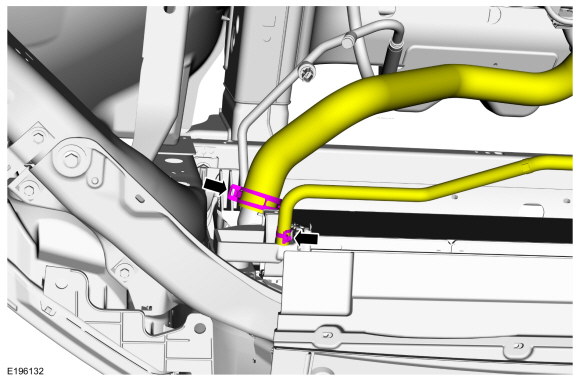 |
-
Pull the lower radiator hose spring clip until the end
of the clip is in the detent on the quick connect coupling and
disconnect the lower radiator hose.
 |
-
Remove the retainers and the cooling module.
Torque: 22 lb.ft (30 Nm)
 |
Installation
-
To install, reverse the removal procedure.
-
NOTICE: Use only the specified material to lubricate the seals.
Install new condenser fitting O-ring seals and lubricate them with clean refrigerant oil.
Refer to: Specifications (412-00 Climate Control System - General Information, Specifications).
-
Fill and bleed the cooling system.
Refer to: Engine Cooling System Draining, Vacuum Filling and Bleeding (303-03 Engine Cooling - 3.5L EcoBoost (272kW/370PS), General Procedures).
 Cooling Fan Motor and Shroud. Removal and Installation
Removal
With the vehicle in NEUTRAL, position it on a hoist.
Refer to: Jacking and Lifting (100-02 Jacking and Lifting, Description and Operation)...
 Degas Bottle. Removal and Installation
Special Tool(s) /
General Equipment
Fluid Suction Gun
Hose Clamp Remover/Installer
Locking Pliers
Materials
Name
Specification
Motorcraft® Yellow Concentrated Antifreeze/CoolantVC-13-G
WSS-M97B57-A1
Motorcraft® Orange Concentrated Antifreeze/CoolantVC-3-B
WSS-M97B44-D
Removal
WARNING:
Alway..
Other information:
Lincoln Navigator 2018-2026 Workshop Manual: Engine Front Undershield. Removal and Installation
NOTE: 4X2 vehicle shown, 4X4 vehicle similar. If equipped, Remove the bolts and the underbody skid plate. Torque: 30 lb.ft (40 Nm) If equipped, Remove the bolts and the underbody skid plate. Torque: 30 lb.ft (40 Nm) ..
Lincoln Navigator 2018-2026 Workshop Manual: Body and Frame. Description and Operation
Body The body consists of the following: Aluminum and aluminum alloys Steel hood hinges Body cab structure constructed of aluminum Bolted, removable front fenders, hinged doors and hood constructed of aluminum Bonded and riveted aluminum body panels Mastic pads used on floor pan for sound deadening Standard and extended wheelbase models ..
Categories
- Manuals Home
- 4th Gen Lincoln Navigator Service Manual (2018 - 2026)
- Front Seat. Removal and Installation
- Body and Paint
- SYNC Module [APIM]. Removal and Installation
- Remote Function Actuator (RFA) Module. Removal and Installation
- Neutral Flat Tow Activation and Deactivation. General Procedures
Front Driveshaft. Removal and Installation
Special Tool(s) / General Equipment
Crimping ToolMaterials
Name Specification Motorcraft® Premium Long-Life GreaseXG-1-E1 ESA-M1C75-B
Removal
With the vehicle in NEUTRAL, position the vehicle on a hoist.Refer to: Jacking and Lifting (100-02 Jacking and Lifting, Description and Operation).
Remove the bolts and the transmission shield.