
Lincoln Navigator: Engine Cooling - 3.5L EcoBoost (272kW/370PS) / Cooling Fan Motor and Shroud. Removal and Installation
Removal
-
With the vehicle in NEUTRAL, position it on a hoist.
Refer to: Jacking and Lifting (100-02 Jacking and Lifting, Description and Operation).
-
Remove the air cleaner outlet pipe.
Refer to: Air Cleaner Outlet Pipe (303-12) .
-
Remove the air cleaner.
Refer to: Air Cleaner (303-12) .
-
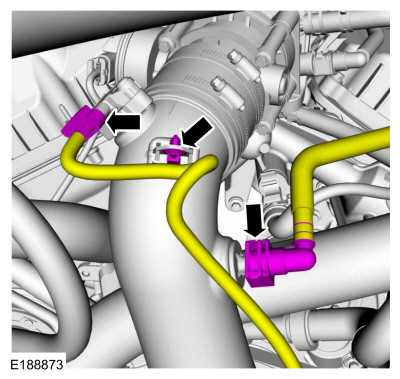
Disconnect the electrical connector and detach the
wiring harness retainer. Disconnect the quick connect coupling.
Refer to: Quick Release Coupling (310-00) .
 |
-
Loosen the clamps and remove the CAC to TB (throttle body) pipe.
 |
-
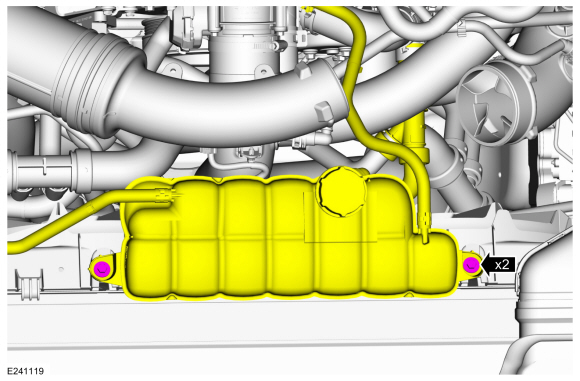
Remove the bolts and position the degas bottle aside.
Torque: 62 lb.in (7 Nm)
 |
-
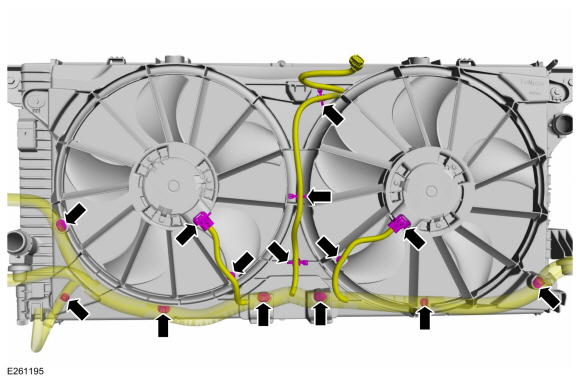
Disconnect the electrical connectors, detach the pin-type retainers and position the wiring harness aside.
 |
-
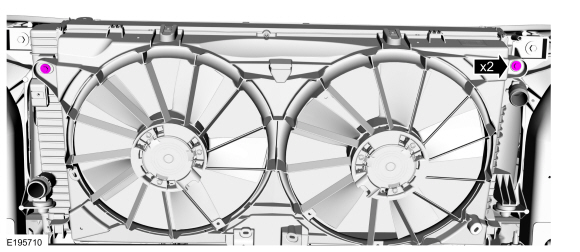
Remove the bolts that secure the cooling fan motor and shroud.
Torque: 62 lb.in (7 Nm)
 |
-
Lift the cooling fan motor and shroud upward and place
wooden block to support it. Detach the pin-type retainers that secure
the lower radiator shield to the cooling fan shroud.
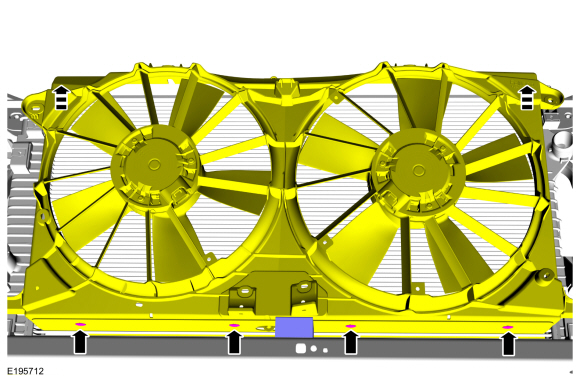 |
-
Remove the cooling fan motor and shroud.
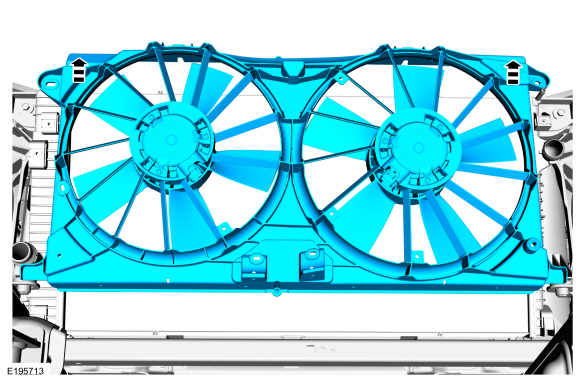 |
Installation
-
To install, reverse the removal procedure.
 Coolant Pump. Removal and Installation
Special Tool(s) /
General Equipment
Hose Clamp Remover/Installer
Materials
Name
Specification
Motorcraft® Yellow Concentrated Antifreeze/CoolantVC-13-G
WSS-M97B57-A1
Motorcraft® Orange Concentrated Antifreeze/CoolantVC-3-B
WSS-M97B44-D
Removal
Drain the cooling system...
 Cooling Module. Removal and Installation
Special Tool(s) /
General Equipment
Hose Clamp Remover/Installer
Removal
NOTE:
Removal steps in this procedure may contain installation details...
Other information:
Lincoln Navigator 2018-2026 Workshop Manual: Thermostat. Removal and Installation
Materials Name Specification Motorcraft® Yellow Concentrated Antifreeze/CoolantVC-13-G WSS-M97B57-A1 Motorcraft® Orange Concentrated Antifreeze/CoolantVC-3-B WSS-M97B44-D Removal NOTE: Removal steps in this procedure may contain installation details...
Lincoln Navigator 2018-2026 Workshop Manual: Oil Leak Inspection. General Procedures
NOTE: If an overnight drive is done, the fan air or road air blast can cause erroneous readings. NOTE: When diagnosing engine oil leaks, the source and location of the leak must be positively identified prior to repair. Prior to carrying out this procedure, clean the cylinder block, cylinder heads, valve covers, oil pan and flywheel/flexplate with a suitable solvent t..
Categories
- Manuals Home
- 4th Gen Lincoln Navigator Service Manual (2018 - 2026)
- Body Control Module (BCM). Removal and Installation
- Power Running Board (PRB). Diagnosis and Testing
- SYNC Module [APIM]. Removal and Installation
- Transmission Fluid Drain and Refill. General Procedures
- Body and Paint
Axle Tube Bearing. Removal and Installation
Special Tool(s) / General Equipment
 205-123
(T78P-1177-A)
Installer, Axle Shaft Oil Seal
 308-047
(T77F-1102-A)
Remover, Bearing Cup Slide Hammer
