Lincoln Navigator: Transfer Case / Transfer Case. Removal
-
With the vehicle in Neutral, position it on a hoist.
Refer to: Jacking and Lifting (100-02 Jacking and Lifting, Description and Operation).
-
If equipped.
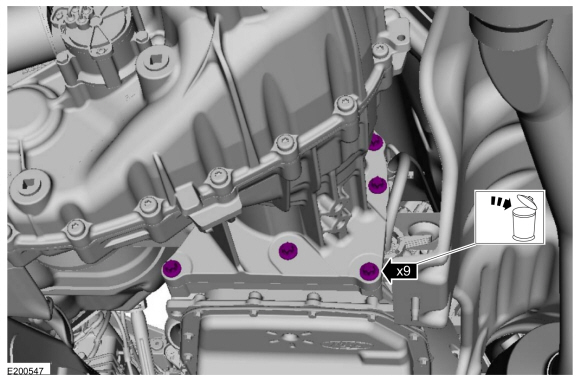
Remove the skid plate bolts and the skid plate.
 |
-
Drain the fluid if the transfer case is to be disassembled.
Refer to: Transfer Case Draining and Filling (307-07B Transfer Case, General Procedures).
-
Remove the front driveshaft.
Refer to: Front Driveshaft (205-01 Driveshaft, Removal and Installation).
-
Remove the rear driveshaft.
Refer to: Rear Driveshaft (205-01 Driveshaft, Removal and Installation).
Vehicles With: 1-Speed Torque On Demand Transfer Case
-
Disconnect the shift motor electrical connector and detach the harness retainer clip from the transfer case.
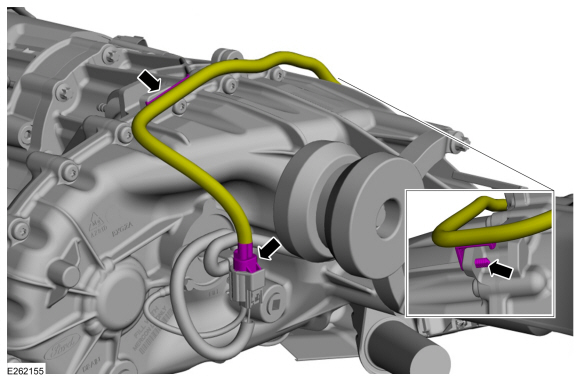 |
Vehicles With: 2-Speed Torque On Demand Transfer Case
-
Disconnect the shift motor electrical connector.
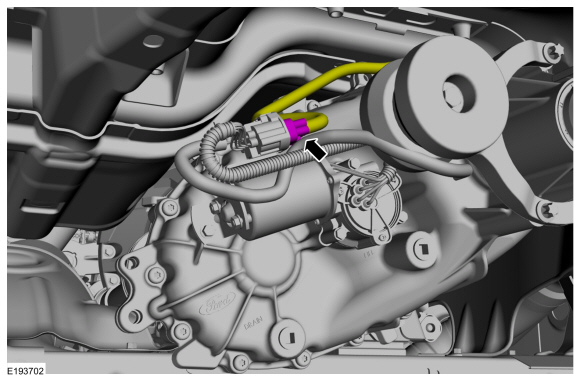 |
-
Detach the harness retainer clip from the transfer case.
 |
All vehicles
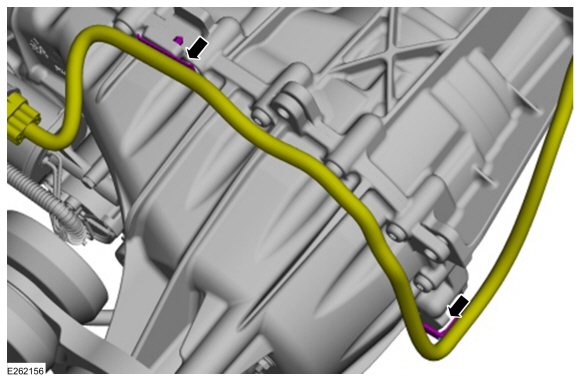
-
Disconnect the vent hose from the transfer case.
 |
-
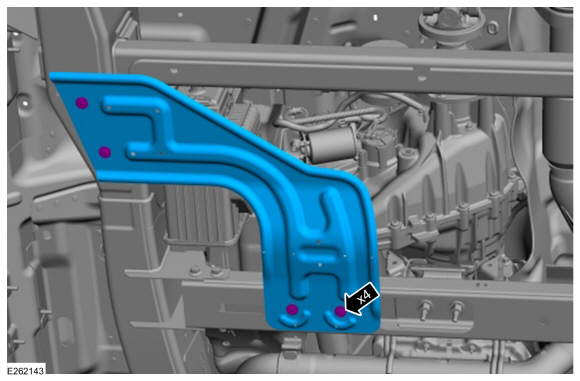
Remove the transmission support crossmember.
Refer to: Transmission Support Crossmember (502-02 Full Frame and Body Mounting, Removal and Installation).
-
Remove the bolt from the LH exhaust support bracket.
 |
-
Remove the transmission support crossmember.
Refer to: Transmission Support Insulator (307-01 Automatic Transmission - 10-Speed Automatic Transmission – 10R80, Removal and Installation).
-
Remove and discard the transfer case-to-transmission bolts.
 |
-
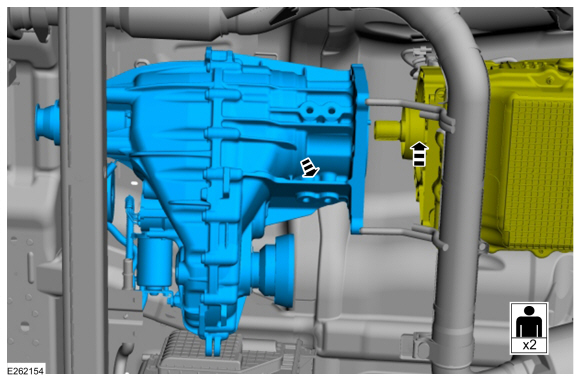
NOTE: The transfer case will need to be positioned on top of the crossmember and will require the help of an assistant.
Separate the transfer case from the transmission and move the transfer case rearward.
 |
-
NOTE: An assistant will be required to remove the transfer case.
Raise the transmission for clearance. Remove the transfer case and lower it from the vehicle.
 |
-
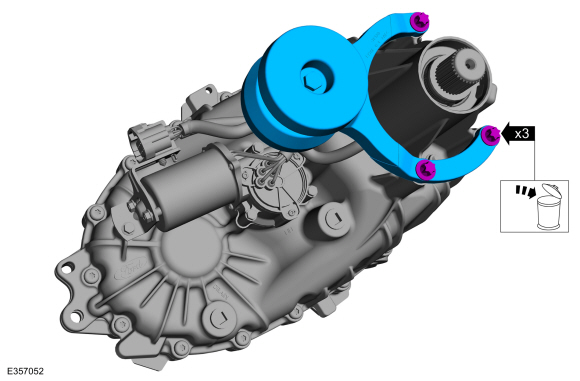
NOTE: If transfer case disassembly or installation of a new transfer case is necessary, remove the vibration damper.
Remove and discard the vibration damper bolts. Remove the vibration damper from the transfer case.
 |
 Transfer Case Rear Seal. Removal and Installation
Special Tool(s) /
General Equipment
308-249
(T96T-7127-A)
Installer, Input Shaft Oil SealTKIT-1996-F/FMTKIT-1996-FLM2
Removal
With the vehicle in NEUTRAL, position it on a hoist...
 Transfer Case - Vehicles With: 1-Speed Torque On Demand Transfer Case. Disassembly and Assembly
Special Tool(s) /
General Equipment
205-153
(T80T-4000-W)
Handle
205-293
(T89P-4850-A)
Installer, Differential Oil SealTKIT-1989-FTKIT-1989-FMTKIT-1989-LMTKIT-1989-FLM
205-504Installer, Halfshaft Pilot BearingTKIT-2002N-F/FMTKIT-2002N-FLMTKIT-2002N-LM
308-250
(T96T-7127-B)
Installer, Output Shaft Oil SealTKIT-1996-F/FMTKIT-1996-FLM2
..
Other information:
Lincoln Navigator 2018-2026 Workshop Manual: Wipers and Washers - Overview. Description and Operation
Overview The windshield wiper/washer system is activated by the wiper/washer switch. The following functions/ features of the windshield wiper/washer system are: Mist wipe Windshield wash (includes front camera wash, if equipped) Courtesy wipe Windshield wipers (low/high speed) Intermittent wipers Speed dependent wipers Wiper activate..
Lincoln Navigator 2018-2026 Workshop Manual: Module Programming. General Procedures
Check NOTE: Perform the following pre-checks to make sure module programming completes without errors. Start the programming session in Key OFF, Engine OFF and prior to initiating programming, turn to KOEO . Make sure the vehicle battery is fully charged or is connected to a battery charger. The battery state of charge should be 12.6 - 13.6 volts during vehicle ..
Categories
- Manuals Home
- 4th Gen Lincoln Navigator Service Manual (2018 - 2026)
- Front Seat. Removal and Installation
- SYNC Module [APIM]. Removal and Installation
- All Terrain Control Module (ATCM). Removal and Installation
- Rear View Mirrors - System Operation and Component Description. Description and Operation
- Windshield Washer Pump. Removal and Installation
Differential Case Runout Check. General Procedures
Special Tool(s) / General Equipment
 205-1016
Installer, Differential Bearing
TKIT-2014D-ROW2
TKIT-2014D-FL_ROW
 205-153
(T80T-4000-W)
205-153
(T80T-4000-W)
Handle
 205-D061
(D83T-4205-C2)
205-D061
(D83T-4205-C2)
Step Plate Dial Indicator Three Leg Puller Punch