Lincoln Navigator: Engine - 3.5L EcoBoost (272kW/370PS) / Timing Chain Tensioner. Removal and Installation
Special Tool(s) /
General Equipment
 |
303-1655
Tool, Camshaft Holding |
Removal
NOTICE:
During engine repair procedures, cleanliness is extremely
important. Any foreign material, including any material created while
cleaning gasket surfaces, that enters the oil passages, coolant passages
or the oil pan may cause engine failure.
RH and LH tensioners
-
Remove the engine front cover.
Refer to: Engine Front Cover (303-01 Engine - 3.5L EcoBoost (272kW/370PS), Removal and Installation).
RH timing chain tensioner
-
-
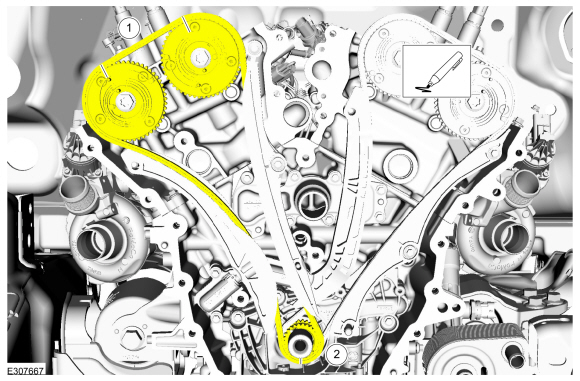
Scribe a location mark on the RH timing chain and the VCT units.
-
Scribe a location mark on the RH timing chain and the crankshaft sprocket.
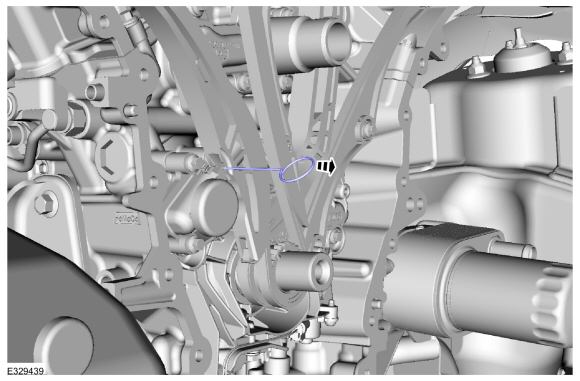
-
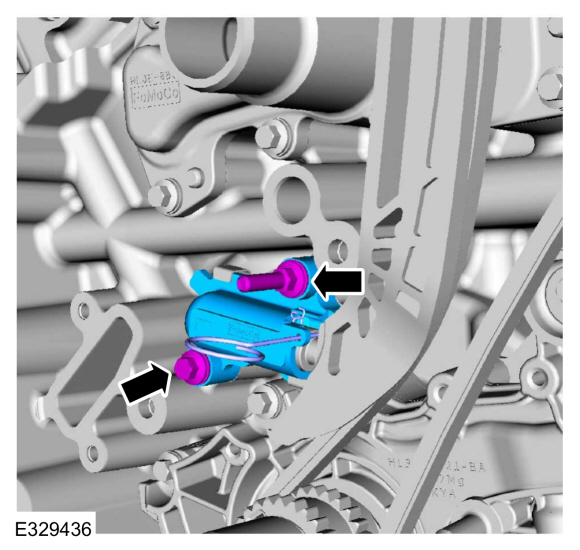
Remove the bolts and the RH timing chain tensioner.
LH timing chain tensioner
-
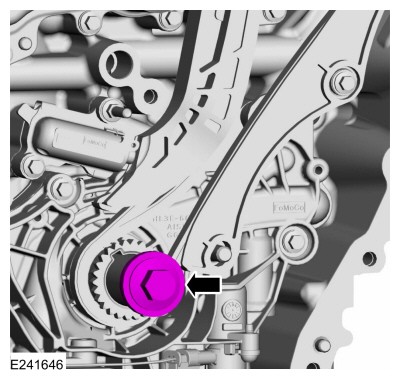
Install the crankshaft pulley bolt.
-
-
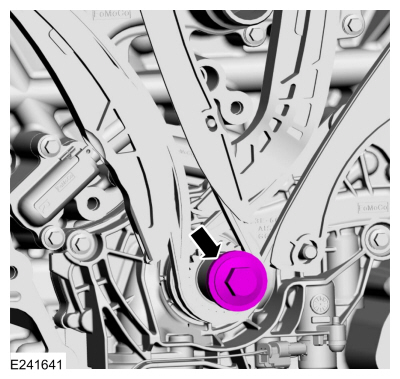
Rotate the crankshaft clockwise.
-
Position the crankshaft sprocket keyway at the 11 o'clock position.
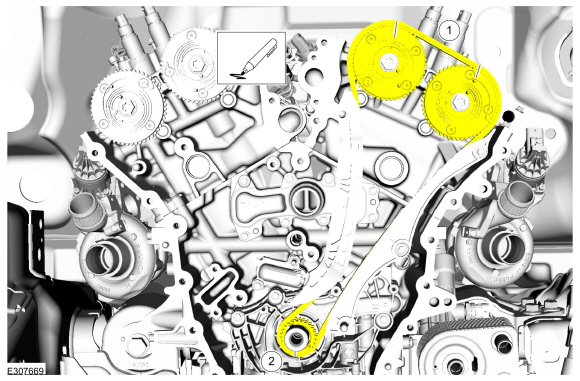
-
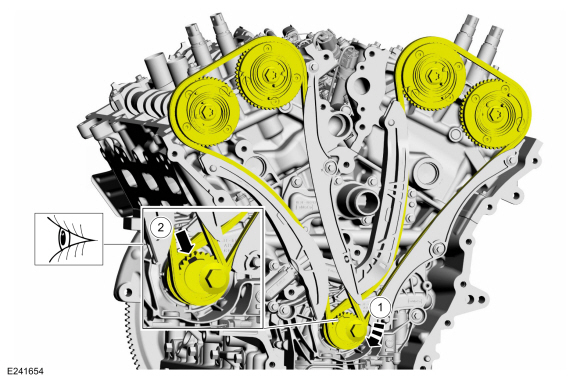
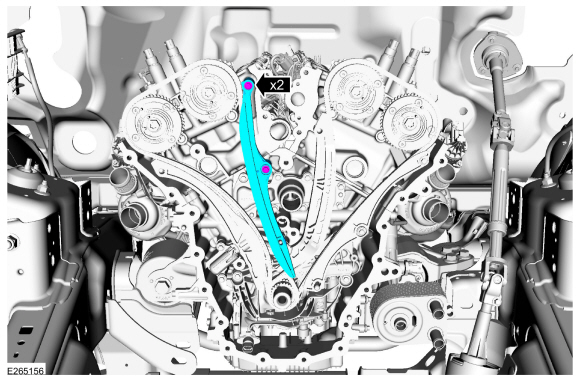
Verify the timing marks on the VCT units are at the positions shown.
-
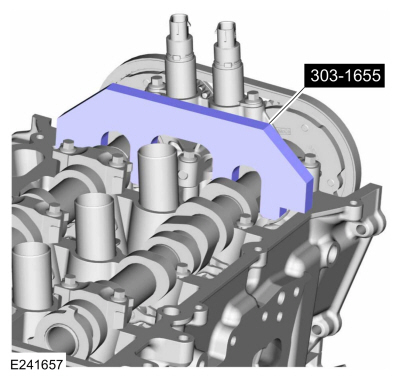
NOTE:
The Camshaft Holding Tool will hold the camshafts in the TDC position.
Install Special Service Tool: 303-1655
Tool, Camshaft Holding.
-
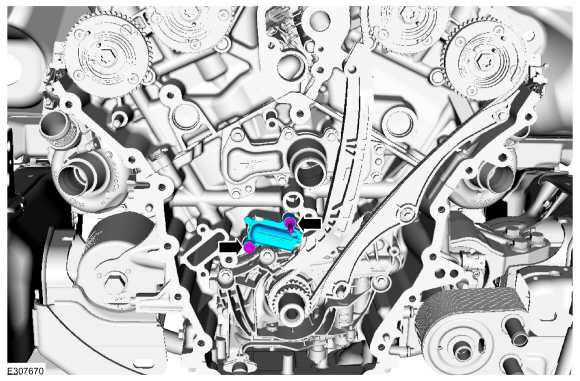
Remove the bolts and the RH timing chain guide.
-
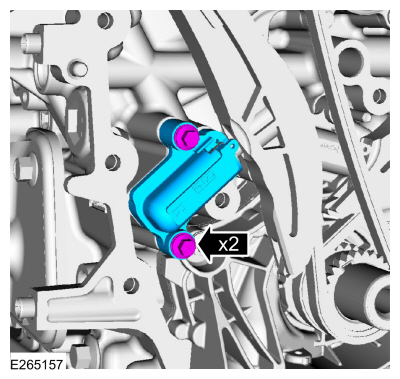
Remove the bolts and the RH timing chain tensioner.
-
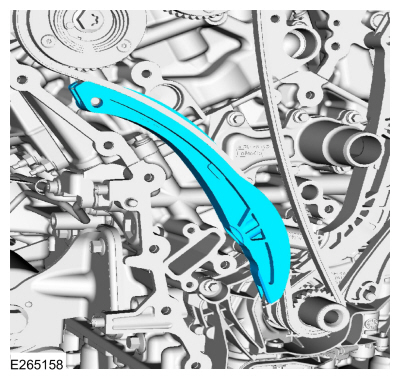
Remove the RH timing chain tensioner arm.
-
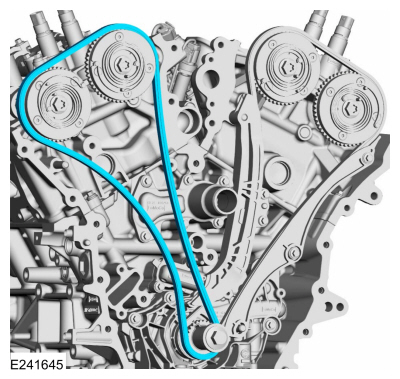
Remove the RH timing chain.
-
Remove the crankshaft pulley bolt.
-
-
Scribe a location mark on the LH timing chain and the VCT units.
-
Scribe a location mark on the LH timing chain and the crankshaft sprocket.
-
Remove the bolts and the LH timing chain tensioner.
Installation
LH timing chain tensioner
-
-
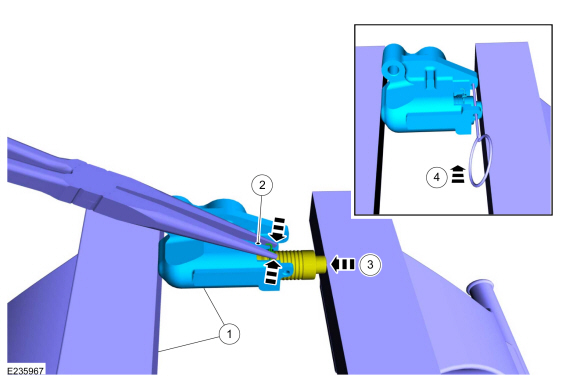
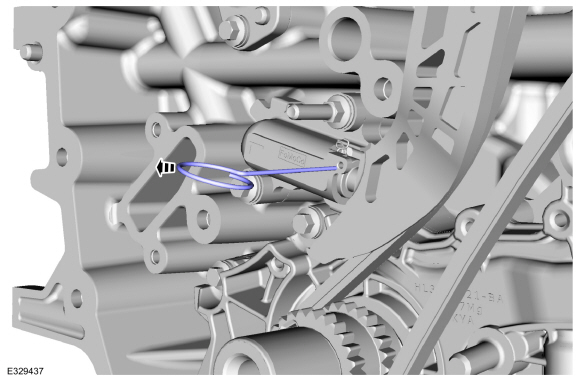
Position the tensioner in a soft-jawed vise.
-
Using pliers, squeeze the ends of the ratchet wire clip together.
-
Using the soft-jawed vise, compress the plunger to the reset position.
-
Install a locking pin in the 2 holes of the tensioner body to hold the plunger in place.
-
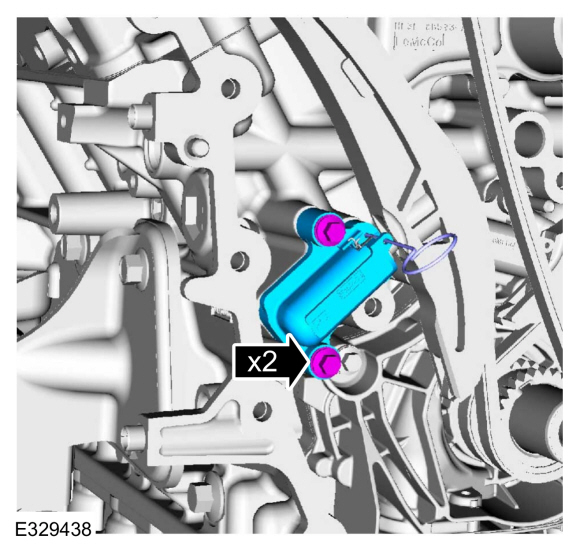
Position the LH timing chain tensioner with the end of the tensioner
correctly engaged to the tensioner arm and install the fasteners.
Torque:
89 lb.in (10 Nm)
-
Remove the tensioner pin.
-
Verify all scribe marks align.
-
NOTE:
The crankshaft sprocket is reversible with a
timing mark on each face. For installation of each timing chain, utilize
the timing mark on the front face of the crankshaft sprocket for chain
alignment.
-
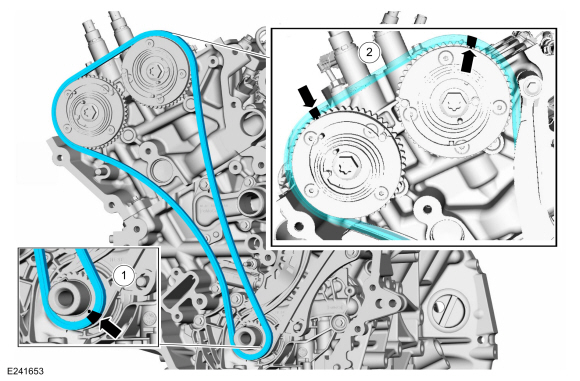
Install the RH timing chain with the single colored links aligned with the timing marks on the VCT units.
-
Install the double colored links so they straddle the timing mark on the crankshaft sprocket.
-
Install the RH timing chain tensioner arm.
-
-
Position the tensioner in a soft-jawed vise.
-
Using pliers, squeeze the ends of the ratchet wire clip together.
-
Using the soft-jawed vise, compress the plunger to the reset position.
-
Install a locking pin in the 2 holes of the tensioner body to hold the plunger in place.
-
Position the RH timing chain tensioner with the end of the tensioner
correctly engaged to the tensioner arm and install the fasteners.
Torque:
89 lb.in (10 Nm)
-
Install the RH timing chain guide and bolts.
Torque:
89 lb.in (10 Nm)
-
Remove the tensioner pin.
-
Remove Special Service Tool: 303-1655
Tool, Camshaft Holding.
RH timing chain tensioner
-
-
Position the tensioner in a soft-jawed vise.
-
Using pliers, squeeze the ends of the ratchet wire clip together.
-
Using the soft-jawed vise, compress the plunger to the reset position.
-
Install a locking pin in the 2 holes of the tensioner body to hold the plunger in place.
-
Position the RH timing chain tensioner with the end of the tensioner
correctly engaged to the tensioner arm and install the fasteners.
Torque:
89 lb.in (10 Nm)
-
Remove the tensioner pin.
-
Verify all scribe marks align.
RH and LH tensioners
-
Install the engine front cover.
Refer to: Engine Front Cover (303-01 Engine - 3.5L EcoBoost (272kW/370PS), Removal and Installation).
Special Tool(s) /
General Equipment
303-1655Tool, Camshaft Holding
Removal
NOTICE:
During engine repair procedures, cleanliness is extremely
important...
Special Tool(s) /
General Equipment
303-1655Tool, Camshaft Holding
Removal
NOTICE:
During engine repair procedures, cleanliness is extremely
important...
Other information:
System Operation
Audio System Overview
NOTE:
Refer to the Owner Literature for additional details of the audio system.
AM / FM Radio
The ACM
can operate when the ignition is on or off. The accessory delay
feature powers the audio system, after the ignition has been turned off,
for a preset time or until a front door is opened...
Removal
Remove the rear spoiler.
Refer to: Rear Spoiler (501-08 Exterior Trim and Ornamentation, Removal and Installation).
Remove the bolts and the high mounted stop lamp assembly.
Disconnect the electrical connector...


 Timing Chain. Removal and Installation
 Timing Chain Tensioner. Removal and Installation