Lincoln Navigator: Parking Aid / Rear Parking Aid Sensor. Removal and Installation
Removal
NOTE: Removal steps in this procedure may contain installation details.
-
Remove the rear bumper cover.
Refer to: Rear Bumper Cover (501-19 Bumpers, Removal and Installation).
-
Disconnect the rear parking aid sensor electrical connectors.
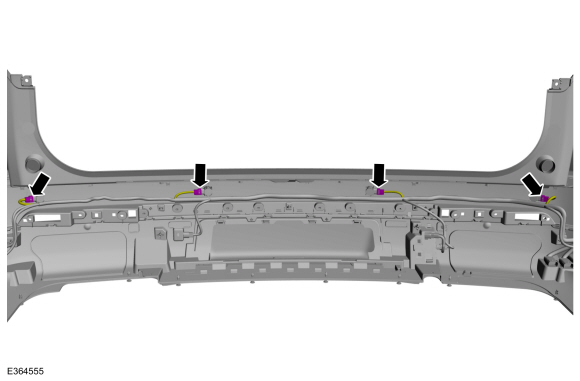 |
-
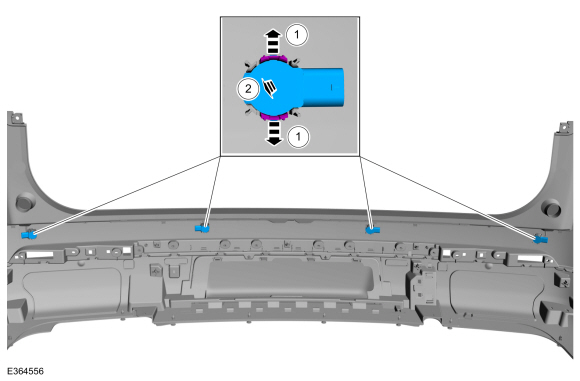
Remove the rear parking aid sensors.
-
Release the tabs.
-
Remove the parking aid sensors.
-
Release the tabs.
 |
Installation
NOTE: Make sure that the isolator rings are installed correctly while installing the sensors.
-
To install, reverse the removal procedure.
-
Carry out the azimuth checks.
Refer to: Azimuth System Check (413-13A Parking Aid, General Procedures).
-
Carry out the elevation system check.
Refer to: Elevation System Check (413-13A Parking Aid, General Procedures).
-
If any sensor fails the checks, diagnose the sensor fault.
Refer to: Parking Aid - System Operation and Component Description (413-13A Parking Aid, Description and Operation).
 Front Parking Aid Sensor. Removal and Installation
Removal
NOTE:
Removal steps in this procedure may contain installation details.
NOTE:
RH side shown, LH side similar.
With the vehicle in NEUTRAL, position it on a hoist...

Other information:
Lincoln Navigator 2018-2026 Workshop Manual: Exterior Rear Door Handle Reinforcement. Removal and Installation
Removal NOTE: LH side shown, RH side similar. Remove the rear door latch. Refer to: Rear Door Latch (501-14 Handles, Locks, Latches and Entry Systems, Removal and Installation). NOTE: This step is only necessary when installing a new component. Release the cable tension by turning the release screw until the handle lever releases from the..
Lincoln Navigator 2018-2026 Workshop Manual: Second Row Seats. Diagnosis and Testing
DTC Chart: SCMC Diagnostics in this manual assume a certain skill level and knowledge of Ford-specific diagnostic practices. REFER to: Diagnostic Methods (100-00 General Information, Description and Operation). SCMC DTC Chart DTC Description Action B146F:00 Back Bladder..
Categories
- Manuals Home
- 4th Gen Lincoln Navigator Service Manual (2018 - 2026)
- Windshield Washer Pump. Removal and Installation
- Front Bumper Cover. Removal and Installation
- Brake Service Mode Activation and Deactivation. General Procedures
- Transmission Fluid Level Check. General Procedures
- Identification Codes. Description and Operation
Rear Stabilizer Bar Link. Removal and Installation
Removal
NOTE: Removal steps in this procedure may contain installation details.
With the vehicle in NEUTRAL, position it on a hoist.Refer to: Jacking and Lifting (100-02 Jacking and Lifting, Description and Operation).
NOTE: Use the hex-holding feature to prevent the stud from turning while removing the nut.
Remove and discard the 2 rear stabilizer bar link nuts and remove the rear stabilizer bar link.Torque: 46 lb.ft (63 Nm)