Lincoln Navigator: Body Closures / Rear Door Weatherstrip. Removal and Installation
Special Tool(s) / General Equipment
| Interior Trim Remover |
Removal
NOTE: Removal steps in this procedure may contain installation details.
NOTE: LH side shown RH side similar.
-
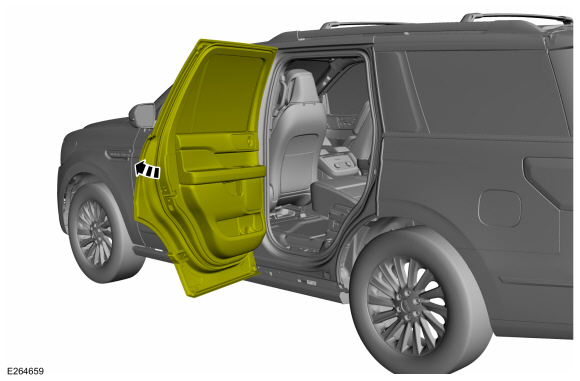
Open the rear door.
 |
-
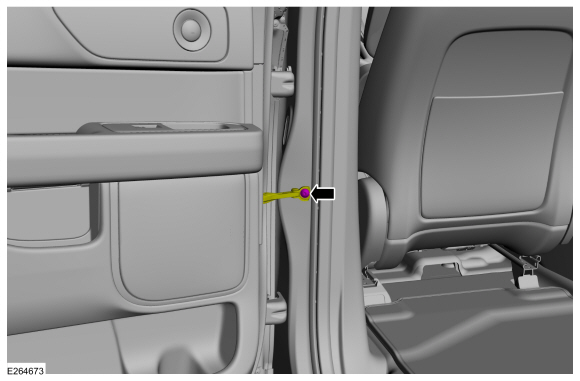
Remove the check arm bolt.
Torque: 17 lb.ft (23 Nm)
 |
-
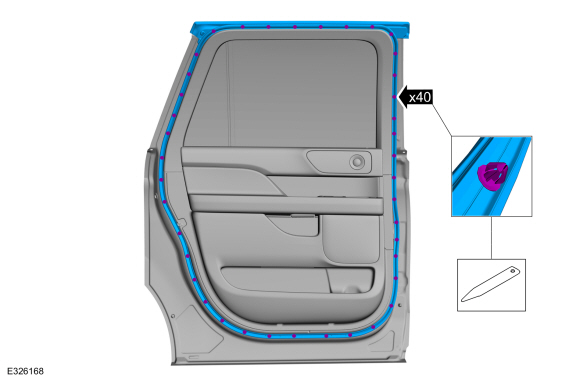
NOTICE: Take extra care not to damage the clips.
Release the clips and remove the rear door weatherstrip.
Remove the General Equipment: Interior Trim Remover
 |
Installation
-
To install, reverse the removal procedure.
 Rear Door Check Arm. Removal and Installation
Removal
NOTE:
Removal steps in this procedure may contain installation details.
NOTE:
LH side shown, RH side similar.
NOTE:
Short wheelbase shown, long wheelbase similar...
 Rear Gate Trunk Module (RGTM). Removal and Installation
Removal
NOTE:
Removal steps in this procedure may contain installation details.
NOTE:
This step is only necessary when installing a new component...
Other information:
Lincoln Navigator 2018-2026 Workshop Manual: SYNC Module [APIM] to Universal Serial Bus (USB) Port Cable. Removal and Installation
Special Tool(s) / General Equipment Interior Trim Remover Removal Upper USB cable Remove the ACM . Refer to: Audio Front Control Module (ACM) (415-00 Information and Entertainment System - General Information - Vehicles With: SYNC 4, Removal and Installation)...
Lincoln Navigator 2018-2026 Workshop Manual: Brake and Clutch Systems Health and Safety Precautions. Description and Operation
WARNING: Do not use any fluid other than clean brake fluid meeting manufacturer's specification. Additionally, do not use brake fluid that has been previously drained. Following these instructions will help prevent system contamination, brake component damage and the risk of serious personal injury...
Categories
- Manuals Home
- 4th Gen Lincoln Navigator Service Manual (2018 - 2026)
- Power Running Board (PRB). Diagnosis and Testing
- Rear Bumper. Removal and Installation
- Remote Function Actuator (RFA) Module. Removal and Installation
- SYNC Module [APIM]. Removal and Installation
- Vehicle Dynamics Control Module (VDM). Removal and Installation
Rear Stabilizer Bar Link. Removal and Installation
Removal
NOTE: Removal steps in this procedure may contain installation details.
With the vehicle in NEUTRAL, position it on a hoist.Refer to: Jacking and Lifting (100-02 Jacking and Lifting, Description and Operation).
NOTE: Use the hex-holding feature to prevent the stud from turning while removing the nut.
Remove and discard the 2 rear stabilizer bar link nuts and remove the rear stabilizer bar link.Torque: 46 lb.ft (63 Nm)
