
Lincoln Navigator: Handles, Locks, Latches and Entry Systems / Liftgate Release Switch. Removal and Installation
Removal
-
Remove the reversing lamp assembly.
Refer to: Reversing Lamp (417-01 Exterior Lighting, Removal and Installation).
-
Disconnect the coaxial cable connector.
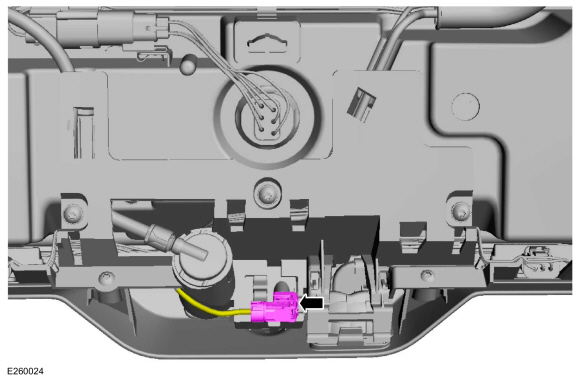 |
-
Remove the screws and the bracket.
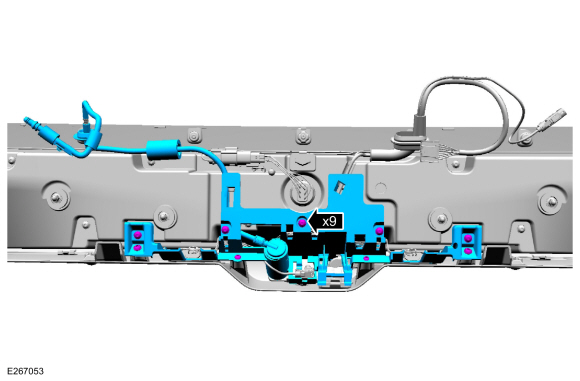 |
-
Remove the rear housing.
-
Disconnect the electrical connector and position the wiring harness aside.
-
Remove the screws and the rear housing from the reversing lamp assembly.
-
Disconnect the electrical connector and position the wiring harness aside.
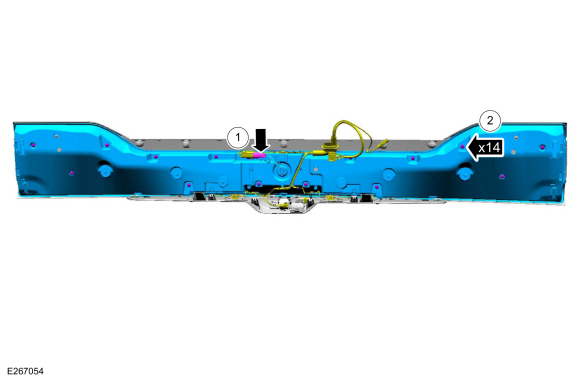 |
-
Remove the liftgate release switch.
-
Disconnect the liftgate release switch electrical connector.
-
Remove the liftgate release switch.
-
Disconnect the liftgate release switch electrical connector.
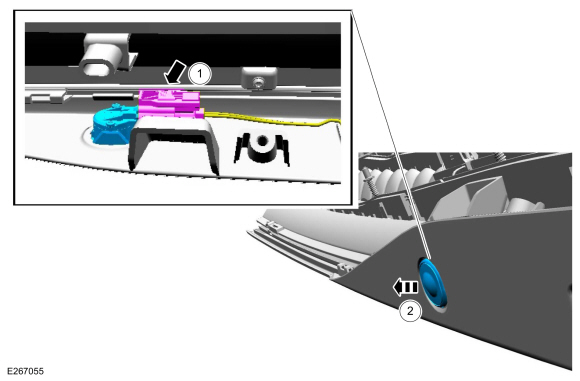 |
Installation
All vehicles
-
To install, reverse the removal procedure.
Vehicles equipped with 360° cameras only
-
Using a diagnostic scan tool, following the on
screen instructions for the LIN New Module Initialization-IPMB configure
the IPMB (image processing module B).
-
Align the 360° cameras
Refer to: 360 Degree View Camera Alignment (413-13B Parking Aid - Vehicles With: Parking Aid Camera, General Procedures).
Vehicles equipped with 360° camera and Trailer Reverse Guidance
-
Using a diagnostic scan tool, following the on
screen instructions for the LIN New Module Initialization-IPMB configure
the IPMB.
-
Align the 360° cameras
Refer to: 360 Degree View Camera Alignment (413-13B Parking Aid - Vehicles With: Parking Aid Camera, General Procedures).
 Liftgate Latch. Removal and Installation
Removal
NOTE:
Removal steps in this procedure may contain installation details.
Remove the liftgate trim panel.
Refer to: Liftgate Trim Panel (501-05 Interior Trim and Ornamentation, Removal and Installation)...
 Liftgate Window Glass Release Switch. Removal and Installation
Removal
Remove the reversing lamp assembly.
Refer to: Reversing Lamp (417-01 Exterior Lighting, Removal and Installation).
Disconnect the coaxial cable connector...
Other information:
Lincoln Navigator 2018-2026 Workshop Manual: Climate Control System Health and Safety Precautions. Description and Operation
WARNING: Air conditioning liquid refrigerant R-134a and R-1234yf are capable of harming eyes or freezing skin. Always wear safety goggles and avoid contact with liquid refrigerant. Failure to follow these instructions may result in serious personal injury...
Lincoln Navigator 2018-2026 Workshop Manual: Seat Heater Mat Installation. General Procedures
Repair NOTE: Click here to view a video version of the seat heater mat removal and installation. View NOTE: Always install a new heater mat. NOTE: During installation, it is allowable to adhere a new heater mat to any adhesive left behind on the foam...
Categories
- Manuals Home
- 4th Gen Lincoln Navigator Service Manual (2018 - 2026)
- Rear View Mirrors - System Operation and Component Description. Description and Operation
- Telematics Control Unit (TCU) Module. Removal and Installation
- Neutral Flat Tow Activation and Deactivation. General Procedures
- Transmission Fluid Drain and Refill. General Procedures
- Remote Function Actuator (RFA) Module. Removal and Installation
Front Stabilizer Bar Link. Removal and Installation
Removal
NOTICE: Suspension fasteners are critical parts that affect the performance of vital components and systems. Failure of these fasteners may result in major service expense. Use the same or equivalent parts if replacement is necessary. Do not use a replacement part of lesser quality or substitute design. Tighten fasteners as specified.
NOTE: Removal steps in this procedure may contain installation details.
With the vehicle in NEUTRAL, position it on a hoist.Refer to: Jacking and Lifting (100-02 Jacking and Lifting, Description and Operation).
NOTICE: Do not use power tools to remove or install the stabilizer bar
