Lincoln Navigator: Exhaust System - 3.5L EcoBoost (272kW/370PS) / Catalytic Converter RH. Removal and Installation
Special Tool(s) / General Equipment
 |
303-476
(T94P-9472-A)
Socket, Exhaust Gas Oxygen Sensor TKIT-1994-LM/M TKIT-1994-F TKIT-1994-FLM/FM |
Materials
| Name | Specification |
|---|---|
| Motorcraft® High Temperature Nickel Anti-Seize Lubricant XL-2 |
- |
| Motorcraft® Penetrating and Lock Lubricant XL-1 |
- |
Removal
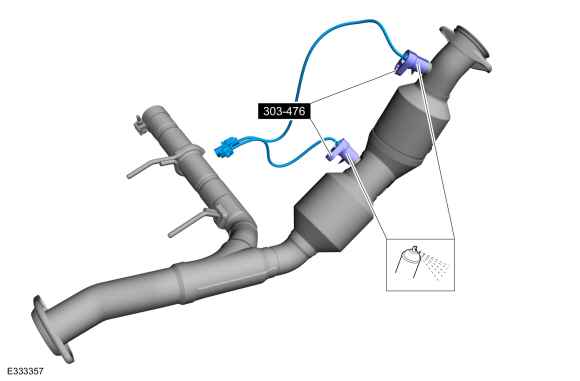
NOTE: If the catalytic converter is not being replaced, the HO2S and the catalyst monitor sensor do not need to be removed from the catalytic converter. Disconnecting the electrical connectors is still necessary.
NOTE: The exhaust Y-pipe dual catalytic converter is a 2-piece assembly. The LH and RH converters can be serviced separately as needed.
-
With the vehicle in NEUTRAL, position it on a hoist.
Refer to: Jacking and Lifting (100-02 Jacking and Lifting, Description and Operation).
-
Remove the LH catalytic converter.
Refer to: Catalytic Converter LH (309-00 Exhaust System - 3.5L EcoBoost (272kW/370PS), Removal and Installation).
-
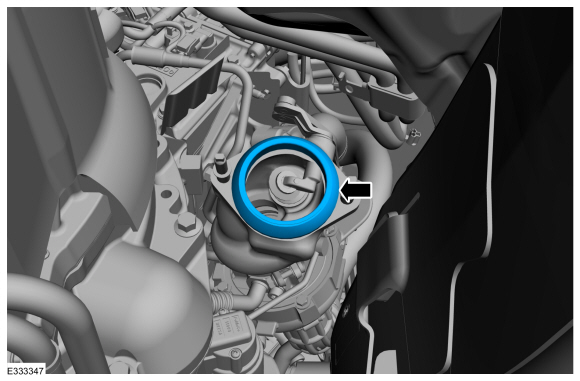
Remove the muffler.
Refer to: Muffler (309-00 Exhaust System - 3.5L EcoBoost (272kW/370PS), Removal and Installation).
-
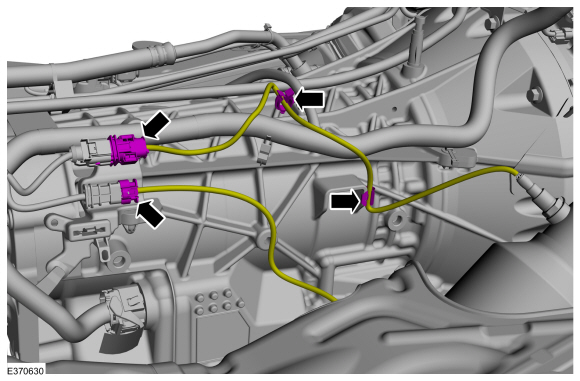
Disconnect the electrical connectors and detach the wire clips.
 |
-
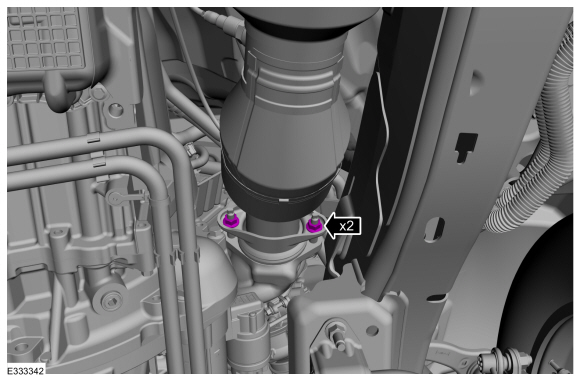
Loosen the RH catalytic converter nuts.
 |
-
Remove the transmission support insulator.
Refer to: Transmission Support Insulator (307-01 Automatic Transmission - 10-Speed Automatic Transmission – 10R80, Removal and Installation).
-
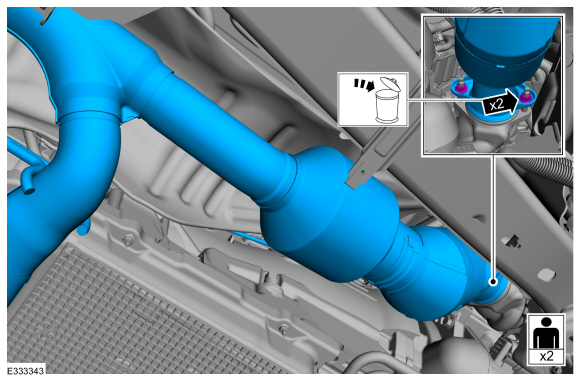
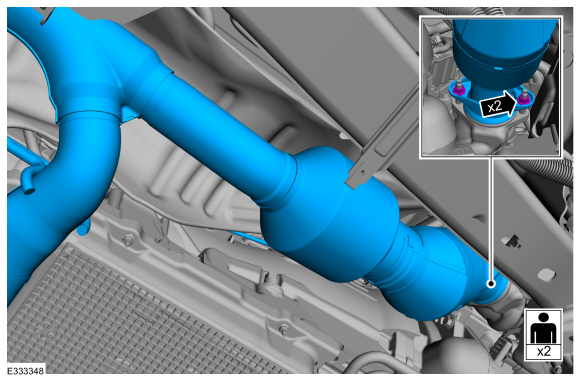
Remove and discard the nuts. Remove the RH catalytic converter .
 |
-
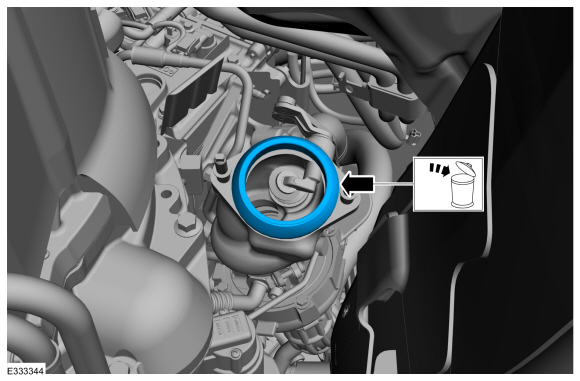
Remove and discard the gasket.
 |
-
NOTE: This step is only required if you are replacing with new components.
Apply penetrating oil to sensor. Using the special tool, remove the HO2S and the catalyst monitor sensors.
Use Special Service Tool: 303-476 (T94P-9472-A) Socket, Exhaust Gas Oxygen Sensor.
Material: Motorcraft® Penetrating and Lock Lubricant / XL-1
 |
Installation
-
Clean all exhaust connections before reassembly.
-
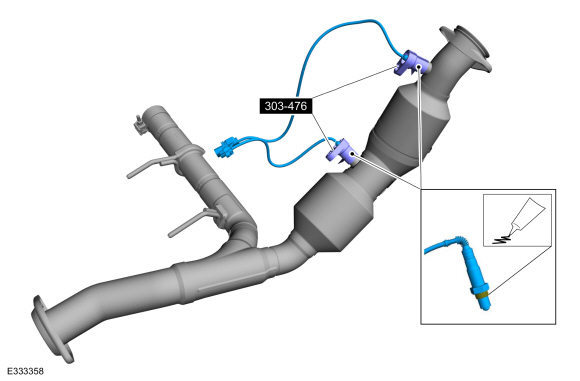
NOTE: This step is only required if you are replacing with new components.
Apply anti-seize to thread of sensor. Using the special tool, install the HO2S and the catalyst monitor sensors.
Use Special Service Tool: 303-476 (T94P-9472-A) Socket, Exhaust Gas Oxygen Sensor.
Material: Motorcraft® High Temperature Nickel Anti-Seize Lubricant / XL-2
Torque: 35 lb.ft (48 Nm)
 |
-
NOTE: Make sure that new gasket is installed.
Install the new gasket.
 |
-
NOTE: Loosely install the new RH catalytic converter nuts. Do not tighten at this time.
Position the RH catalytic converter in vehicle with a new gasket. Loosely install the RH catalytic converter nuts.
 |
-
Install the transmission support insulator.
Refer to: Transmission Support Insulator (307-01 Automatic Transmission - 10-Speed Automatic Transmission – 10R80, Removal and Installation).
-
NOTE: Evenly tighten the RH catalytic converter nuts.
Tighten the RH catalytic converter nuts.
Torque: 30 lb.ft (40 Nm)
|
-
Install the LH catalytic converter.
Refer to: Catalytic Converter LH (309-00 Exhaust System - 3.5L EcoBoost (272kW/370PS), Removal and Installation).
-
Connect the electrical connectors and attach the wire clips.
|
-
Install the muffler.
Refer to: Muffler (309-00 Exhaust System - 3.5L EcoBoost (272kW/370PS), Removal and Installation).
-
Check the exhaust system for leaks.

 Muffler. Removal and Installation
Removal
With the vehicle in NEUTRAL, position it on a hoist.
Refer to: Jacking and Lifting (100-02 Jacking and Lifting, Description and Operation)...
Other information:
Lincoln Navigator 2018-2026 Workshop Manual: Floor Panel Reinforcement. Removal and Installation
Special Tool(s) / General Equipment 6.5 mm Drill Bit Scraper for Straight Edges Self-Piercing Rivet (SPR) Remover/Installer Belt Sander Blind Rivet Gun Hot Air Gun Locking Pliers Materials Name Specification Metal Bonding AdhesiveTA-1, TA-1-B, 3M™ 08115, LORD Fusor® 108B, Henkel Teroson EP 5055 - ..
Lincoln Navigator 2018-2026 Workshop Manual: Parking Aid - Component Location. Description and Operation
Item Description 1 Rear parking aid sensors 2 Parking aid switch/active park assist switch 3 IPMA 4 Front active park assist sensors 5 Front parking aid sensors 6 Front speakers 7 Rear speakers 8 Rear active park assist sensors ..
Categories
- Manuals Home
- 4th Gen Lincoln Navigator Service Manual (2018 - 2026)
- SYNC Module [APIM]. Removal and Installation
- Body and Paint
- Front Seat. Removal and Installation
- Neutral Flat Tow Activation and Deactivation. General Procedures
- Head Up Display (HUD) Module Calibration. General Procedures
Differential Case Runout Check. General Procedures
Special Tool(s) / General Equipment
 205-1016
Installer, Differential Bearing
TKIT-2014D-ROW2
TKIT-2014D-FL_ROW
 205-153
(T80T-4000-W)
205-153
(T80T-4000-W)
Handle
 205-D061
(D83T-4205-C2)
205-D061
(D83T-4205-C2)
Step Plate Dial Indicator Three Leg Puller Punch