Lincoln Navigator: Automatic Transmission - 10-Speed Automatic Transmission – 10R80 / Transmission Fluid Auxiliary Pump. Removal and Installation
Removal
-
NOTE: It is not necessary to remove the transmission fluid filter to remove the transmission fluid auxiliary pump.
Remove the transmission fluid pan and gasket.
Refer to: Transmission Fluid Pan, Gasket and Filter (307-01 Automatic Transmission - 10-Speed Automatic Transmission – 10R80, Removal and Installation).
-
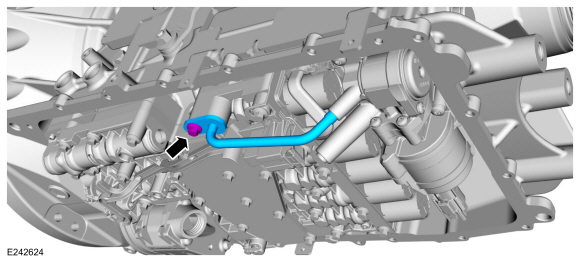
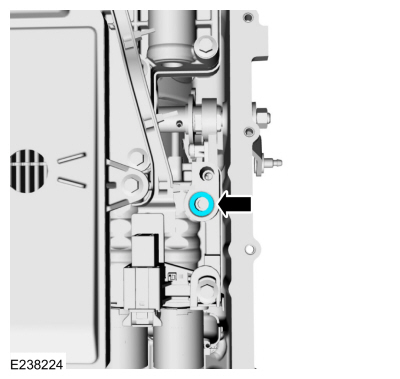
Remove the bolt and the transmission fluid auxiliary pump tube.
 |
-
Remove the transmission fluid auxiliary pump tube seal.
 |
-
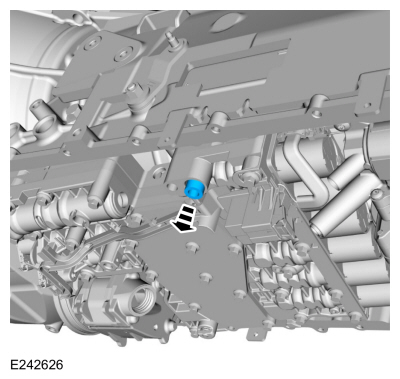
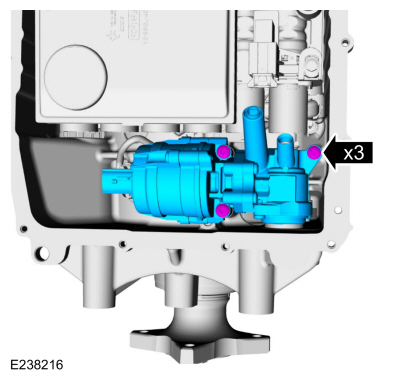
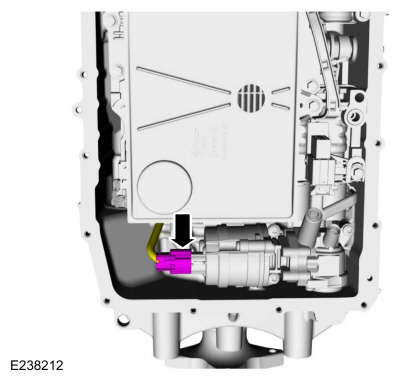
Disconnect the transmission fluid auxiliary pump.
 |
-
NOTE: A short 1/4" drive T-30 socket is required to remove the rear pump bolt.
NOTE: The fluid auxiliary pump may need to be removed from the RH side of the vehicle to clear the exhaust system and fluid filter.
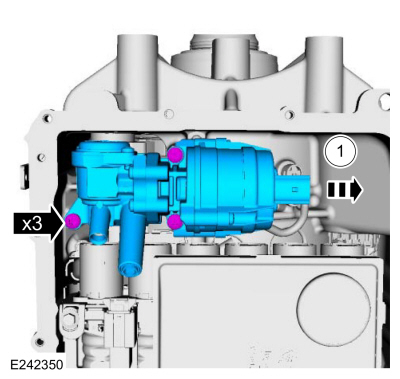
Remove the bolts and the transmission fluid auxiliary pump.
-
If necessary, remove the fluid auxiliary pump towards the RH side.
-
If necessary, remove the fluid auxiliary pump towards the RH side.
 |
Installation
-
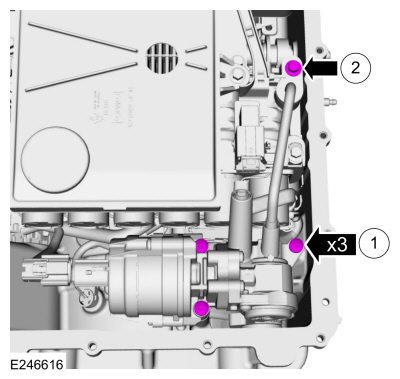
Install the transmission fluid auxiliary pump and loosely install the bolts.
 |
-
Install the transmission fluid auxiliary pump tube seal.
 |
-
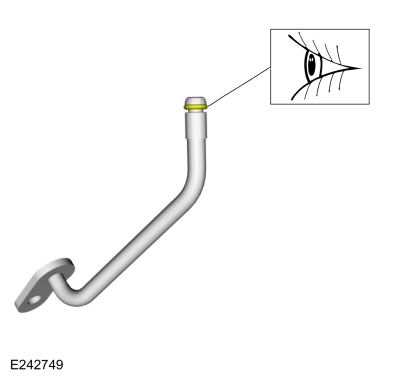
Inspect the transmission fluid auxiliary pump tube O-ring.
 |
-
Install the transmission fluid auxiliary pump tube and loosely install the bolt.
 |
-
-
Transmission fluid auxiliary pump bolts
Torque: 97 lb.in (11 Nm)
-
Transmission fluid auxiliary pump tube bolt
Torque: 106 lb.in (12 Nm)
-
Transmission fluid auxiliary pump bolts
 |
-
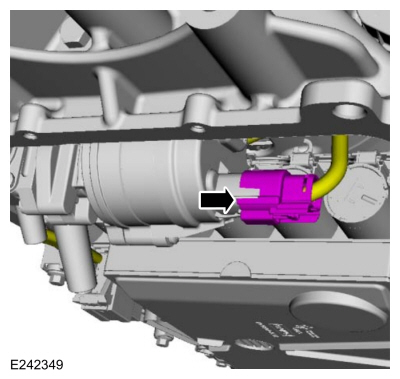
Connect the transmission fluid auxiliary pump electrical connector.
 |
-
Install the transmission fluid pan and gasket.
Refer to: Transmission Fluid Pan, Gasket and Filter (307-01 Automatic Transmission - 10-Speed Automatic Transmission – 10R80, Removal and Installation).

 Transmission Fluid Pan, Gasket and Filter. Removal and Installation
Materials
Name
Specification
Motorcraft® MERCON® ULV Automatic Transmission FluidXT-12-QULV
WSS-M2C949-A, MERCON® ULV
Removal
With the vehicle in NEUTRAL, position it on a hoist...
Other information:
Lincoln Navigator 2018-2026 Workshop Manual: Rear View Mirrors - Overview. Description and Operation
Overview Exterior, Power The power mirror system allows the LH and RH exterior mirror glass to be positioned electronically. The movement of the exterior mirror glass is controlled by the exterior mirror control switch and the LH or RH mirror selection buttons determine which exterior mirror glass is controlled...
Lincoln Navigator 2018-2026 Workshop Manual: Second Row Seat Backrest Blower Motor. Removal and Installation
Special Tool(s) / General Equipment Interior Trim Remover Removal NOTE: Right hand (RH) shown, left hand (LH) similar. Remove the second row single seat backrest cover. Refer to: Second Row Single Seat Backrest Cover - Vehicles Without: Multi-Contour Seats (501-10B Second Row Seats, Removal and Installation)...
Categories
- Manuals Home
- 4th Gen Lincoln Navigator Service Manual (2018 - 2026)
- Telematics Control Unit (TCU) Module. Removal and Installation
- Power Running Board (PRB). Diagnosis and Testing
- Remote Function Actuator (RFA) Module. Removal and Installation
- Front Bumper Cover. Removal and Installation
- Head Up Display (HUD) Module Calibration. General Procedures
Rear Drive Halfshafts. Diagnosis and Testing
Preliminary Inspection
Visually inspect the CV joints, housing, boots, and clamps for obvious signs of mechanical damage.If an obvious cause for an observed or reported concern is found, correct the cause (if possible) before proceeding to the next step
If the cause is not visually evident, verify the symptom and REFER to Symptom Chart: NVH.