Lincoln Navigator: Exterior Lighting / Trailer Module (TRM). Removal and Installation
Removal
NOTE: Removal steps in this procedure may contain installation details.
NOTE: Adjustable brake pedal and bracket shown, fixed brake pedal and bracket similar.
All vehicles
-
NOTE: This step is only necessary if the TRM (trailer module) is being replaced.
Using a diagnostic scan tool, begin the PMI process for TRM the following the on-screen instructions.
Vehicles with adjustable pedals
-
Move the pedals to the full forward (away from the driver) position.
All vehicles
-
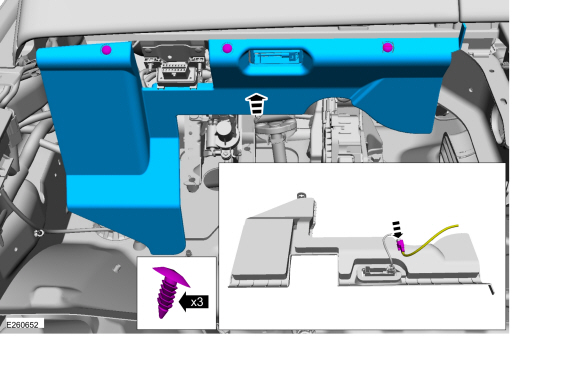
Remove the push pins and remove the LH insulation panel.
-
Disconnect the electical connector.
-
Disconnect the electical connector.
 |
-
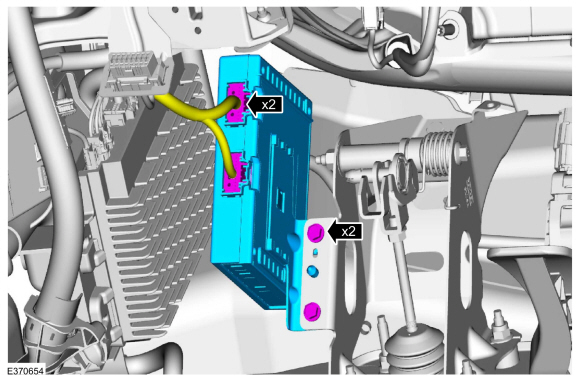
Remove bolts and the TRM .
-
Disconnect the electical connectors.
Torque: 106 lb.in (12 Nm)
-
Disconnect the electical connectors.
 |
Installation
-
To install, reverse the removal procedure.
-
NOTE: Carry out this step only if the TRM (trailer module) is being replaced.
Using a diagnostic scan tool, complete the PMI process for the TRM following the on-screen instructions.
 Reversing Lamp. Removal and Installation
Removal
Remove the liftgate trim panel.
Refer to: Liftgate Trim Panel (501-05 Interior Trim and Ornamentation, Removal and Installation)...

Other information:
Lincoln Navigator 2018-2026 Workshop Manual: Front Door Window Regulator and Motor. Removal and Installation
Special Tool(s) / General Equipment Interior Trim Remover Removal NOTE: LH side shown, RH side similar. NOTE: For non-functional front door window regulators and motors with the window in the 40 mm open to full closed position, cut the front door window regulator cables to allow window movement. NOTE: Removal steps in this procedure may contain instal..
Lincoln Navigator 2018-2026 Workshop Manual: Engine Starting Control System. Diagnosis and Testing
Diagnostic Trouble Code (DTC) Chart Diagnostics in this manual assume a certain skill level and knowledge of Ford-specific diagnostic practices. REFER to: Diagnostic Methods (100-00 General Information, Description and Operation). Module DTC Description Action PCM P164C:00 Internal Control Module Start-Stop Performance: No Sub Type Information GO to Pinpoint Test A..
Categories
- Manuals Home
- 4th Gen Lincoln Navigator Service Manual (2018 - 2026)
- Liftgate Trim Panel. Removal and Installation
- Brake Service Mode Activation and Deactivation. General Procedures
- Front Seat. Removal and Installation
- Body and Paint
- Body Control Module (BCM). Removal and Installation
Axle Tube Bearing. Removal and Installation
Special Tool(s) / General Equipment
 205-123
(T78P-1177-A)
205-123
(T78P-1177-A)
Installer, Axle Shaft Oil Seal
 308-047
(T77F-1102-A)
308-047
(T77F-1102-A)
Remover, Bearing Cup Slide Hammer