• Navigator Manuals
  • Service
  • New
  • Top
  • Sitemap
Lincoln Navigator Manuals

Lincoln Navigator: Parking Aid - Vehicles With: Parking Aid Camera / Parking Aid. Diagnosis and Testing

Lincoln Navigator 2018-2025 Workshop Manual / Instrumentation and Warning Systems / Parking Aid - Vehicles With: Parking Aid Camera / Parking Aid. Diagnosis and Testing

Diagnostic Trouble Code (DTC) Chart

Diagnostics in this manual assume a certain skill level and knowledge of Ford-specific diagnostic practices.
REFER to: Diagnostic Methods (100-00 General Information, Description and Operation).


Module DTC Description Action
APIM C1001:01 Vision System Camera: General Electrical Failure GO to Pinpoint Test A
APIM C1001:01 Vision System Camera: General Electrical Failure GO to Pinpoint Test G
APIM C1001:02 Vision System Camera: General Signal Failure GO to Pinpoint Test G
APIM C1001:02 Vision System Camera: General Signal Failure GO to Pinpoint Test H
APIM C1001:1C Vision System Camera: Circuit Voltage Out Of Range GO to Pinpoint Test G
APIM C1001:1C Vision System Camera: Circuit Voltage Out Of Range GO to Pinpoint Test H
APIM C1001:81 Vision System Camera: Invalid Serial Data Received GO to Pinpoint Test G
APIM C1001:81 Vision System Camera: Invalid Serial Data Received GO to Pinpoint Test H
APIM C1001:87 Vision System Camera: Missing Message GO to Pinpoint Test G
APIM C1001:87 Vision System Camera: Missing Message GO to Pinpoint Test H
BCM B115E:01 Camera Module: General Electrical Failure GO to Pinpoint Test A
BCM B115E:02 Camera Module: General Signal Failure GO to Pinpoint Test A
BCM B115E:08 Camera Module: Bus Signal/Message Failures GO to Pinpoint Test A
BCM B115E:49 Camera Module: Internal Electronic Failure GO to Pinpoint Test A
BCM B115E:55 Camera Module: Not Configured GO to Pinpoint Test V
BCM B115E:9A Camera Module: Component or System Operating Conditions GO to Pinpoint Test A
IPMA B115E:08 Camera Module: Bus Signal/Message Failures GO to Pinpoint Test G
IPMA B115E:08 Camera Module: Bus Signal/Message Failures GO to Pinpoint Test J
IPMA B115E:11 Camera Module: Circuit Short To Ground GO to Pinpoint Test G
IPMA B115E:11 Camera Module: Circuit Short To Ground GO to Pinpoint Test J
IPMA B115E:15 Camera Module: Circuit Short To Battery Or Open GO to Pinpoint Test G
IPMA B115E:15 Camera Module: Circuit Short To Battery Or Open GO to Pinpoint Test J
IPMA B115E:31 Camera Module: No Signal GO to Pinpoint Test G
IPMA B115E:31 Camera Module: No Signal GO to Pinpoint Test J
IPMA B115E:49 Camera Module: Internal Electronic Failure GO to Pinpoint Test R
IPMA B115E:55 Camera Module: Not Configured GO to Pinpoint Test V
IPMA B115E:78 Camera Module: Alignment Or Adjustment Incorrect GO to Pinpoint Test W
IPMA B115E:92 Camera Module: Performance Or Incorrect Operation GO to Pinpoint Test G
IPMA B115E:92 Camera Module: Performance Or Incorrect Operation GO to Pinpoint Test J
IPMA B115E:96 Camera Module: Component Internal Failure GO to Pinpoint Test R
IPMA B12BE:11 Left Front Camera: Circuit Short To Ground GO to Pinpoint Test L
IPMA B12BE:15 Left Front Camera: Circuit Short To Battery Or Open GO to Pinpoint Test L
IPMA B12BE:31 Left Front Camera: No Signal GO to Pinpoint Test L
IPMA B12BE:96 Left Front Camera: Component Internal Failure GO to Pinpoint Test T
IPMA B12BF:11 Right Front Camera: Circuit Short To Ground GO to Pinpoint Test M
IPMA B12BF:15 Right Front Camera: Circuit Short To Battery Or Open GO to Pinpoint Test M
IPMA B12BF:31 Right Front Camera: No Signal GO to Pinpoint Test M
IPMA B12BF:96 Right Front Camera: Component Internal Failure GO to Pinpoint Test U
IPMA B1300:12 Video Output 'A': Circuit Short To Battery GO to Pinpoint Test G
IPMA B148E:11 Front Camera: Circuit Short To Ground GO to Pinpoint Test K
IPMA B148E:15 Front Camera: Circuit Short To Battery Or Open GO to Pinpoint Test K
IPMA B148E:31 Front Camera: No Signal GO to Pinpoint Test K
IPMA B148E:96 Front Camera: Component Internal Failure GO to Pinpoint Test S
IPMA B14A5:11 Multi-Camera View Switch: Circuit Short To Ground GO to Pinpoint Test N
IPMA B1578:78 Digital Park Assist Camera Vision System: Alignment Or Adjustment Incorrect GO to Pinpoint Test W

Symptom Chart(s)

Rear Parking Aid Camera Only

Diagnostics in this manual assume a certain skill level and knowledge of Ford-specific diagnostic practices.
REFER to: Diagnostic Methods (100-00 General Information, Description and Operation).

Condition Actions
The rear parking aid camera is inoperative without IPMA   GO to Pinpoint Test A
The rear parking aid camera is inoperative with IPMA   GO to Pinpoint Test G
The audio system displays REAR VIDEO CAMERA IS UNAVAILABLE or CAMERA IS UNAVAILABLE PLEASE CONTACT YOUR DEALERSHIP and a black screen/no image without IPMA   GO to Pinpoint Test A
The audio system displays REAR VIDEO CAMERA IS UNAVAILABLE or CAMERA IS UNAVAILABLE PLEASE CONTACT YOUR DEALERSHIP and a black screen/no image with IPMA   GO to Pinpoint Test G
Static/flashing/blinking/flickering/scrolling or rolling image/screen, scrolling horizontal lines without IPMA   GO to Pinpoint Test B
Static/flashing/blinking/flickering/scrolling or rolling image/screen, scrolling horizontal lines with IPMA   GO to Pinpoint Test G
Poor image quality (foggy/cloudy/fuzzy/blurry/hazy image or moisture/water in lens or black spots) without IPMA   GO to Pinpoint Test B
Poor image quality (foggy/cloudy/fuzzy/blurry/hazy image or moisture/water in lens or black spots) with IPMA   GO to Pinpoint Test G
Frozen screen or slow screen transitions  
REFER to: Information and Entertainment System (415-00 Information and Entertainment System - General Information - Vehicles With: SYNC 4, Diagnosis and Testing).
Manual zoom function is inoperative without IPMA   GO to Pinpoint Test E
Manual zoom function is inoperative with IPMA   GO to Pinpoint Test Q
Visual park aid alert is inoperative without IPMA   GO to Pinpoint Test C
Visual park aid alert is inoperative with IPMA   GO to Pinpoint Test O
Active guidelines are inoperative or do not operate correctly without IPMA   GO to Pinpoint Test D
Active guidelines are inoperative or do not operate correctly with IPMA   GO to Pinpoint Test P
Fixed guidelines are inoperative or do not operate correctly without IPMA   GO to Pinpoint Test D
Fixed guidelines are inoperative or do not operate correctly with IPMA   GO to Pinpoint Test P
The video delay feature is inoperative or does not operate correctly   GO to Pinpoint Test F
Video image is upside down   GO to Pinpoint Test X
All other image concerns without IPMA   GO to Pinpoint Test A
All other image concerns with IPMA   GO to Pinpoint Test G

360 Degree View Camera

Diagnostics in this manual assume a certain skill level and knowledge of Ford-specific diagnostic practices.
REFER to: Diagnostic Methods (100-00 General Information, Description and Operation).

NOTICE: Use caution when handling the coaxial cables. Damage may occur if the cable is bent at too sharp of an angle.

Condition Possible Sources Actions
The camera system does not respond when the camera selection switch is pressed Refer to the Pinpoint Test   GO to Pinpoint Test N
The Rear 360 + Normal view is not displayed on the audio system display when reverse gear is selected Refer to the Pinpoint Test   GO to Pinpoint Test J
All 360 degree camera views are inoperative or do not operate correctly Refer to the Pinpoint Test   GO to Pinpoint Test H
Rear camera views are inoperative or do not operate correctly Refer to the Pinpoint Test   GO to Pinpoint Test J
The front camera views are inoperative or do not operate correctly Refer to the Pinpoint Test   GO to Pinpoint Test K
The right side camera views are inoperative or do not operate correctly Refer to the Pinpoint Test   GO to Pinpoint Test M
The left side camera views are inoperative or do not operate correctly Refer to the Pinpoint Test   GO to Pinpoint Test L
Static/flashing/blinking/flickering/scrolling or rolling image/screen, scrolling horizontal lines for one or more 360 degree camera views Refer to the Pinpoint Test   GO to Pinpoint Test I
Poor image quality (foggy/cloudy/fuzzy/blurry/hazy image or moisture/water in lens or black spots) for one or more 360 degree camera views Refer to the Pinpoint Test   GO to Pinpoint Test I
The lower corners of the front, rear, or side camera image in the 360 degree camera view show vertical colored lines or appear greyed out Refer to the Pinpoint Test   GO to Pinpoint Test Y
Frozen or slow screen transitions between camera views Refer to the Pinpoint Test   GO to Pinpoint Test Z
One or more of the images in the 360 degree camera view is misaligned
  • Camera alignment
 
REFER to: 360 Degree View Camera Alignment (413-13B Parking Aid - Vehicles With: Parking Aid Camera, General Procedures).
Manual zoom function is inoperative (rear parking aid camera image only) Refer to the Pinpoint Test   GO to Pinpoint Test Q
Visual park aid alert is inoperative Refer to the Pinpoint Test   GO to Pinpoint Test O
Active guidelines are inoperative or do not operate correctly (rear parking aid camera image only) Refer to the Pinpoint Test   GO to Pinpoint Test P
Fixed guidelines are inoperative or do not operate correctly (rear parking aid camera image only) Refer to the Pinpoint Test   GO to Pinpoint Test P
The video delay feature is inoperative or does not operate correctly (rear parking aid camera image only) Refer to the Pinpoint Test   GO to Pinpoint Test F

Pinpoint Test(s)


PINPOINT TEST A: THE REAR PARKING AID CAMERA IS INOPERATIVE OR DOES NOT OPERATE CORRECTLY - WITH REAR PARKING AID CAMERA WITHOUT IPMA (IMAGE PROCESSING MODULE A)

Refer to Wiring Diagrams Cell 145 for schematic and connector information.

Normal Operation and Fault Conditions

REFER to: Parking Aid - System Operation and Component Description (413-13B Parking Aid - Vehicles With: Parking Aid Camera, Description and Operation).

DTC Fault Trigger Conditions

DTC Description Fault Trigger Condition
APIM C1001:01 Vision System Camera: General Electrical Failure A continuous and on-demand DTC that sets in the APIM when the expected video signal is not received from the rear parking aid camera.
BCM B115E:01 Camera Module: General Electrical Failure A continuous memory and on-demand DTC that sets in the BCM when an internal electrical failure is detected from the rear parking aid camera.
BCM B115E:02 Camera Module: General Signal Failure A continuous memory and on-demand DTC that sets in the BCM when invalid LIN data is received from the rear parking aid camera.
BCM B115E:08 Camera Module: Bus Signal/Message Failures A continuous memory and on-demand DTC that sets in the BCM when messages are missing on the LIN circuit.
BCM B115E:49 Camera Module: Internal Electronic Failure A continuous memory and on-demand DTC that sets in the BCM when an internal fault in the rear parking aid camera is detected.
BCM B115E:9A Camera Module: Component or System Operating Conditions An on-demand DTC that sets in the BCM when a fault in the rear parking aid camera is detected.

Possible Sources

  • Wiring, terminals or connectors
  • Rear parking aid camera
  • BCM concern
  • TR input concern
  • Audio system display (without video display in interior auto-dimming mirror)
  • Fuse
  • Communication concern
  • LIN concern
A1 CHECK AND CLEAN THE REAR VIDEO CAMERA LENS
  • Clean and make sure the rear parking aid camera lens is clear of any debris.
  • Ignition ON.
  • Test the system and verify the parking aid camera image.

Is the parking aid camera concern still present?
Yes GO to A2
No The system is operating correctly at this time. The concern was caused by a dirty parking aid camera lens.

A2 CHECK FOR CORRECT GEAR INPUT
  • While monitoring the reversing lamps, move the selector lever through the entire range.

Do the reversing lamps illuminate only in reverse?
Yes GO to A3
No
REFER to: Reversing Lamps (417-01 Exterior Lighting, Diagnosis and Testing).

A3 CHECK THE BCM (BODY CONTROL MODULE) CONTINUOUS MEMORY DIAGNOSTIC TROUBLE CODES (CMDTCS)
  • Using a diagnostic scan tool, check the BCM Continuous Memory Diagnostic Trouble Codes (CMDTCs).

Are any Continuous Memory Diagnostic Trouble Codes (CMDTCs) present?
Yes For BCM Diagnostic Trouble Codes (DTCs) B115E:01, B115E:02, B115E:08, B115E:49 or B115E:9A, GO to A7
For all other DTCs (diagnostic trouble codes), REFER to the DTC Chart in this section.
No GO to A4

A4 CARRY OUT A NETWORK TEST
  • Using a diagnostic scan tool, carry out a network test.

Do all modules pass the network test?
Yes GO to A5
No
REFER to: Controller Area Network (CAN) Module Communications Network (418-00A Controller Area Network (CAN) Module Communications Network, Diagnosis and Testing).

A5 CHECK FOR DIAGNOSTIC TROUBLE CODES (DTCS) FROM THE APIM (SYNC MODULE) SELF-TEST
  • Using a diagnostic scan tool, carry out the APIM self-test.

Are any Diagnostic Trouble Codes (DTCs) retrieved?
Yes For DTC C1001:01, GO to A6
For all other Diagnostic Trouble Codes (DTCs),
REFER to: Information and Entertainment System (415-00 Information and Entertainment System - General Information - Vehicles With: SYNC 4, Diagnosis and Testing).
No GO to A6

A6 CHECK THE VIDEO DISPLAY
  • Observe the audio system display while placing the selector lever in reverse.
  • Wait 30 seconds.

Does the display switch to parking aid camera mode and display REAR VIDEO CAMERA IS UNAVAILABLE PLEASE CONTACT YOUR DEALERSHIP?
Yes GO to A7
No DIAGNOSE the audio system display.
REFER to: Information and Entertainment System (415-00 Information and Entertainment System - General Information - Vehicles With: SYNC 4, Diagnosis and Testing).

A7 CHECK THE VOLTAGE TO THE CAMERA

NOTE: Before disconnecting the rear parking aid camera, verify that the connector is properly seated and latched.

  • Ignition OFF.
  • Disconnect Liftgate applique C4488A .
  • Ignition ON.
  • Measure:
    Click to display connectors
    Positive Lead Measurement / Action Negative Lead
      C4488A-1   Ground

Is the voltage greater than 11 volts?
Yes GO to A8
No INSPECT BCM fuse 22 (5A). If the fuse is OK, repair the circuit for an open. If the fuse is not OK, REFER to the Wiring Diagrams manual to identify the possible causes of the short circuit.

A8 CHECK FOR GROUND TO THE CAMERA
  • Ignition OFF.
  • Measure:
    Click to display connectors
    Positive Lead Measurement / Action Negative Lead
      C4488A-4   Ground

Is the resistance less than 3 ohms?
Yes GO to A9
No REPAIR the circuit.

A9 CHECK THE VIDEO SIGNAL CIRCUITS FOR A SHORT TO VOLTAGE
  • Disconnect APIM C2383A .
  • Ignition ON.
  • Measure:
    Click to display connectors
    Positive Lead Measurement / Action Negative Lead
      C4488A-2   Ground
      C4488A-3   Ground

Is any voltage present?
Yes REPAIR the circuit in question.
No GO to A10

A10 CHECK THE VIDEO SIGNAL CIRCUITS FOR A SHORT TO GROUND
  • Ignition OFF.
  • Measure:
    Click to display connectors
    Positive Lead Measurement / Action Negative Lead
      C4488A-2   Ground
      C4488A-3   Ground

Are the resistances greater than 10,000 ohms?
Yes GO to A11
No REPAIR the circuit in question.

A11 CHECK THE VIDEO SIGNAL CIRCUITS FOR A SHORT TO THE VIDEO SHIELD
  • Measure:
    Positive Lead Measurement / Action Negative Lead
      C4488A-2   C4488A-4
      C4488A-3   C4488A-4

Are the resistances greater than 10,000 ohms?
Yes GO to A12
No REPAIR the circuit in question.

A12 CHECK THE VIDEO SIGNAL CIRCUITS FOR AN OPEN
  • Connect a fused jumper wire:
    Click to display connectors
    Positive Lead Measurement / Action Negative Lead
      C4488A-2   C4488A-3
  • Measure:
    Click to display connectors
    Positive Lead Measurement / Action Negative Lead
      C2383A-14   C2383A-15

Is the resistance less than 3 ohms?
Yes Remove the fused jumper wire, GO to A14
No Remove the fused jumper wire, GO to A13

A13 CHECK THE VIDEO (+) SIGNAL CIRCUIT FOR AN OPEN
  • Measure:
    Click to display connectors
    Positive Lead Measurement / Action Negative Lead
      C2383A-14   C4488A-3

Is the resistance less than 3 ohms?
Yes REPAIR the video (-) signal circuit.
No REPAIR the video (+) signal circuit.

A14 CHECK THE LIN (LOCAL INTERCONNECT NETWORK) CIRCUIT FOR A SHORT TO VOLTAGE
  • Disconnect BCM C2280E .
  • Disconnect DC / AC inverter C3501 .
  • Ignition ON.
  • Measure:
    Click to display connectors
    Positive Lead Measurement / Action Negative Lead
      C2280E-37   Ground

Is any voltage present?
Yes REPAIR the circuit.
No GO to A15

A15 CHECK THE LIN (LOCAL INTERCONNECT NETWORK) CIRCUIT FOR AN OPEN
  • Ignition OFF.
  • Measure:
    Click to display connectors
    Positive Lead Measurement / Action Negative Lead
      C2280E-37   C4488A-5

Is resistance less than 3 ohms ?
Yes GO to A16
No REPAIR the circuit.

A16 CHECK THE LIN (LOCAL INTERCONNECT NETWORK) CIRCUIT FOR A SHORT TO GROUND
  • Measure:
    Click to display connectors
    Positive Lead Measurement / Action Negative Lead
      C2280E-37   Ground

Is resistance greater than 10,000 ohms?
Yes GO to A17
No REPAIR the circuit.

A17 CHECK FOR REAR PARKING AID CAMERA OPERATION
  • Ignition OFF.
  • Disconnect and inspect the Rear Parking Aid Camera connector.
  • Repair:
    • corrosion (install new connector or terminals – clean module pins)
    • damaged or bent pins – install new terminals/pins
    • pushed-out pins – install new pins as necessary
  • Reconnect the rear parking aid camera connector. Make sure it seats and latches correctly.
  • Operate the system and determine if the concern is still present.

Is the concern still present?
Yes CHECK OASIS for any applicable service articles: TSB , GSB , SSM or FSA . If a service article exists for this concern, DISCONTINUE this test and FOLLOW the service article instructions. If no service articles address this concern, INSTALL a new camera.
REFER to: Rear Parking Aid Camera (413-13B Parking Aid - Vehicles With: Parking Aid Camera, Removal and Installation). If the concern is still present after camera replacement, GO to A18
No The system is operating correctly at this time. The concern may have been caused by a loose or corroded connector. ADDRESS the root cause of any connector or pin issues.

A18 CHECK FOR CORRECT BCM (BODY CONTROL MODULE) OPERATION
  • Ignition OFF.
  • Disconnect and inspect the BCM connectors.
  • Repair:
    • corrosion (install new connector or terminals – clean module pins)
    • damaged or bent pins – install new terminals/pins
    • pushed-out pins – install new pins as necessary
  • Reconnect the BCM connectors. Make sure they seat and latch correctly.
  • Operate the system and determine if the concern is still present.

Is the concern still present?
Yes CHECK OASIS for any applicable service articles: TSB , GSB , SSM or FSA . If a service article exists for this concern, DISCONTINUE this test and FOLLOW the service article instructions. If no service articles address this concern, INSTALL a new BCM .
REFER to: Body Control Module (BCM) (419-10 Multifunction Electronic Modules, Removal and Installation).
No The system is operating correctly at this time. The concern may have been caused by a loose or corroded connector. ADDRESS the root cause of any connector or pin issues.

PINPOINT TEST B: POOR IMAGE QUALITY - WITHOUT IPMA (IMAGE PROCESSING MODULE A)

Refer to Wiring Diagrams Cell 145 for schematic and connector information.

Normal Operation and Fault Conditions

REFER to: Parking Aid - System Operation and Component Description (413-13B Parking Aid - Vehicles With: Parking Aid Camera, Description and Operation).

Possible Sources

  • Dirty or scratched camera lens
  • Wiring, terminals or connectors
  • Rear parking aid camera
  • APIM
  • Interference from other sources

Visual Inspection and Pre-checks

  • Make sure the rear video camera lens is clear of any debris.
B1 CHECK AND CLEAN THE CAMERA LENS
  • Clean and make sure the rear parking aid camera lens is clear of any debris and scratches.
  • Test the rear parking aid camera system while observing the video camera image.

Is the concern still present?
Yes GO to B2
No The system is operating correctly at this time. The concern may have been caused by dirt or debris on the camera lens or intermittent electromagnetic interference from an outside source.

B2 CHECK THE VOLTAGE TO THE REAR CAMERA
  • Ignition OFF.
  • Disconnect Rear Parking Aid Camera C4488A .
  • Ignition ON.
  • Measure:
    Click to display connectors
    Positive Lead Measurement / Action Negative Lead
      C4488A-1   Ground

Is the voltage greater than 11 volts?
Yes GO to B3
No INSPECT BCM fuse 22 (5A). If the fuse is OK, repair the circuit for an open. If the fuse is not OK, REFER to the Wiring Diagrams manual to identify the possible causes of the short circuit.

B3 CHECK THE CAMERA GROUND CIRCUIT
  • Measure:
    Click to display connectors
    Positive Lead Measurement / Action Negative Lead
      C4488A-4   Ground

Is the resistance less than 3 ohms?
Yes GO to B4
No REPAIR the circuit.

B4 CHECK THE VIDEO SIGNAL AND SHIELD CIRCUITS FOR A SHORT TO VOLTAGE
  • Disconnect APIM C2383A .
  • Ignition ON.
  • Measure:
    Click to display connectors
    Positive Lead Measurement / Action Negative Lead
      C4488A-2   Ground
      C4488A-3   Ground
      C4488A-4   Ground

Is any voltage present?
Yes REPAIR the circuit in question.
No GO to B5

B5 CHECK THE VIDEO SIGNAL CIRCUITS FOR A SHORT TO GROUND
  • Ignition OFF.
  • Measure:
    Click to display connectors
    Positive Lead Measurement / Action Negative Lead
      C4488A-3   Ground
      C4488A-4   Ground

Are the resistances greater than 10,000 ohms?
Yes GO to B6
No REPAIR the circuit in question.

B6 CHECK THE VIDEO SIGNAL CIRCUITS FOR A SHORT TO THE VIDEO SHIELD
  • Measure:
    Click to display connectors
    Positive Lead Measurement / Action Negative Lead
      C4488A-3   C4488A-5
      C4488A-4   C4488A-5

Are the resistances greater than 10,000 ohms?
Yes GO to B7
No REPAIR the circuit in question.

B7 CHECK VIDEO SIGNAL CIRCUITS FOR AN OPEN
  • Measure:
    Click to display connectors
    Positive Lead Measurement / Action Negative Lead
      C4488A-2   C2383A-15
      C4488A-3   C2383A-14

Are the resistances less than 3 ohms?
Yes GO to B8
No REPAIR the circuit in question.

B8 CHECK THE VIDEO SHIELD CIRCUIT FOR AN OPEN
  • Measure:
    Click to display connectors
    Positive Lead Measurement / Action Negative Lead
      C4488A-5   C2383A-33

Is the resistance less than 3 ohms?
Yes GO to B9
No REPAIR the circuit

B9 CHECK FOR CORRECT PARKING AID CAMERA OPERATION
  • Ignition OFF.
  • Disconnect and inspect the rear parking aid camera connector.
  • Repair:
    • corrosion (install new connector or terminals – clean module pins)
    • damaged or bent pins – install new terminals/pins
    • pushed-out pins – install new pins as necessary
  • Reconnect the rear parking aid camera connector. Make sure it seats and latches correctly.
  • Operate the system and determine if the concern is still present.

Is the concern still present?
Yes CHECK OASIS for any applicable service articles: TSB , GSB , SSM or FSA . If a service article exists for this concern, DISCONTINUE this test and FOLLOW the service article instructions. If no service articles address this concern, INSTALL a new camera.
REFER to: Rear Parking Aid Camera (413-13B Parking Aid - Vehicles With: Parking Aid Camera, Removal and Installation).
No The system is operating correctly at this time. The concern may have been caused by a loose or corroded connector. ADDRESS the root cause of any connector or pin issues.

PINPOINT TEST C: THE VISUAL PARK AID ALERT IS INOPERATIVE - WITHOUT IPMA (IMAGE PROCESSING MODULE A)

Normal Operation and Fault Conditions

REFER to: Parking Aid - System Operation and Component Description (413-13B Parking Aid - Vehicles With: Parking Aid Camera, Description and Operation).

Possible Sources

  • Rear parking aid camera
  • PAM concern
  • BCM concern

Visual Inspection and Pre-checks

  • If the rear parking aid camera is not configured after replacement, some video functions will be inoperative. Turn the ignition on for 5 minutes to allow the camera/BCM calibration to complete.
C1 CARRY OUT A NETWORK TEST
  • Ignition ON.
  • Using a diagnostic scan tool, carry out a network test.

Do all modules pass the network test?
Yes GO to C2
No
REFER to: Controller Area Network (CAN) Module Communications Network (418-00A Controller Area Network (CAN) Module Communications Network, Diagnosis and Testing).

C2 CHECK THE PAM (PARKING ASSIST CONTROL MODULE) CONTINUOUS MEMORY DIAGNOSTIC TROUBLE CODES (CMDTCS)
  • Using a diagnostic scan tool, check the PAM Continuous Memory Diagnostic Trouble Codes (CMDTCs).

Are any Continuous Memory Diagnostic Trouble Codes (CMDTCs) present?
Yes
REFER to: Parking Aid (413-13A Parking Aid, Diagnosis and Testing).
No GO to C3

C3 CHECK THE BCM (BODY CONTROL MODULE) CONTINUOUS MEMORY DIAGNOSTIC TROUBLE CODES (CMDTCS)
  • Using a diagnostic scan tool, check the BCM Continuous Memory Diagnostic Trouble Codes (CMDTCs).

Are any Continuous Memory Diagnostic Trouble Codes (CMDTCs) present?
Yes REFER to BCM DTC Chart in this section.
No GO to C4

C4 CHECK FOR CORRECT VIDEO CAMERA OPERATION
  • Ignition ON.
  • Disconnect and inspect the rear parking aid camera connector.
  • Repair:
    • corrosion (install new connector or terminals – clean module pins)
    • damaged or bent pins – install new terminals/pins
    • pushed-out pins – install new pins as necessary
  • Reconnect the rear parking aid camera connector. Make sure it seats and latches correctly.
  • Operate the system and determine if the concern is still present.

Is the concern still present?
Yes CHECK OASIS for any applicable service articles: TSB , GSB , SSM or FSA . If a service article exists for this concern, DISCONTINUE this test and FOLLOW the service article instructions. If no service articles address this concern, INSTALL a new camera.
REFER to: Rear Parking Aid Camera (413-13B Parking Aid - Vehicles With: Parking Aid Camera, Removal and Installation).
No The system is operating correctly at this time. The concern may have been caused by a loose or corroded connector. ADDRESS the root cause of any connector or pin issues.

PINPOINT TEST D: THE GUIDELINES ARE INOPERATIVE OR DO NOT OPERATE CORRECTLY - WITHOUT IPMA (IMAGE PROCESSING MODULE A)

NOTE: If the battery has been disconnected or discharged, or a module is disconnected or replaced, the active guidelines may be inoperative until the vehicle is driven on a flat and smooth road at 32 km/h (20 mph) or more, with hands placed loosely on the steering wheel and minimal steering correction for approximately 30 seconds.

If the guidelines remain inoperative, it may be necessary to disconnect the battery for 5 minutes with the driver's door open, then drive the vehicle for 8 kilometers (5 miles) in normal city driving before carrying out the procedure described above.

Normal Operation and Fault Conditions

REFER to: Parking Aid - System Operation and Component Description (413-13B Parking Aid - Vehicles With: Parking Aid Camera, Description and Operation).

Possible Sources

  • Communication network concern
  • Video camera not configured after replacement
  • liftgate position ajar concern
  • Steering wheel position data concern (active guidelines only)
  • Rear parking aid camera
  • ABS module concern (active guidelines only)
  • PSCM concern (active guidelines only)
  • APIM

Visual Inspection and Pre-checks

  • Verify the inoperative feature is enabled in the settings menu. Refer to the Owner's Literature.
  • Verify the liftgate is fully closed.
  • If the rear parking aid camera is not configured after replacement, some video functions will be inoperative. Verify the rear video camera configuration using the diagnostic scan tool.
  • For active guideline concerns, verify the concern was not caused by the steering wheel being in the straight ahead position. Active guidelines are not displayed unless the steering wheel is rotated.
D1 CARRY OUT A NETWORK TEST
  • Ignition ON.
  • Using a diagnostic scan tool, carry out a network test.

Do all modules pass the network test?
Yes If the vehicle is equipped with factory trailer tow, GO to D2
If the vehicle is not equipped with factory trailer tow, GO to D3
No
REFER to: Controller Area Network (CAN) Module Communications Network (418-00A Controller Area Network (CAN) Module Communications Network, Diagnosis and Testing).

D2 CHECK THE DIAGNOSTIC TROUBLE CODES (DTCS) FROM THE TRM (TRAILER MODULE) SELF-TEST
  • Using a diagnostic scan tool, carry out the TRM self-test.

Are any TRM Diagnostic Trouble Codes (DTCs) retrieved?
Yes
REFER to: Trailer Lamps (417-01 Exterior Lighting, Diagnosis and Testing).
No GO to D3

D3 CHECK THE DIAGNOSTIC TROUBLE CODES (DTCS) FROM THE BCM (BODY CONTROL MODULE) SELF-TEST
  • Using a scan tool, carry out the BCM self-test.

Are any BCM Diagnostic Trouble Codes (DTCs) retrieved?
Yes REFER to the BCM DTC Chart in this section.
No For an active guideline concern, GO to D4
For a fixed guideline concern, GO to D6

D4 CHECK THE DIAGNOSTIC TROUBLE CODES (DTCS) FROM THE ABS (ANTI-LOCK BRAKE SYSTEM) MODULE SELF-TEST
  • Using a diagnostic scan tool, carry out the ABS module self-test.

Are any ABS module Diagnostic Trouble Codes (DTCs) retrieved?
Yes
REFER to: Anti-Lock Brake System (ABS) and Stability Control (206-09 Anti-Lock Brake System (ABS) and Stability Control, Diagnosis and Testing).
No GO to D5

D5 CHECK THE DIAGNOSTIC TROUBLE CODES (DTCS) FROM THE PSCM (POWER STEERING CONTROL MODULE) SELF-TEST
  • Using a diagnostic scan tool, carry out the PSCM self-test.

Are any PSCM Diagnostic Trouble Codes (DTCs) retrieved?
Yes
REFER to: Steering Wheel and Column Electrical Components (211-05 Steering Wheel and Column Electrical Components, Diagnosis and Testing).
No GO to D6

D6 CHECK FOR CORRECT REAR PARKING AID CAMERA OPERATION
  • Ignition OFF.
  • Disconnect and inspect the rear parking aid camera connector.
  • Repair:
    • corrosion (install new connector or terminals – clean module pins)
    • damaged or bent pins – install new terminals/pins
    • pushed-out pins – install new pins as necessary
  • Reconnect the rear parking aid camera connector. Make sure it seats and latches correctly.
  • Operate the system and determine if the concern is still present.

Is the concern still present?
Yes CHECK OASIS for any applicable service articles: TSB , GSB , SSM or FSA . If a service article exists for this concern, DISCONTINUE this test and FOLLOW the service article instructions. If no service articles address this concern, INSTALL a new rear parking aid camera.
REFER to: Rear Parking Aid Camera (413-13B Parking Aid - Vehicles With: Parking Aid Camera, Removal and Installation).
If the concern is still present after camera replacement, GO to D7
No The system is operating correctly at this time. The concern may have been caused by a loose or corroded connector. ADDRESS the root cause of any connector or pin issues.

D7 CHECK FOR CORRECT BCM (BODY CONTROL MODULE) OPERATION
  • Ignition OFF.
  • Disconnect and inspect all BCM connectors.
  • Repair:
    • corrosion (install new connector or terminals – clean module pins)
    • damaged or bent pins – install new terminals/pins
    • pushed-out pins – install new pins as necessary
  • Reconnect all BCM connectors. Make sure they seat and latch correctly.
  • Operate the system and determine if the concern is still present.

Is the concern still present?
Yes CHECK OASIS for any applicable service articles: TSB , GSB , SSM or FSA . If a service article exists for this concern, DISCONTINUE this test and FOLLOW the service article instructions. If no service articles address this concern, INSTALL a new BCM .
REFER to: Body Control Module (BCM) (419-10 Multifunction Electronic Modules, Removal and Installation).
No The system is operating correctly at this time. The concern may have been caused by a loose or corroded connector. ADDRESS the root cause of any connector or pin issues.

PINPOINT TEST E: THE MANUAL ZOOM IS INOPERATIVE - WITHOUT IPMA (IMAGE PROCESSING MODULE A)

Normal Operation and Fault Conditions

REFER to: Parking Aid - System Operation and Component Description (413-13B Parking Aid - Vehicles With: Parking Aid Camera, Description and Operation).

Possible Sources

  • Communication network concern
  • Video camera not configured after replacement
  • Rear parking aid camera
  • APIM concern

Visual Inspection and Pre-checks

  • If the rear parking aid camera is not configured after replacement, some video functions will be inoperative. Verify the rear video camera configuration using the diagnostic scan tool.
E1 CARRY OUT A NETWORK TEST
  • Ignition ON.
  • Using a diagnostic scan tool, carry out a network test.

Do all modules pass the network test?
Yes GO to E2
No See the Symptom Chart: Communication Network.
REFER to: Controller Area Network (CAN) Module Communications Network (418-00A Controller Area Network (CAN) Module Communications Network, Diagnosis and Testing).

E2 CHECK FOR RECORDED DIAGNOSTIC TROUBLE CODES (DTCS) FROM THE APIM (SYNC MODULE) SELF-TEST
  • Using a diagnostic scan tool, carry out the APIM self-test.

Are any Diagnostic Trouble Codes present?
Yes For DTC C1001:01, GO to Pinpoint Test A
For all other Diagnostic Trouble Codes (DTCs), see the DTC chart in this section.
No GO to E3

E3 CHECK FOR CORRECT REAR PARKING AID CAMERA OPERATION
  • Ignition OFF.
  • Disconnect and inspect the rear parking aid camera connector.
  • Repair:
    • corrosion (install new connector or terminals – clean module pins)
    • damaged or bent pins – install new terminals/pins
    • pushed-out pins – install new pins as necessary
  • Reconnect the rear parking aid camera connector. Make sure it seats and latches correctly.
  • Operate the system and determine if the concern is still present.

Is the concern still present?
Yes CHECK OASIS for any applicable service articles: TSB , GSB , SSM or FSA . If a service article exists for this concern, DISCONTINUE this test and FOLLOW the service article instructions. If no service articles address this concern, INSTALL a new rear parking aid camera.
REFER to: Rear Parking Aid Camera (413-13B Parking Aid - Vehicles With: Parking Aid Camera, Removal and Installation).
No The system is operating correctly at this time. The concern may have been caused by a loose or corroded connector. ADDRESS the root cause of any connector or pin issues.

PINPOINT TEST F: THE VIDEO DELAY IS INOPERATIVE OR DOES NOT OPERATE CORRECTLY

Normal Operation and Fault Conditions

REFER to: Parking Aid - System Operation and Component Description (413-13B Parking Aid - Vehicles With: Parking Aid Camera, Description and Operation).

Possible Sources

  • Communication network concern
  • The rear parking aid camera delay feature is disabled
  • TR input concern
  • APIM concern

Visual Inspection and Pre-checks

  • Verify the video delay feature is turned on in the settings menu. Refer to the Owner's Literature.
F1 CARRY OUT A NETWORK TEST
  • Ignition ON.
  • Using a diagnostic scan tool, carry out a network test.

Do all modules pass the network test?
Yes GO to F2
No See the Symptom Chart: Communication Network.
REFER to: Controller Area Network (CAN) Module Communications Network (418-00A Controller Area Network (CAN) Module Communications Network, Diagnosis and Testing).

F2 CHECK THE FOR CORRECT GEAR INPUT
  • Apply the parking brake.
  • While monitoring the reversing lamps, rotate to each GSM position (P, R, N, D, S).

Do the reversing lamps illuminate only when reverse gear is selected?
Yes GO to F3
No DIAGNOSE the reversing lamps.
REFER to: Reversing Lamps (417-01 Exterior Lighting, Diagnosis and Testing).

F3 CHECK FOR DIAGNOSTIC TROUBLE CODES (DTCS) FROM THE APIM (SYNC MODULE) SELF-TEST
  • Using a diagnostic scan tool, carry out the APIM self-test.

Are any Diagnostic Trouble Codes (DTCs) retrieved?
Yes • For DTC C1001:01, GO to Pinpoint Test A
• For all other Diagnostic Trouble Codes (DTCs), REFER to the Master DTC Chart.
No GO to F4

F4 CHECK FOR CORRECT APIM (SYNC MODULE) OPERATION
  • Ignition OFF.
  • Disconnect and inspect the APIM connectors.
  • Repair:
    • corrosion (install new connector or terminals – clean module pins)
    • damaged or bent pins – install new terminals/pins
    • pushed-out pins – install new pins as necessary
  • Reconnect the APIM connectors. Make sure they seat and latch correctly.
  • Operate the system and determine if the concern is still present.

Is the concern still present?
Yes CHECK OASIS for any applicable service articles: TSB , GSB , SSM or FSA . If a service article exists for this concern, DISCONTINUE this test and FOLLOW the service article instructions. If no service articles address this concern, INSTALL a new APIM .
REFER to: SYNC Module [APIM] (415-00 Information and Entertainment System - General Information - Vehicles With: SYNC 4, Removal and Installation).
No The system is operating correctly at this time. The concern may have been caused by a loose or corroded connector. ADDRESS the root cause of any connector or pin issues.

PINPOINT TEST G: THE REAR PARKING AID CAMERA IS INOPERATIVE OR DOES NOT OPERATE CORRECTLY - VEHICLES EQUIPPED WITH REAR PARKING AID CAMERA ONLY WITH IPMA (IMAGE PROCESSING MODULE A)

Refer to Wiring Diagrams Cell 145 for schematic and connector information.

Normal Operation and Fault Conditions

REFER to: Parking Aid - System Operation and Component Description (413-13B Parking Aid - Vehicles With: Parking Aid Camera, Description and Operation).

DTC Fault Trigger Conditions

DTC Description Fault Trigger Condition
APIM C1001:01 Vision System Camera: General Electrical Failure A continuous and on-demand DTC that sets in the APIM when an expected video signal is not received from the IPMA .
APIM C1001:02 Vision System Camera: General Signal Failure A continuous and on-demand DTC that sets in the APIM when the video signal is not received from the IPMA .
APIM C1001:1C Vision System Camera: Circuit Voltage Out Of Range A continuous and on-demand DTC that sets in the APIM when an unexpected voltage is detected on the coaxial cable between the IPMA and APIM .
APIM C1001:81 Vision System Camera: Invalid Serial Data Received A continuous and on-demand DTC that sets in the APIM when an expected video signal is not received from the IPMA .
APIM C1001:87 Vision System Camera: Missing Message A continuous and on-demand DTC that sets in the APIM when message is missing from the IPMA over the LVDS .
IPMA B115E:08 Camera Module: Bus Signal/Message Failures A continuous and on-demand DTC that sets in the IPMA when expected communications are not received from the rear parking aid camera over the LVDS .
IPMA B115E:11 Camera Module: Circuit Short To Ground A continuous and on-demand DTC that sets in the IPMA when rear parking aid camera coaxial cable is shorted to ground.
IPMA B115E:15 Camera Module: Circuit Short To Battery Or Open A continuous and on-demand DTC that sets in the IPMA when rear parking aid camera coaxial cable is shorted to battery or open.
IPMA B115E:31 Camera Module: No Signal A continuous and on-demand DTC that sets in the IPMA when expected video signals are not received from the rear parking aid camera over the coaxial cable.
IPMA B115E:92 Camera Module: Performance Or Incorrect Operation A continuous and on-demand DTC that sets in the IPMA when expected video signals are not received from the rear parking aid camera over the coaxial cable.
IPMA B1300:12 Video Output 'A': Circuit Short To Battery A continuous and on-demand DTC that sets in the IPMA when the analog video signal to the APIM is shorted to battery.

Possible Sources

  • Coaxial cable
  • Communication network concern
  • TR input concern
  • Vehicle speed input concern
  • Rear parking aid camera
  • IPMA
G1 CHECK FOR CORRECT GEAR INPUT AT THE IPC (INSTRUMENT PANEL CLUSTER)
  • Ignition ON.
  • While monitoring the IPC PRNDL indicator, briefly select each gear in the entire range.

Does the IPC PRNDL indicator match the actual gear selection?
Yes GO to G2
No DIAGNOSE the PRNDL indicator.
REFER to: Instrumentation, Message Center and Warning Chimes (413-01 Instrumentation, Message Center and Warning Chimes, Diagnosis and Testing).

G2 CHECK FOR CORRECT SPEEDOMETER OPERATION
  • Verify the operation of the speedometer.

Does the speedometer operate correctly?
Yes GO to G3
No DIAGNOSE the speedometer.
REFER to: Instrumentation, Message Center and Warning Chimes (413-01 Instrumentation, Message Center and Warning Chimes, Diagnosis and Testing).

G3 CARRY OUT A NETWORK TEST
  • Using a diagnostic scan tool, carry out a network test.

Do all modules pass the network test?
Yes GO to G4
No See the Symptom Chart: Communication Network.
REFER to: Controller Area Network (CAN) Module Communications Network (418-00A Controller Area Network (CAN) Module Communications Network, Diagnosis and Testing).

G4 CHECK THE DISPLAY
  • NOTE: Some fault conditions may cause the actual camera image(s) not to be displayed. Observe the audio system display.
  • Select REVERSE.
  • Wait 30 seconds.

Does the audio system display switch to parking aid camera display mode?
Yes Select PARK. GO to G5
No Select PARK. DIAGNOSE the display.
REFER to: Information and Entertainment System (415-00 Information and Entertainment System - General Information - Vehicles With: SYNC 4, Diagnosis and Testing).

G5 CHECK THE REAR CAMERA COAXIAL CABLE CORE AND SHIELD FOR A SHORT TO VOLTAGE
  • Ignition OFF.
  • Disconnect IPMA C242F .
  • Disconnect Rear parking aid camera C4352B .
  • Ignition ON.
  • Measure VDC :
    Click to display connectors
    Positive Lead Measurement / Action Negative Lead
    C242E-2 coaxial cable core   Ground
    C242E-2 coaxial cable shield   Ground

Is any DC voltage present?
Yes REPLACE the affected coaxial cable.
No GO to G6

G6 CHECK THE REAR CAMERA COAXIAL CABLE CORE FOR A SHORT TO GROUND
  • Ignition OFF.
  • Measure:
    Click to display connectors
    Positive Lead Measurement / Action Negative Lead
    C242E-2 coaxial cable core   Ground

Is the resistance greater than 10,000 ohms?
Yes GO to G7
No REPLACE the affected coaxial cable.

G7 CHECK THE REAR CAMERA COAXIAL CABLE CORE AND SHIELD FOR AN OPEN
  • Measure:
    Click to display connectors
    Positive Lead Measurement / Action Negative Lead
    C242E-2 coaxial cable core C4352B-1 coaxial cable core
    C242E-2 coaxial cable shield C4352B-1 coaxial cable shield

Are the resistances less than 3 ohms?
Yes GO to G8
No REPLACE the affected coaxial cable.

G8 CHECK THE REAR CAMERA COAXIAL CABLE CORE AND SHIELD FOR A SHORT TOGETHER
  • Measure:
    Click to display connectors
    Positive Lead Measurement / Action Negative Lead
    C242E-2 coaxial cable core C242E-2 coaxial cable shield

Is the resistance greater than 10,000 ohms?
Yes INSTALL a new rear parking aid camera.
REFER to: Rear Parking Aid Camera (413-13B Parking Aid - Vehicles With: Parking Aid Camera, Removal and Installation).
If the concern is still present after camera replacement, GO to G9
No REPLACE the affected coaxial cable.

G9 CHECK THE IPMA (IMAGE PROCESSING MODULE A) TO APIM (SYNC MODULE) COAXIAL CABLE CORE AND SHIELD FOR A SHORT TO VOLTAGE
  • Ignition OFF.
  • Disconnect IPMA C242F .
  • Disconnect APIM C2383E, or with Duer-OS, C2342I .
  • Ignition ON.
  • Measure VDC :
    Click to display connectors
    Positive Lead Measurement / Action Negative Lead
    C242F-1 coaxial cable core   Ground
    C242F-1 coaxial cable shield   Ground

Is any DC voltage present?
Yes REPLACE the affected coaxial cable.
No GO to G10

G10 CHECK THE COAXIAL CABLE CORE FOR A SHORT TO GROUND
  • Ignition OFF.
  • Measure:
    Click to display connectors
    Positive Lead Measurement / Action Negative Lead
    C242F-1 coaxial cable core   Ground

Is the resistance greater than 10,000 ohms?
Yes GO to G11
No REPLACE the affected coaxial cable.

G11 CHECK THE COAXIAL CABLE CORE AND SHIELD FOR AN OPEN
  • Measure:
    Click to display connectors

      SYNC 4


    Positive Lead Measurement / Action Negative Lead
    C242F-1 coaxial cable core C2383E-1 coaxial cable core
    C242F-1 coaxial cable shield C2383E-1 coaxial cable shield

    Click to display connectors

      Duer-OS


    Positive Lead Measurement / Action Negative Lead
    C242F-1 coaxial cable core C2342I-1 coaxial cable core
    C242F-1 coaxial cable shield C2342I-1 coaxial cable shield

Are the resistances less than 3 ohms?
Yes GO to G12
No REPLACE the affected coaxial cable.

G12 CHECK THE COAXIAL CABLE CORE AND SHIELD FOR A SHORT TOGETHER
  • Measure:
    Click to display connectors
    Positive Lead Measurement / Action Negative Lead
    C242F-1 coaxial cable core C242F-1 coaxial cable shield

Is the resistance greater than 10,000 ohms?
Yes INSTALL a new rear parking aid camera.
REFER to: Rear Parking Aid Camera (413-13B Parking Aid - Vehicles With: Parking Aid Camera, Removal and Installation).
If the concern is still present after camera replacement, GO to G13
No REPLACE the affected coaxial cable.

G13 CHECK FOR CORRECT IPMA (IMAGE PROCESSING MODULE A) OPERATION
  • Ignition OFF.
  • Disconnect and inspect the IPMA connectors.
  • Repair:
    • corrosion (install new connector or terminals – clean module pins)
    • damaged or bent pins – install new terminals/pins
    • pushed-out pins – install new pins as necessary
  • Reconnect the IPMA connectors. Make sure they seat and latch correctly.
  • Operate the system and determine if the concern is still present.

Is the concern still present?
Yes CHECK OASIS for any applicable service articles: TSB , GSB , SSM or FSA . If a service article exists for this concern, DISCONTINUE this test and FOLLOW the service article instructions. If no service articles address this concern, INSTALL a new IPMA .
REFER to: Image Processing Module A (IPMA) (419-07 Lane Keeping System, Removal and Installation).
If the concern is still present after IPMA replacement, GO to G14
No The system is operating correctly at this time. The concern may have been caused by a loose or corroded connector. ADDRESS the root cause of any connector or pin issues.

G14 CHECK FOR CORRECT APIM (SYNC MODULE) OPERATION
  • Ignition OFF.
  • Disconnect and inspect the APIM connectors.
  • Repair:
    • corrosion (install new connector or terminals – clean module pins)
    • damaged or bent pins – install new terminals/pins
    • pushed-out pins – install new pins as necessary
  • Reconnect the APIM connectors. Make sure they seat and latch correctly.
  • Operate the system and determine if the concern is still present.

Is the concern still present?
Yes CHECK OASIS for any applicable service articles: TSB , GSB , SSM or FSA . If a service article exists for this concern, DISCONTINUE this test and FOLLOW the service article instructions. If no service articles address this concern, INSTALL a new APIM .
REFER to: SYNC Module [APIM] (415-00 Information and Entertainment System - General Information - Vehicles With: SYNC 4, Removal and Installation).
No The system is operating correctly at this time. The concern may have been caused by a loose or corroded connector. ADDRESS the root cause of any connector or pin issues.

PINPOINT TEST H: ALL 360 DEGREE CAMERA VIEWS ARE INOPERATIVE OR DO NOT OPERATE CORRECTLY

Refer to Wiring Diagrams Cell 145 for schematic and connector information.

Normal Operation and Fault Conditions

REFER to: Parking Aid - System Operation and Component Description (413-13B Parking Aid - Vehicles With: Parking Aid Camera, Description and Operation).

DTC Fault Trigger Conditions

DTC Description Fault Trigger Condition
APIM C1001:02 Vision System Camera: General Signal Failure A continuous and on-demand DTC that sets in the APIM when the video signal is not received from the IPMA .
APIM C1001:1C Vision System Camera: Circuit Voltage Out Of Range A continuous and on-demand DTC that sets in the APIM when an unexpected voltage is detected on the coaxial cable between the IPMA and APIM .
APIM C1001:81 Vision System Camera: Invalid Serial Data Received A continuous and on-demand DTC that sets in the APIM when an expected video signal is not received from the IPMA .
APIM C1001:87 Vision System Camera: Missing Message A continuous and on-demand DTC that sets in the APIM when message is missing from the IPMA over the LVDS .

Possible Sources

  • Wiring, terminals or connectors
  • Communication network concern
  • TR input concern
  • Infotainment display concern
  • IPMA
H1 CHECK FOR CORRECT GEAR INPUT AT THE IPC (INSTRUMENT PANEL CLUSTER)
  • Ignition ON.
  • While monitoring the IPC PRNDL indicator, briefly select each gear in the entire range.

Does the IPC PRNDL indicator match the actual gear selection?
Yes GO to H2
No DIAGNOSE the PRNDL indicator.
REFER to: Instrumentation, Message Center and Warning Chimes (413-01 Instrumentation, Message Center and Warning Chimes, Diagnosis and Testing).

H2 CARRY OUT A NETWORK TEST
  • Using a diagnostic scan tool, carry out a network test.

Do all modules pass the network test?
Yes GO to H3
No See the Symptom Chart: Communication Network.
REFER to: Controller Area Network (CAN) Module Communications Network (418-00A Controller Area Network (CAN) Module Communications Network, Diagnosis and Testing).

H3 CHECK THE DISPLAY
  • NOTE: Some fault conditions may cause the actual camera image(s) not to be displayed. Observe the audio system display.
  • Select REVERSE.
  • Wait 30 seconds.

Does the audio system display switch to parking aid camera display mode?
Yes Select PARK. GO to H4
No Select PARK. DIAGNOSE the display.
REFER to: Information and Entertainment System (415-00 Information and Entertainment System - General Information - Vehicles With: SYNC 4, Diagnosis and Testing).

H4 CHECK FOR DIAGNOSTIC TROUBLE CODES (DTCS) FROM THE IPMA (IMAGE PROCESSING MODULE A) SELF-TEST
  • Using the diagnostic scan tool, carry out the IPMA self-test.

Are any Diagnostic Trouble Codes (DTCs) retrieved?
Yes REFER to the IPMA DTC Chart in this section.
No GO to H5

H5 CHECK THE COAXIAL CABLE CORE AND SHIELD FOR A SHORT TO VOLTAGE
  • Ignition OFF.
  • Disconnect IPMA C242F .
  • Disconnect APIM C2383E or C2342I with Duer-OS .
  • Ignition ON.
  • Measure VDC :
    Click to display connectors
    Positive Lead Measurement / Action Negative Lead
    C242F-1 coaxial cable core   Ground
    C242F-1 coaxial cable shield   Ground

Is any DC voltage present?
Yes REPLACE the affected coaxial cable.
No GO to H6

H6 CHECK THE COAXIAL CABLE CORE FOR A SHORT TO GROUND
  • Ignition OFF.
  • Measure:
    Click to display connectors
    Positive Lead Measurement / Action Negative Lead
    C242F-1 coaxial cable core   Ground

Is the resistance greater than 10,000 ohms?
Yes GO to H7
No REPLACE the affected coaxial cable.

H7 CHECK THE COAXIAL CABLE CORE AND SHIELD FOR AN OPEN
  • Measure:
    Click to display connectors

      Duer-OS


    Positive Lead Measurement / Action Negative Lead
    C242F-1 coaxial cable core C2342I-1 coaxial cable core
    C242F-1 coaxial cable shield C2342I-1 coaxial cable shield

    Click to display connectors

      All other models


    Positive Lead Measurement / Action Negative Lead
    C242F-1 coaxial cable core C2383E-1 coaxial cable core
    C242F-1 coaxial cable shield C2383E-1 coaxial cable shield

Are the resistances less than 3 ohms?
Yes GO to H8
No REPLACE the affected coaxial cable.

H8 CHECK THE COAXIAL CABLE CORE AND SHIELD FOR A SHORT TOGETHER
  • Measure:
    Click to display connectors
    Positive Lead Measurement / Action Negative Lead
    C242F-1 coaxial cable core C242F-1 coaxial cable shield

Is the resistance greater than 10,000 ohms?
Yes INSTALL a new rear parking aid camera.
REFER to: Rear Parking Aid Camera (413-13B Parking Aid - Vehicles With: Parking Aid Camera, Removal and Installation).
If the concern is still present after camera replacement, GO to H9
No REPLACE the affected coaxial cable.

H9 CHECK FOR CORRECT IPMA (IMAGE PROCESSING MODULE A) OPERATION
  • Ignition OFF.
  • Disconnect and inspect the IPMA connectors.
  • Repair:
    • corrosion (install new connector or terminals – clean module pins)
    • damaged or bent pins – install new terminals/pins
    • pushed-out pins – install new pins as necessary
  • Reconnect the IPMA connectors. Make sure they seat and latch correctly.
  • Operate the system and determine if the concern is still present.

Is the concern still present?
Yes CHECK OASIS for any applicable service articles: TSB , GSB , SSM or FSA . If a service article exists for this concern, DISCONTINUE this test and FOLLOW the service article instructions. If no service articles address this concern, INSTALL a new IPMA .
REFER to: Image Processing Module A (IPMA) (419-07 Lane Keeping System, Removal and Installation).
If the concern is still present after IPMA replacement, GO to H10
No The system is operating correctly at this time. The concern may have been caused by a loose or corroded connector. ADDRESS the root cause of any connector or pin issues.

H10 CHECK FOR CORRECT APIM (SYNC MODULE) OPERATION
  • Ignition OFF.
  • Disconnect and inspect the APIM connectors.
  • Repair:
    • corrosion (install new connector or terminals – clean module pins)
    • damaged or bent pins – install new terminals/pins
    • pushed-out pins – install new pins as necessary
  • Reconnect the APIM connectors. Make sure they seat and latch correctly.
  • Operate the system and determine if the concern is still present.

Is the concern still present?
Yes CHECK OASIS for any applicable service articles: TSB , GSB , SSM or FSA . If a service article exists for this concern, DISCONTINUE this test and FOLLOW the service article instructions. If no service articles address this concern, INSTALL a new APIM .
REFER to: SYNC Module [APIM] (415-00 Information and Entertainment System - General Information - Vehicles With: SYNC 4, Removal and Installation).
No The system is operating correctly at this time. The concern may have been caused by a loose or corroded connector. ADDRESS the root cause of any connector or pin issues.

PINPOINT TEST I: POOR IMAGE QUALITY - VEHICLES WITH IPMA (IMAGE PROCESSING MODULE A)

NOTE: Before disconnecting any of the cameras, verify the connectors are properly seated and latched.


Refer to Wiring Diagrams Cell 145 for schematic and connector information.

Normal Operation and Fault Conditions

The video signals are transmitted from each camera to the IPMA on a coaxial cable. The IPMA processes the image data and sends a single video image to the APIM via coaxial cable. REFER to: Parking Aid - System Operation and Component Description (413-13B Parking Aid - Vehicles With: Parking Aid Camera, Description and Operation).

Possible Sources

  • Dirty or scratched camera lens
  • Fuse
  • Wiring, terminals or connectors
  • Coaxial cable
  • Camera
  • IPMA
  • APIM concern

Visual Inspection and Pre-checks

  • Inspect the camera lenses for damage, dirt, debris and scratches.
I1 INSPECT THE CAMERA IMAGES
  • Ignition ON.
  • Press the camera selection switch.
  • Inspect the image(s) to determine which camera is/are affected.
    • 1 - Front camera
    • 2 - LH side camera
    • 3 - RH side camera
    • 4 - Rear camera

Does the poor image quality affect more than one camera image?
Yes GO to Pinpoint Test H
No • For a front camera concern, GO to I2
• For a rear camera concern, GO to I6
• For a LH side camera concern, GO to I10
• For a RH side camera concern, GO to I14

I2 CHECK THE FRONT CAMERA COAXIAL CABLE CORE AND SHIELD FOR A SHORT TO VOLTAGE
  • Ignition OFF.
  • Disconnect IPMA C242E .
  • Disconnect Front parking aid camera C1663 .
  • Ignition ON.
  • Measure VDC :
    Click to display connectors
    Positive Lead Measurement / Action Negative Lead
    C242E-1 coaxial cable core   Ground
    C242E-1 coaxial cable shield   Ground

Is any DC voltage present?
Yes REPLACE the affected coaxial cable.
No GO to I3

I3 CHECK THE FRONT CAMERA COAXIAL CABLE CORE FOR A SHORT TO GROUND
  • Ignition OFF.
  • Measure:
    Click to display connectors
    Positive Lead Measurement / Action Negative Lead
    C242E-1 coaxial cable core   Ground

Is the resistance greater than 10,000 ohms?
Yes GO to I4
No REPLACE the affected coaxial cable.

I4 CHECK THE FRONT CAMERA COAXIAL CABLE CORE AND SHIELD FOR AN OPEN
  • Measure:
    Click to display connectors
    Positive Lead Measurement / Action Negative Lead
    C242E-1 coaxial cable core C1663-1 coaxial cable core
    C242E-1 coaxial cable shield C1663-1 coaxial cable shield

Are the resistances less than 3 ohms?
Yes GO to I5
No REPLACE the affected coaxial cable.

I5 CHECK THE FRONT CAMERA COAXIAL CABLE CORE AND SHIELD FOR A SHORT TOGETHER
  • Measure:
    Click to display connectors
    Positive Lead Measurement / Action Negative Lead
    C242E-1 coaxial cable core C242E-1 coaxial cable shield

Is the resistance greater than 10,000 ohms?
Yes INSTALL a new front parking aid camera.
REFER to: Front Parking Aid Camera (413-13B Parking Aid - Vehicles With: Parking Aid Camera, Removal and Installation).
If the concern is still present after camera replacement, GO to I18
No REPLACE the affected coaxial cable.

I6 CHECK THE REAR CAMERA COAXIAL CABLE CORE AND SHIELD FOR A SHORT TO VOLTAGE
  • Ignition OFF.
  • Disconnect IPMA C242E .
  • Disconnect Rear parking aid camera C4352B .
  • Ignition ON.
  • Measure VDC :
    Click to display connectors
    Positive Lead Measurement / Action Negative Lead
    C242E-2 coaxial cable core   Ground
    C242E-2 coaxial cable shield   Ground

Is any DC voltage present?
Yes REPLACE the affected coaxial cable.
No GO to I7

I7 CHECK THE REAR CAMERA COAXIAL CABLE CORE FOR A SHORT TO GROUND
  • Ignition OFF.
  • Measure:
    Click to display connectors
    Positive Lead Measurement / Action Negative Lead
    C242E-2 coaxial cable core   Ground

Is the resistance greater than 10,000 ohms?
Yes GO to I8
No REPLACE the affected coaxial cable.

I8 CHECK THE REAR CAMERA COAXIAL CABLE CORE AND SHIELD FOR AN OPEN
  • Measure:
    Click to display connectors
    Positive Lead Measurement / Action Negative Lead
    C242E-2 coaxial cable core C4352B-1 coaxial cable core
    C242E-2 coaxial cable shield C4352B-1 coaxial cable shield

Are the resistances less than 3 ohms?
Yes GO to I9
No REPLACE the affected coaxial cable.

I9 CHECK THE REAR CAMERA COAXIAL CABLE CORE AND SHIELD FOR A SHORT TOGETHER
  • Measure:
    Click to display connectors
    Positive Lead Measurement / Action Negative Lead
    C242E-2 coaxial cable core C242E-2 coaxial cable shield

Is the resistance greater than 10,000 ohms?
Yes INSTALL a new rear parking aid camera.
REFER to: Rear Parking Aid Camera (413-13B Parking Aid - Vehicles With: Parking Aid Camera, Removal and Installation).
If the concern is still present after camera replacement, GO to I18
No REPLACE the affected coaxial cable.

I10 CHECK THE LH (LEFT-HAND) SIDE CAMERA COAXIAL CABLE CORE AND SHIELD FOR A SHORT TO VOLTAGE
  • Ignition OFF.
  • Disconnect IPMA C242E .
  • Disconnect LH side camera C5104 .
  • Ignition ON.
  • Measure VDC :
    Click to display connectors
    Positive Lead Measurement / Action Negative Lead
    C242E-3 coaxial cable core   Ground
    C242E-3 coaxial cable shield   Ground

Is any DC voltage present?
Yes REPLACE the affected coaxial cable.
No GO to I11

I11 CHECK THE LH (LEFT-HAND) SIDE CAMERA COAXIAL CABLE CORE FOR A SHORT TO GROUND
  • Ignition OFF.
  • Measure:
    Click to display connectors
    Positive Lead Measurement / Action Negative Lead
    C242E-3 coaxial cable core   Ground

Is the resistance greater than 10,000 ohms?
Yes GO to I12
No REPLACE the affected coaxial cable.

I12 CHECK THE LH (LEFT-HAND) SIDE CAMERA COAXIAL CABLE CORE AND SHIELD FOR AN OPEN
  • Measure:
    Click to display connectors
    Positive Lead Measurement / Action Negative Lead
    C242E-3 coaxial cable core C5104-1 coaxial cable core
    C242E-3 coaxial cable shield C5104-1 coaxial cable shield

Are the resistances less than 3 ohms?
Yes GO to I13
No REPLACE the affected coaxial cable.

I13 CHECK THE LH (LEFT-HAND) SIDE CAMERA COAXIAL CABLE CORE AND SHIELD FOR A SHORT TOGETHER
  • Measure:
    Click to display connectors
    Positive Lead Measurement / Action Negative Lead
    C242E-3 coaxial cable core C242E-3 coaxial cable shield

Is the resistance greater than 10,000 ohms?
Yes INSTALL a new LH side camera.
REFER to: Side Parking Aid Camera (413-13B Parking Aid - Vehicles With: Parking Aid Camera, Removal and Installation).
If the concern is still present after camera replacement, GO to I18
No REPLACE the affected coaxial cable.

I14 CHECK THE RH (RIGHT-HAND) SIDE CAMERA COAXIAL CABLE CORE AND SHIELD FOR A SHORT TO VOLTAGE
  • Ignition OFF.
  • Disconnect IPMA C242E .
  • Disconnect RH side parking aid camera C6104 .
  • Ignition ON.
  • Measure VDC :
    Click to display connectors
    Positive Lead Measurement / Action Negative Lead
    C242E-4 coaxial cable core   Ground
    C242E-4 coaxial cable shield   Ground

Is any DC voltage present?
Yes REPLACE the affected coaxial cable.
No GO to I15

I15 CHECK THE RH (RIGHT-HAND) SIDE CAMERA COAXIAL CABLE CORE FOR A SHORT TO GROUND
  • Ignition OFF.
  • Measure:
    Click to display connectors
    Positive Lead Measurement / Action Negative Lead
    C242E-4 coaxial cable core   Ground

Is the resistance greater than 10,000 ohms?
Yes GO to I16
No REPLACE the affected coaxial cable.

I16 CHECK THE RH (RIGHT-HAND) SIDE CAMERA COAXIAL CABLE CORE AND SHIELD FOR AN OPEN
  • Measure:
    Click to display connectors
    Positive Lead Measurement / Action Negative Lead
    C242E-4 coaxial cable core C6104-1 coaxial cable core
    C242E-4 coaxial cable shield C6104-1 coaxial cable shield

Are the resistances less than 3 ohms?
Yes GO to I17
No REPLACE the affected coaxial cable.

I17 CHECK THE RH (RIGHT-HAND) SIDE CAMERA COAXIAL CABLE CORE AND SHIELD FOR A SHORT TOGETHER
  • Measure:
    Click to display connectors
    Positive Lead Measurement / Action Negative Lead
    C242E-4 coaxial cable core C242E-4 coaxial cable shield

Is the resistance greater than 10,000 ohms?
Yes INSTALL a new RH side camera.
REFER to: Side Parking Aid Camera (413-13B Parking Aid - Vehicles With: Parking Aid Camera, Removal and Installation).
If the concern is still present after camera replacement, GO to I18
No REPLACE the affected coaxial cable.

I18 CHECK FOR CORRECT IPMA (IMAGE PROCESSING MODULE A) OPERATION
  • Ignition OFF.
  • Disconnect and inspect the IPMA connectors.
  • Repair:
    • corrosion (install new connector or terminals – clean module pins)
    • damaged or bent pins – install new terminals/pins
    • pushed-out pins – install new pins as necessary
  • Reconnect the IPMA connectors. Make sure they seat and latch correctly.
  • Operate the system and determine if the concern is still present.

Is the concern still present?
Yes CHECK OASIS for any applicable service articles: TSB , GSB , SSM or FSA . If a service article exists for this concern, DISCONTINUE this test and FOLLOW the service article instructions. If no service articles address this concern, INSTALL a new IPMA .
REFER to: Image Processing Module A (IPMA) (419-07 Lane Keeping System, Removal and Installation).
No The system is operating correctly at this time. The concern may have been caused by a loose or corroded connector. ADDRESS the root cause of any connector or pin issues.

PINPOINT TEST J: THE REAR PARKING AID CAMERA IS INOPERATIVE OR DOES NOT OPERATE CORRECTLY - VEHICLES EQUIPPED WITH 360 DEGREE VIEW CAMERA

Refer to Wiring Diagrams Cell 145 for schematic and connector information.

Normal Operation and Fault Conditions

REFER to: Parking Aid - System Operation and Component Description (413-13B Parking Aid - Vehicles With: Parking Aid Camera, Description and Operation).

DTC Fault Trigger Conditions

DTC Description Fault Trigger Condition
IPMA B115E:08 Camera Module: Bus Signal/Message Failures A continuous and on-demand DTC that sets in the IPMA when expected communications are not received from the rear parking aid camera over the LVDS .
IPMA B115E:11 Camera Module: Circuit Short To Ground A continuous and on-demand DTC that sets in the IPMA when rear parking aid camera coaxial cable is shorted to ground.
IPMA B115E:15 Camera Module: Circuit Short To Battery Or Open A continuous and on-demand DTC that sets in the IPMA when rear parking aid camera coaxial cable is shorted to battery or open.
IPMA B115E:31 Camera Module: No Signal A continuous and on-demand DTC that sets in the IPMA when expected video signals are not received from the rear parking aid camera over the coaxial cable.
IPMA B115E:92 Camera Module: Performance Or Incorrect Operation A continuous and on-demand DTC that sets in the IPMA when expected video signals are not received from the rear parking aid camera over the coaxial cable.

Possible Sources

  • Coaxial cable
  • Communication network concern
  • TR input concern
  • Vehicle speed input concern
  • Rear parking aid camera
  • IPMA
J1 CHECK FOR CORRECT GEAR INPUT AT THE IPC (INSTRUMENT PANEL CLUSTER)
  • Ignition ON.
  • While monitoring the IPC PRNDL indicator, briefly select each gear in the entire range.

Does the IPC PRNDL indicator match the actual gear selection?
Yes GO to J2
No DIAGNOSE the PRNDL indicator.
REFER to: Instrumentation, Message Center and Warning Chimes (413-01 Instrumentation, Message Center and Warning Chimes, Diagnosis and Testing).

J2 CHECK FOR CORRECT SPEEDOMETER OPERATION
  • Verify the operation of the speedometer.

Does the speedometer operate correctly?
Yes GO to J3
No DIAGNOSE the speedometer.
REFER to: Instrumentation, Message Center and Warning Chimes (413-01 Instrumentation, Message Center and Warning Chimes, Diagnosis and Testing).

J3 CARRY OUT A NETWORK TEST
  • Using a diagnostic scan tool, carry out a network test.

Do all modules pass the network test?
Yes GO to J4
No See the Symptom Chart: Communication Network.
REFER to: Controller Area Network (CAN) Module Communications Network (418-00A Controller Area Network (CAN) Module Communications Network, Diagnosis and Testing).

J4 CHECK THE DISPLAY
  • NOTE: Some fault conditions may cause the actual camera image(s) not to be displayed. Observe the audio system display.
  • Select REVERSE.
  • Wait 30 seconds.

Does the audio system display switch to parking aid camera display mode?
Yes Select PARK. GO to J5
No Select PARK. DIAGNOSE the display.
REFER to: Information and Entertainment System (415-00 Information and Entertainment System - General Information - Vehicles With: SYNC 4, Diagnosis and Testing).

J5 CHECK THE REAR CAMERA COAXIAL CABLE CORE AND SHIELD FOR A SHORT TO VOLTAGE
  • Ignition OFF.
  • Disconnect IPMA C242E .
  • Disconnect Rear parking aid camera C4352B .
  • Ignition ON.
  • Measure VDC :
    Click to display connectors
    Positive Lead Measurement / Action Negative Lead
    C242E-2 coaxial cable core   Ground
    C242E-2 coaxial cable shield   Ground

Is any DC voltage present?
Yes REPLACE the affected coaxial cable.
No GO to J6

J6 CHECK THE REAR CAMERA COAXIAL CABLE CORE FOR A SHORT TO GROUND
  • Ignition OFF.
  • Measure:
    Click to display connectors
    Positive Lead Measurement / Action Negative Lead
    C242E-2 coaxial cable core   Ground

Is the resistance greater than 10,000 ohms?
Yes GO to J7
No REPLACE the affected coaxial cable.

J7 CHECK THE REAR CAMERA COAXIAL CABLE CORE AND SHIELD FOR AN OPEN
  • Measure:
    Click to display connectors
    Positive Lead Measurement / Action Negative Lead
    C242E-2 coaxial cable core C4352B-1 coaxial cable core
    C242E-2 coaxial cable shield C4352B-1 coaxial cable shield

Are the resistances less than 3 ohms?
Yes GO to J8
No REPLACE the affected coaxial cable.

J8 CHECK THE REAR CAMERA COAXIAL CABLE CORE AND SHIELD FOR A SHORT TOGETHER
  • Measure:
    Click to display connectors
    Positive Lead Measurement / Action Negative Lead
    C242E-2 coaxial cable core C242E-2 coaxial cable shield

Is the resistance greater than 10,000 ohms?
Yes INSTALL a new rear parking aid camera.
REFER to: Rear Parking Aid Camera (413-13B Parking Aid - Vehicles With: Parking Aid Camera, Removal and Installation).
If the concern is still present after camera replacement, GO to J9
No REPLACE the affected coaxial cable.

J9 CHECK FOR CORRECT IPMA (IMAGE PROCESSING MODULE A) OPERATION
  • Ignition OFF.
  • Disconnect and inspect the IPMA connectors.
  • Repair:
    • corrosion (install new connector or terminals – clean module pins)
    • damaged or bent pins – install new terminals/pins
    • pushed-out pins – install new pins as necessary
  • Reconnect the IPMA connectors. Make sure they seat and latch correctly.
  • Operate the system and determine if the concern is still present.

Is the concern still present?
Yes CHECK OASIS for any applicable service articles: TSB , GSB , SSM or FSA . If a service article exists for this concern, DISCONTINUE this test and FOLLOW the service article instructions. If no service articles address this concern, INSTALL a new IPMA . REFER to: Image Processing Module A (IPMA) (419-07 Lane Keeping System, Removal and Installation).
No The system is operating correctly at this time. The concern may have been caused by a loose or corroded connector. ADDRESS the root cause of any connector or pin issues.

PINPOINT TEST K: THE FRONT PARKING AID CAMERA IS INOPERATIVE OR DOES NOT OPERATE CORRECTLY

Refer to Wiring Diagrams Cell 145 for schematic and connector information.

Normal Operation and Fault Conditions

REFER to: Parking Aid - System Operation and Component Description (413-13B Parking Aid - Vehicles With: Parking Aid Camera, Description and Operation).

DTC Fault Trigger Conditions

DTC Description Fault Trigger Condition
IPMA B148E:11 Front Camera: Circuit Short To Ground A continuous and on-demand DTC that sets in the IPMA when front parking aid camera coaxial cable is shorted to ground.
IPMA B148E:15 Front Camera: Circuit Short To Battery Or Open A continuous and on-demand DTC that sets in the IPMA when front parking aid camera coaxial cable is shorted to battery or open.
IPMA B148E:31 Front Camera: No Signal A continuous and on-demand DTC that sets in the IPMA when expected video signals are not received from the front parking aid camera over the coaxial cable.

Possible Sources

  • Communication network concern
  • TR input concern
  • Vehicle speed input concern
  • Front parking aid camera
  • Display concern
  • IPMA
K1 CHECK FOR CORRECT GEAR INPUT AT THE IPC (INSTRUMENT PANEL CLUSTER)
  • Ignition ON.
  • While monitoring the IPC PRNDL indicator, briefly select each gear in the entire range.

Does the IPC PRNDL indicator match the actual gear selection?
Yes GO to K2
No DIAGNOSE the PRNDL indicator.
REFER to: Instrumentation, Message Center and Warning Chimes (413-01 Instrumentation, Message Center and Warning Chimes, Diagnosis and Testing).

K2 CHECK FOR CORRECT SPEEDOMETER OPERATION
  • Verify the operation of the speedometer.

Does the speedometer operate correctly?
Yes GO to K3
No DIAGNOSE the speedometer.
REFER to: Instrumentation, Message Center and Warning Chimes (413-01 Instrumentation, Message Center and Warning Chimes, Diagnosis and Testing).

K3 CARRY OUT A NETWORK TEST
  • Using a diagnostic scan tool, carry out a network test.

Do all modules pass the network test?
Yes GO to K4
No See the Symptom Chart: Communication Network.
REFER to: Controller Area Network (CAN) Module Communications Network (418-00A Controller Area Network (CAN) Module Communications Network, Diagnosis and Testing).

K4 CHECK THE DISPLAY
  • NOTE: Some fault conditions may cause the actual camera image(s) not to be displayed. Observe the audio system display.
  • Select REVERSE.
  • Wait 30 seconds.

Does the audio system display switch to parking aid camera display mode?
Yes Select PARK. GO to K5
No Select PARK. DIAGNOSE the display.
REFER to: Information and Entertainment System (415-00 Information and Entertainment System - General Information - Vehicles With: SYNC 4, Diagnosis and Testing).

K5 CHECK THE FRONT CAMERA COAXIAL CABLE CORE AND SHIELD FOR A SHORT TO VOLTAGE
  • Ignition OFF.
  • Disconnect IPMA C242E .
  • Disconnect Front parking aid camera C1663 .
  • Ignition ON.
  • Measure VDC :
    Click to display connectors
    Positive Lead Measurement / Action Negative Lead
    C242E-1 coaxial cable core   Ground
    C242E-1 coaxial cable shield   Ground

Is any DC voltage present?
Yes REPLACE the affected coaxial cable.
No GO to K6

K6 CHECK THE FRONT CAMERA COAXIAL CABLE CORE FOR A SHORT TO GROUND
  • Ignition OFF.
  • Measure:
    Click to display connectors
    Positive Lead Measurement / Action Negative Lead
    C242E-1 coaxial cable core   Ground

Is the resistance greater than 10,000 ohms?
Yes GO to K7
No REPLACE the affected coaxial cable.

K7 CHECK THE FRONT CAMERA COAXIAL CABLE CORE AND SHIELD FOR AN OPEN
  • Measure:
    Click to display connectors
    Positive Lead Measurement / Action Negative Lead
    C242E-1 coaxial cable core C1663-1 coaxial cable core
    C242E-1 coaxial cable shield C1663-1 coaxial cable shield

Are the resistances less than 3 ohms?
Yes GO to K8
No REPLACE the affected coaxial cable.

K8 CHECK THE FRONT CAMERA COAXIAL CABLE CORE AND SHIELD FOR A SHORT TOGETHER
  • Measure:
    Click to display connectors
    Positive Lead Measurement / Action Negative Lead
    C242E-1 coaxial cable core C242E-1 coaxial cable shield

Is the resistance greater than 10,000 ohms?
Yes INSTALL a new front parking aid camera.
REFER to: Front Parking Aid Camera (413-13B Parking Aid - Vehicles With: Parking Aid Camera, Removal and Installation).
If the concern is still present after camera replacement, GO to K9
No REPLACE the affected coaxial cable.

K9 CHECK FOR CORRECT IPMA (IMAGE PROCESSING MODULE A) OPERATION
  • Ignition OFF.
  • Disconnect and inspect the IPMA connectors.
  • Repair:
    • corrosion (install new connector or terminals – clean module pins)
    • damaged or bent pins – install new terminals/pins
    • pushed-out pins – install new pins as necessary
  • Reconnect the IPMA connectors. Make sure they seat and latch correctly.
  • Operate the system and determine if the concern is still present.

Is the concern still present?
Yes CHECK OASIS for any applicable service articles: TSB , GSB , SSM or FSA . If a service article exists for this concern, DISCONTINUE this test and FOLLOW the service article instructions. If no service articles address this concern, INSTALL a new IPMA . REFER to: Image Processing Module A (IPMA) (419-07 Lane Keeping System, Removal and Installation).
No The system is operating correctly at this time. The concern may have been caused by a loose or corroded connector. ADDRESS the root cause of any connector or pin issues.

PINPOINT TEST L: THE LH (LEFT-HAND) SIDE PARKING AID CAMERA IS INOPERATIVE OR DOES NOT OPERATE CORRECTLY

Refer to Wiring Diagrams Cell 145 for schematic and connector information.

Normal Operation and Fault Conditions

REFER to: Parking Aid - System Operation and Component Description (413-13B Parking Aid - Vehicles With: Parking Aid Camera, Description and Operation).

DTC Fault Trigger Conditions

DTC Description Fault Trigger Condition
IPMA B12BE:11 Left Front Camera: Circuit Short To Ground A continuous and on-demand DTC that sets in the IPMA when LH side parking aid camera coaxial cable is shorted to ground.
IPMA B12BE:15 Left Front Camera: Circuit Short To Battery Or Open A continuous and on-demand DTC that sets in the IPMA when LH side parking aid camera coaxial cable is shorted to battery or open.
IPMA B12BE:31 Left Front Camera: No Signal A continuous and on-demand DTC that sets in the IPMA when expected video signals are not received from the LH side parking aid camera over the coaxial cable.

Possible Sources

  • Communication network concern
  • LH side parking aid camera
  • IPMA
L1 CARRY OUT A NETWORK TEST
  • Using a diagnostic scan tool, carry out a network test.

Do all modules pass the network test?
Yes GO to L2
No See the Symptom Chart: Communication Network.
REFER to: Controller Area Network (CAN) Module Communications Network (418-00A Controller Area Network (CAN) Module Communications Network, Diagnosis and Testing).

L2 CHECK THE LH (LEFT-HAND) SIDE CAMERA COAXIAL CABLE CORE AND SHIELD FOR A SHORT TO VOLTAGE
  • Ignition OFF.
  • Disconnect IPMA C242E .
  • Disconnect LH side parking aid camera C5104 .
  • Ignition ON.
  • Measure VDC :
    Click to display connectors
    Positive Lead Measurement / Action Negative Lead
    C242E-3 coaxial cable core   Ground
    C242E-3 coaxial cable shield   Ground

Is any DC voltage present?
Yes REPLACE the affected coaxial cable.
No GO to L3

L3 CHECK THE LH (LEFT-HAND) SIDE CAMERA COAXIAL CABLE CORE FOR A SHORT TO GROUND
  • Ignition OFF.
  • Measure:
    Click to display connectors
    Positive Lead Measurement / Action Negative Lead
    C242E-3 coaxial cable core   Ground

Is the resistance greater than 10,000 ohms?
Yes GO to L4
No REPLACE the affected coaxial cable.

L4 CHECK THE LH (LEFT-HAND) SIDE CAMERA COAXIAL CABLE CORE AND SHIELD FOR AN OPEN
  • Measure:
    Click to display connectors
    Positive Lead Measurement / Action Negative Lead
    C242E-3 coaxial cable core C5104-1 coaxial cable core
    C242E-3 coaxial cable shield C5104-1 coaxial cable shield

Are the resistances less than 3 ohms?
Yes GO to L5
No REPLACE the affected coaxial cable.

L5 CHECK THE LH (LEFT-HAND) SIDE CAMERA COAXIAL CABLE CORE AND SHIELD FOR A SHORT TOGETHER
  • Measure:
    Click to display connectors
    Positive Lead Measurement / Action Negative Lead
    C242E-3 coaxial cable core C242E-3 coaxial cable shield

Is the resistance greater than 10,000 ohms?
Yes INSTALL a new LH side camera.
REFER to: Side Parking Aid Camera (413-13B Parking Aid - Vehicles With: Parking Aid Camera, Removal and Installation).
If the concern is still present after camera replacement, GO to L6
No REPLACE the affected coaxial cable.

L6 CHECK FOR CORRECT IPMA (IMAGE PROCESSING MODULE A) OPERATION
  • Ignition OFF.
  • Disconnect and inspect the IPMA connectors.
  • Repair:
    • corrosion (install new connector or terminals – clean module pins)
    • damaged or bent pins – install new terminals/pins
    • pushed-out pins – install new pins as necessary
  • Reconnect the IPMA connectors. Make sure they seat and latch correctly.
  • Operate the system and determine if the concern is still present.

Is the concern still present?
Yes CHECK OASIS for any applicable service articles: TSB , GSB , SSM or FSA . If a service article exists for this concern, DISCONTINUE this test and FOLLOW the service article instructions. If no service articles address this concern, INSTALL a new IPMA .
REFER to: Image Processing Module A (IPMA) (419-07 Lane Keeping System, Removal and Installation).
No The system is operating correctly at this time. The concern may have been caused by a loose or corroded connector. ADDRESS the root cause of any connector or pin issues.

PINPOINT TEST M: THE RH (RIGHT-HAND) SIDE PARKING AID CAMERA IS INOPERATIVE OR DOES NOT OPERATE CORRECTLY

Refer to Wiring Diagrams Cell 145 for schematic and connector information.

Normal Operation and Fault Conditions

REFER to: Parking Aid - System Operation and Component Description (413-13B Parking Aid - Vehicles With: Parking Aid Camera, Description and Operation).

DTC Fault Trigger Conditions

DTC Description Fault Trigger Condition
IPMA B12BF:11 Right Front Camera: Circuit Short To Ground A continuous and on-demand DTC that sets in the IPMA when RH side parking aid camera coaxial cable is shorted to ground.
IPMA B12BF:15 Right Front Camera: Circuit Short To Battery Or Open A continuous and on-demand DTC that sets in the IPMA when RH side parking aid camera coaxial cable is shorted to battery or open.
IPMA B12BF:31 Right Front Camera: No Signal A continuous and on-demand DTC that sets in the IPMA when expected video signals are not received from the RH side parking aid camera over the coaxial cable.

Possible Sources

  • Communication network concern
  • RH side parking aid camera
  • IPMA
M1 CARRY OUT A NETWORK TEST
  • Using a diagnostic scan tool, carry out a network test.

Do all modules pass the network test?
Yes GO to M2
No See the Symptom Chart: Communication Network.
REFER to: Controller Area Network (CAN) Module Communications Network (418-00A Controller Area Network (CAN) Module Communications Network, Diagnosis and Testing).

M2 CHECK THE RH (RIGHT-HAND) SIDE CAMERA COAXIAL CABLE CORE AND SHIELD FOR A SHORT TO VOLTAGE
  • Ignition OFF.
  • Disconnect IPMA C242E .
  • Disconnect RH side parking aid camera C6104 .
  • Ignition ON.
  • Measure VDC :
    Click to display connectors
    Positive Lead Measurement / Action Negative Lead
    C242E-4 coaxial cable core   Ground
    C242E-4 coaxial cable shield   Ground

Is any DC voltage present?
Yes REPLACE the affected coaxial cable.
No GO to M3

M3 CHECK THE RH (RIGHT-HAND) SIDE CAMERA COAXIAL CABLE CORE FOR A SHORT TO GROUND
  • Ignition OFF.
  • Measure:
    Click to display connectors
    Positive Lead Measurement / Action Negative Lead
    C242E-4 coaxial cable core   Ground

Is the resistance greater than 10,000 ohms?
Yes GO to M4
No REPLACE the affected coaxial cable.

M4 CHECK THE RH (RIGHT-HAND) SIDE CAMERA COAXIAL CABLE CORE AND SHIELD FOR AN OPEN
  • Measure:
    Click to display connectors
    Positive Lead Measurement / Action Negative Lead
    C242E-4 coaxial cable core C6104-1 coaxial cable core
    C242E-4 coaxial cable shield C6104-1 coaxial cable shield

Are the resistances less than 3 ohms?
Yes GO to M5
No REPLACE the affected coaxial cable.

M5 CHECK THE RH (RIGHT-HAND) SIDE CAMERA COAXIAL CABLE CORE AND SHIELD FOR A SHORT TOGETHER
  • Measure:
    Click to display connectors
    Positive Lead Measurement / Action Negative Lead
    C242E-4 coaxial cable core C242E-4 coaxial cable shield

Is the resistance greater than 10,000 ohms?
Yes INSTALL a new RH side camera.
REFER to: Side Parking Aid Camera (413-13B Parking Aid - Vehicles With: Parking Aid Camera, Removal and Installation).
If the concern is still present after camera replacement, GO to M6
No REPLACE the affected coaxial cable.

M6 CHECK FOR CORRECT IPMA (IMAGE PROCESSING MODULE A) OPERATION
  • Ignition OFF.
  • Disconnect and inspect the IPMA connectors.
  • Repair:
    • corrosion (install new connector or terminals – clean module pins)
    • damaged or bent pins – install new terminals/pins
    • pushed-out pins – install new pins as necessary
  • Reconnect the IPMA connectors. Make sure they seat and latch correctly.
  • Operate the system and determine if the concern is still present.

Is the concern still present?
Yes CHECK OASIS for any applicable service articles: TSB , GSB , SSM or FSA . If a service article exists for this concern, DISCONTINUE this test and FOLLOW the service article instructions. If no service articles address this concern, INSTALL a new IPMA .
REFER to: Image Processing Module A (IPMA) (419-07 Lane Keeping System, Removal and Installation).
No The system is operating correctly at this time. The concern may have been caused by a loose or corroded connector. ADDRESS the root cause of any connector or pin issues.

PINPOINT TEST N: THE 360 DEGREE VIEW CAMERA SYSTEM DOES NOT RESPOND WHEN THE CAMERA SELECTION SWITCH IS PRESSED

Refer to Wiring Diagrams Cell 145 for schematic and connector information.

Normal Operation and Fault Conditions

REFER to: Parking Aid - System Operation and Component Description (413-13B Parking Aid - Vehicles With: Parking Aid Camera, Description and Operation).

DTC Fault Trigger Conditions

DTC Description Fault Trigger Condition
IPMA B14A5:11 Multi-Camera View Switch: Circuit Short To Ground A continuous and on-demand DTC that sets in the IPMA when the camera selection switch is stuck closed or the circuit is shorted to ground.

Possible Sources

  • Wiring, terminals or connectors
  • TR input concern
  • Vehicle speed input concern
  • Camera selection switch
  • IPMA

Visual Inspection and Pre-checks

  • Inspect the camera selection switch to verify that the switch is not damaged or stuck in the pressed position.
N1 VERIFY THE CUSTOMER CONCERN
  • Ignition ON.
  • Verify the operation of the camera selection switch.

Does the camera selection switch operate correctly?
Yes CLEAR the DTC . The system is operating correctly at this time. The concern may have been caused by high network traffic or the driver's perception of how the parking aid system operates. REFER to the Owner's Manual.
No GO to N2

N2 CHECK FOR DIAGNOSTIC TROUBLE CODES (DTCS) FROM THE IPMA (IMAGE PROCESSING MODULE A) SELF-TEST
  • Using the diagnostic scan tool, perform the IPMA self-test.

Are any Diagnostic Trouble Codes (DTCs) retrieved?
Yes For DTC B14A5:11, GO to N7
For all other Diagnostic Trouble Codes (DTCs), REFER to the DTC Chart in this section.
No GO to N3

N3 CHECK FOR CORRECT GEAR INPUT AT THE IPC (INSTRUMENT PANEL CLUSTER)
  • Ignition ON.
  • While monitoring the IPC PRNDL indicator, briefly select each gear in the entire range.

Does the IPC PRNDL indicator match the actual gear selection?
Yes GO to N4
No DIAGNOSE the PRNDL indicator.
REFER to: Instrumentation, Message Center and Warning Chimes (413-01 Instrumentation, Message Center and Warning Chimes, Diagnosis and Testing).

N4 CHECK FOR CORRECT SPEEDOMETER OPERATION
  • Verify the operation of the speedometer.

Does the speedometer operate correctly?
Yes GO to N5
No DIAGNOSE the speedometer.
REFER to: Instrumentation, Message Center and Warning Chimes (413-01 Instrumentation, Message Center and Warning Chimes, Diagnosis and Testing).

N5 CHECK FOR GROUND AT THE CAMERA SELECTION SWITCH
  • Ignition OFF.
  • Disconnect Instrument panel center stack left switch C2480 .
  • Measure:
    Click to display connectors
    Positive Lead Measurement / Action Negative Lead
      C2480-3   Ground

Is the resistance less than 3 ohms?
Yes GO to N6
No REPAIR the circuit.

N6 CHECK THE CAMERA SELECTION SWITCH CIRCUIT FOR AN OPEN
  • Disconnect IPMA C242B .
  • Measure:
    Click to display connectors
    Positive Lead Measurement / Action Negative Lead
      C242B-10   C2480-2

Is the resistance less than 3 ohms?
Yes INSTALL a new instrument panel console switch assembly. If the concern is still present after replacing the switch, GO to N9
No REPAIR the circuit.

N7 CHECK THE CAMERA SELECTION SWITCH
  • Ignition OFF.
  • Disconnect Instrument panel center stack left switch C2480 .
  • Ignition ON.
  • Using a diagnostic scan tool, clear the IPMA Diagnostic Trouble Codes (DTCs) and repeat the self-test.

Is DTC B14A5:11 still present?
Yes GO to N8
No INSTALL a new instrument panel console switch assembly.

N8 CHECK THE CAMERA SELECTION SWITCH CIRCUIT FOR A SHORT TO GROUND
  • Ignition OFF.
  • Disconnect IPMA C242B .
  • Measure:
    Click to display connectors
    Positive Lead Measurement / Action Negative Lead
      C2480-2   Ground

Is the resistance greater than 10,000 ohms?
Yes GO to N9
No REPAIR the circuit.

N9 CHECK FOR CORRECT IPMA (IMAGE PROCESSING MODULE A) OPERATION
  • Ignition OFF.
  • Disconnect and inspect the IPMA connectors.
  • Repair:
    • corrosion (install new connector or terminals – clean module pins)
    • damaged or bent pins – install new terminals/pins
    • pushed-out pins – install new pins as necessary
  • Reconnect the IPMA connectors. Make sure they seat and latch correctly.
  • Operate the system and determine if the concern is still present.

Is the concern still present?
Yes CHECK OASIS for any applicable service articles: TSB , GSB , SSM or FSA . If a service article exists for this concern, DISCONTINUE this test and FOLLOW the service article instructions. If no service articles address this concern, INSTALL a new IPMA . REFER to: Image Processing Module A (IPMA) (419-07 Lane Keeping System, Removal and Installation).
No The system is operating correctly at this time. The concern may have been caused by a loose or corroded connector. ADDRESS the root cause of any connector or pin issues.

PINPOINT TEST O: THE VISUAL PARK AID ALERT IS INOPERATIVE - VEHICLES WITH IPMA (IMAGE PROCESSING MODULE A)

Normal Operation and Fault Conditions

REFER to: Parking Aid - System Operation and Component Description (413-13B Parking Aid - Vehicles With: Parking Aid Camera, Description and Operation).

Possible Sources

  • Communication network concern
  • APIM
  • IPMA
O1 VERIFY THE VISUAL PARK AID ALERT IS ENABLED
  • Ignition ON.
  • Verify that the visual park aid alert is enabled in the infotainment system settings menu. Refer to the Owner's Literature.

Is the visual park aid alert enabled?
Yes GO to O2
No ENABLE the visual park aid alert.

O2 CARRY OUT A NETWORK TEST
  • Using a diagnostic scan tool, carry out a network test.

Do all modules pass the network test?
Yes GO to O3
No See the Symptom Chart: Communication Network.
REFER to: Controller Area Network (CAN) Module Communications Network (418-00A Controller Area Network (CAN) Module Communications Network, Diagnosis and Testing).

O3 CHECK THE DIAGNOSTIC TROUBLE CODES (DTCS) FROM THE IPMA (IMAGE PROCESSING MODULE A) SELF-TEST
  • Using a diagnostic scan tool, carry out the IPMA self-test.

Are any IPMA Diagnostic Trouble Codes (DTCs) recorded?
Yes REFER to the DTC Chart in this section.
No • If the visual park aid alert for the 360 degree overhead view is inoperative, GO to O4
• For all other views, GO to O5

O4 CHECK FOR CORRECT IPMA (IMAGE PROCESSING MODULE A) OPERATION
  • Ignition OFF.
  • Disconnect and inspect the IPMA connectors.
  • Repair:
    • corrosion (install new connector or terminals – clean module pins)
    • damaged or bent pins – install new terminals/pins
    • pushed-out pins – install new pins as necessary
  • Reconnect the IPMA connectors. Make sure they seat and latch correctly.
  • Operate the system and determine if the concern is still present.

Is the concern still present?
Yes CHECK OASIS for any applicable service articles: TSB , GSB , SSM or FSA . If a service article exists for this concern, DISCONTINUE this test and FOLLOW the service article instructions. If no service articles address this concern, INSTALL a new IPMA . REFER to: Image Processing Module A (IPMA) (419-07 Lane Keeping System, Removal and Installation).
No The system is operating correctly at this time. The concern may have been caused by a loose or corroded connector. ADDRESS the root cause of any connector or pin issues.

O5 CHECK FOR CORRECT APIM (SYNC MODULE) OPERATION
  • Ignition OFF.
  • Disconnect and inspect the APIM connectors.
  • Repair:
    • corrosion (install new connector or terminals – clean module pins)
    • damaged or bent pins – install new terminals/pins
    • pushed-out pins – install new pins as necessary
  • Reconnect the APIM connectors. Make sure they seat and latch correctly.
  • Operate the system and determine if the concern is still present.

Is the concern still present?
Yes CHECK OASIS for any applicable service articles: TSB , GSB , SSM or FSA . If a service article exists for this concern, DISCONTINUE this test and FOLLOW the service article instructions. If no service articles address this concern, INSTALL a new APIM .
REFER to: SYNC Module [APIM] (415-00 Information and Entertainment System - General Information - Vehicles With: SYNC 4, Removal and Installation).
No The system is operating correctly at this time. The concern may have been caused by a loose or corroded connector. ADDRESS the root cause of any connector or pin issues.

PINPOINT TEST P: THE GUIDELINES ARE INOPERATIVE OR DO NOT OPERATE CORRECTLY - VEHICLES EQUIPPED WITH IPMA (IMAGE PROCESSING MODULE A)

NOTE: If the battery has been disconnected or discharged, or a module is disconnected or replaced, the active guidelines may be inoperative until the vehicle is driven on a flat and smooth road at 32 km/h (20 mph) or more, with hands placed loosely on the steering wheel and minimal steering correction for approximately 30 seconds.

If the guidelines remain inoperative, it may be necessary to disconnect the battery for 5 minutes with the driver's door open, then drive the vehicle for 8 kilometers (5 miles) in normal city driving before carrying out the procedure described above.

Normal Operation and Fault Conditions

REFER to: Parking Aid - System Operation and Component Description (413-13B Parking Aid - Vehicles With: Parking Aid Camera, Description and Operation).

Possible Sources

  • Communication network concern
  • liftgate position ajar concern
  • Steering wheel angle data concern (active guidelines only)
  • ABS module concern (active guidelines only)
  • PSCM concern (active guidelines only)
  • IPMA concern

Visual Inspection and Pre-checks

  • Verify the liftgate is fully closed.
  • For active guideline concerns, verify the concern was not caused by the steering wheel being in the straight ahead position. Active guidelines are not displayed unless the steering wheel is rotated.
P1 CARRY OUT A NETWORK TEST
  • Ignition ON.
  • Using a diagnostic scan tool, carry out a network test.

Do all modules pass the network test?
Yes GO to P2
No See the Symptom Chart: Communication Network.
REFER to: Controller Area Network (CAN) Module Communications Network (418-00A Controller Area Network (CAN) Module Communications Network, Diagnosis and Testing).

P2 CHECK THE DIAGNOSTIC TROUBLE CODES (DTCS) FROM THE IPMA (IMAGE PROCESSING MODULE A) SELF-TEST
  • Using a scan tool, carry out the IPMA self-test.

Are any IPMA Diagnostic Trouble Codes (DTCs) retrieved?
Yes REFER to the IPMA DTC Chart in this section.
No • For an active guideline concern, GO to P3
• For a fixed guideline concern, GO to P6

P3 CHECK THE DIAGNOSTIC TROUBLE CODES (DTCS) FROM THE ABS (ANTI-LOCK BRAKE SYSTEM) MODULE SELF-TEST
  • Using a diagnostic scan tool, carry out the ABS module self-test.

Are any ABS module Diagnostic Trouble Codes (DTCs) retrieved?
Yes See the ABS DTC Chart.
REFER to: Anti-Lock Brake System (ABS) and Stability Control (206-09 Anti-Lock Brake System (ABS) and Stability Control, Diagnosis and Testing).
No GO to P4

P4 CHECK THE DIAGNOSTIC TROUBLE CODES (DTCS) FROM THE PSCM (POWER STEERING CONTROL MODULE) SELF-TEST
  • Using a diagnostic scan tool, carry out the PSCM self-test.

Are any PSCM Diagnostic Trouble Codes (DTCs) retrieved?
Yes See the PSCM DTC Chart.
REFER to: Steering Wheel and Column Electrical Components (211-05 Steering Wheel and Column Electrical Components, Diagnosis and Testing).
No GO to P5

P5 CHECK THE LIFTGATE AJAR PID (PARAMETER IDENTIFICATION)
  • Using a diagnostic scan tool, view the RGTM Parameter Identifications (PIDs).
  • Access the  RGTM  and monitor the  LIFTG_DECKL_AJAR  PID


Does the PID consistently agree with the liftgate position?
Yes GO to P6
No DIAGNOSE the liftgate. Refer to the appropriate section in Group 501 for the procedure.

P6 CHECK FOR CORRECT IPMA (IMAGE PROCESSING MODULE A) OPERATION
  • Ignition OFF.
  • Disconnect and inspect the IPMA connectors.
  • Repair:
    • corrosion (install new connector or terminals – clean module pins)
    • damaged or bent pins – install new terminals/pins
    • pushed-out pins – install new pins as necessary
  • Reconnect the IPMA connectors. Make sure they seat and latch correctly.
  • Operate the system and determine if the concern is still present.

Is the concern still present?
Yes CHECK OASIS for any applicable service articles: TSB , GSB , SSM or FSA . If a service article exists for this concern, DISCONTINUE this test and FOLLOW the service article instructions. If no service articles address this concern, INSTALL a new IPMA . REFER to: Image Processing Module A (IPMA) (419-07 Lane Keeping System, Removal and Installation).
No The system is operating correctly at this time. The concern may have been caused by a loose or corroded connector. ADDRESS the root cause of any connector or pin issues.

PINPOINT TEST Q: THE MANUAL ZOOM IS INOPERATIVE - VEHICLES WITH IPMA (IMAGE PROCESSING MODULE A)

Normal Operation and Fault Conditions

REFER to: Parking Aid - System Operation and Component Description (413-13B Parking Aid - Vehicles With: Parking Aid Camera, Description and Operation).

Possible Sources

  • Communication network concern
  • Rear parking aid camera
  • APIM concern
  • GWM concern
  • IPMA concern
Q1 CARRY OUT A NETWORK TEST
  • Ignition ON.
  • Using a diagnostic scan tool, carry out a network test.

Do all modules pass the network test?
Yes GO to Q2
No See the Symptom Chart: Communication Network.
REFER to: Controller Area Network (CAN) Module Communications Network (418-00A Controller Area Network (CAN) Module Communications Network, Diagnosis and Testing).

Q2 CHECK FOR RECORDED DIAGNOSTIC TROUBLE CODES (DTCS) FROM THE IPMA (IMAGE PROCESSING MODULE A) SELF-TEST
  • Using a diagnostic scan tool, carry out the IPMA self-test.

Are any Diagnostic Trouble Codes (DTCs) present?
Yes REFER to the DTC Chart in this section.
No GO to Q3

Q3 CHECK FOR RECORDED DIAGNOSTIC TROUBLE CODES (DTCS) FROM THE APIM (SYNC MODULE) SELF-TEST
  • Using a diagnostic scan tool, carry out the APIM self-test.

Are any Diagnostic Trouble Codes (DTCs) present?
Yes • For DTC C1001:01, GO to Pinpoint Test H
• For all other Diagnostic Trouble Codes (DTCs), REFER to the master DTC chart.
No GO to Q4

Q4 CHECK FOR RECORDED DIAGNOSTIC TROUBLE CODES (DTCS) FROM THE GWM (GATEWAY MODULE A) SELF-TEST
  • Using a diagnostic scan tool, carry out the GWM self-test.

Are any Diagnostic Trouble Codes (DTCs) recorded?
Yes See DTC Chart: GWM .
REFER to: Controller Area Network (CAN) Module Communications Network (418-00A Controller Area Network (CAN) Module Communications Network, Diagnosis and Testing).
No INSTALL a new rear parking aid camera.
REFER to: Rear Parking Aid Camera (413-13B Parking Aid - Vehicles With: Parking Aid Camera, Removal and Installation).
If the concern is still present after camera replacement, GO to Q5

Q5 CHECK FOR CORRECT IPMA (IMAGE PROCESSING MODULE A) OPERATION
  • Ignition OFF.
  • Disconnect and inspect the IPMA connectors.
  • Repair:
    • corrosion (install new connector or terminals – clean module pins)
    • damaged or bent pins – install new terminals/pins
    • pushed-out pins – install new pins as necessary
  • Reconnect the IPMA connectors. Make sure they seat and latch correctly.
  • Operate the system and determine if the concern is still present.

Is the concern still present?
Yes CHECK OASIS for any applicable service articles: TSB , GSB , SSM or FSA . If a service article exists for this concern, DISCONTINUE this test and FOLLOW the service article instructions. If no service articles address this concern, INSTALL a new IPMA .
REFER to: Image Processing Module A (IPMA) (419-07 Lane Keeping System, Removal and Installation).
No The system is operating correctly at this time. The concern may have been caused by a loose or corroded connector. ADDRESS the root cause of any connector or pin issues.

PINPOINT TEST R: REAR CAMERA INTERNAL FAILURE - B115E:49 OR B115E:96

Normal Operation and Fault Conditions

DTC Fault Trigger Conditions

DTC Description Fault Trigger Condition
IPMA B115E:49 Camera Module: Internal Electronic Failure Sets in continuous memory and on-demand in the IPMA when an internal fault is detected in the rear parking aid camera.
IPMA B115E:96 Camera Module: Component Internal Failure A continuous and on-demand DTC that sets in the IPMA when the rear parking aid camera has an internal failure.

Possible Sources

  • Rear parking aid camera
R1 CHECK FOR DIAGNOSTIC TROUBLE CODES (DTCS) FROM THE IPMA (IMAGE PROCESSING MODULE A) SELF-TEST
  • Ignition ON.
  • Using the diagnostic scan tool, clear the Diagnostic Trouble Codes (DTCs).
  • Wait 10 seconds.
  • Using the diagnostic scan tool, carry out the IPMA self-test.

Is DTC B115E:49 or B115E:96 retrieved?
Yes INSTALL a new rear parking aid camera,
REFER to: Rear Parking Aid Camera (413-13B Parking Aid - Vehicles With: Parking Aid Camera, Removal and Installation).
No The system is operating correctly at this time.

PINPOINT TEST S: FRONT CAMERA INTERNAL FAILURE - B148E:96

Normal Operation and Fault Conditions

DTC Fault Trigger Conditions

DTC Description Fault Trigger Condition
IPMA B148E:96 Front Camera: Component Internal Failure A continuous and on-demand DTC that sets in the IPMA when the front parking aid camera has an internal failure.

Possible Sources

  • Front parking aid camera
S1 CHECK FOR DIAGNOSTIC TROUBLE CODES (DTCS) FROM THE IPMA (IMAGE PROCESSING MODULE A) SELF-TEST
  • Ignition ON.
  • Using the diagnostic scan tool, clear the Diagnostic Trouble Codes (DTCs).
  • Wait 10 seconds.
  • Using the diagnostic scan tool, carry out the IPMA self-test.

Is DTC B148E:96 retrieved?
Yes INSTALL a new front parking aid camera,
REFER to: Front Parking Aid Camera (413-13B Parking Aid - Vehicles With: Parking Aid Camera, Removal and Installation).
No The system is operating correctly at this time.

PINPOINT TEST T: LEFT CAMERA INTERNAL FAILURE - B12BE:96

Normal Operation and Fault Conditions

DTC Fault Trigger Conditions

DTC Description Fault Trigger Condition
IPMA B12BE:96 Left Front Camera: Component Internal Failure A continuous and on-demand DTC that sets in the IPMA when the LH side parking aid camera has an internal failure.

Possible Sources

  • LH side parking aid camera
T1 CHECK FOR DIAGNOSTIC TROUBLE CODES (DTCS) FROM THE IPMA (IMAGE PROCESSING MODULE A) SELF-TEST
  • Ignition ON.
  • Using the diagnostic scan tool, clear the Diagnostic Trouble Codes (DTCs).
  • Wait 10 seconds.
  • Using the diagnostic scan tool, carry out the IPMA self-test.

Is DTC B12BE:96 retrieved?
Yes INSTALL a new LH side parking aid camera,
REFER to: Side Parking Aid Camera (413-13B Parking Aid - Vehicles With: Parking Aid Camera, Removal and Installation).
No The system is operating correctly at this time.

PINPOINT TEST U: RIGHT CAMERA INTERNAL FAILURE - B12BF:96

Normal Operation and Fault Conditions

DTC Fault Trigger Conditions

DTC Description Fault Trigger Condition
IPMA B12BF:96 Right Front Camera: Component Internal Failure A continuous and on-demand DTC that sets in the IPMA when the RH side parking aid camera has an internal failure.

Possible Sources

  • RH side parking aid camera
U1 CHECK FOR DIAGNOSTIC TROUBLE CODES (DTCS) FROM THE IPMA (IMAGE PROCESSING MODULE A) SELF-TEST
  • Ignition ON.
  • Using the diagnostic scan tool, clear the Diagnostic Trouble Codes (DTCs).
  • Wait 10 seconds.
  • Using the diagnostic scan tool, carry out the IPMA self-test.

Is DTC B12BF:96 retrieved?
Yes INSTALL a new RH side parking aid camera,
REFER to: Side Parking Aid Camera (413-13B Parking Aid - Vehicles With: Parking Aid Camera, Removal and Installation).
No The system is operating correctly at this time.

PINPOINT TEST V: REAR CAMERA NOT CONFIGURED - B115E:55

Normal Operation and Fault Conditions

DTC Fault Trigger Conditions

DTC Description Fault Trigger Condition
BCM B115E:55 Camera Module: Not Configured Sets in continuous memory and on-demand in the BCM when the rear parking aid camera is not configured.
IPMA B115E:55 Camera Module: Not Configured Sets in continuous memory and on-demand in the IPMA when the rear parking aid camera is not configured.

Possible Sources

  • Rear parking aid camera initialization
V1 PERFORM THE PARKING AID CAMERA INITIALIZATION USING A DIAGNOSTIC SCAN TOOL
  • Ignition ON.
  • Using the diagnostic scan tool, perform the parking aid camera initialization procedure.
    REFER to: Parking Aid Camera Initialization (413-13B Parking Aid - Vehicles With: Parking Aid Camera, General Procedures).

Did the parking aid camera initialization procedure complete successfully?
Yes The system is operating correctly at this time.
No REFER to the parking aid camera initialization procedure to troubleshoot the concern.
REFER to: Parking Aid Camera Initialization (413-13B Parking Aid - Vehicles With: Parking Aid Camera, General Procedures).

PINPOINT TEST W: CAMERA ALIGNMENT INCORRECT - B115E:78 OR B1578:78

Normal Operation and Fault Conditions

DTC Fault Trigger Conditions

DTC Description Fault Trigger Condition
IPMA B115E:78 Camera Module: Alignment Or Adjustment Incorrect Sets in continuous memory and on-demand in the IPMA when the camera alignment is detected to be incorrect.
IPMA B1578:78 Digital Park Assist Camera Vision System: Alignment Or Adjustment Incorrect Sets in continuous memory and on-demand in the IPMA when the camera alignment is detected to be incorrect.

Possible Sources

  • 360 degree view camera alignment
W1 CARRY OUT THE 360 DEGREE VIEW CAMERA ALIGNMENT USING A DIAGNOSTIC SCAN TOOL
  • Ignition ON.
  • Using the diagnostic scan tool, carry out the 360 degree view camera alignment procedure.
    REFER to: 360 Degree View Camera Alignment (413-13B Parking Aid - Vehicles With: Parking Aid Camera, General Procedures).

Did the 360 degree view camera alignment procedure complete successfully?
Yes The system is operating correctly at this time.
No REFER to the 360 degree view camera alignment procedure to troubleshoot the concern.
REFER to: 360 Degree View Camera Alignment (413-13B Parking Aid - Vehicles With: Parking Aid Camera, General Procedures).

PINPOINT TEST X: VIDEO IMAGE IS UPSIDE DOWN

Refer to Wiring Diagrams Cell 145 for schematic and connector information.

Normal Operation and Fault Conditions

REFER to: Parking Aid - System Operation and Component Description (413-13B Parking Aid - Vehicles With: Parking Aid Camera, Description and Operation).

Possible Sources

  • Rear parking aid camera
X1 CHECK FOR REAR PARKING AID CAMERA OPERATION
  • Ignition OFF.
  • Disconnect and inspect the Rear Parking Aid Camera connector.
  • Repair:
    • corrosion (install new connector or terminals – clean module pins)
    • damaged or bent pins – install new terminals/pins
    • pushed-out pins – install new pins as necessary
  • Reconnect the rear parking aid camera connector. Make sure it seats and latches correctly.
  • Operate the system and determine if the concern is still present.

Is the concern still present?
Yes CHECK OASIS for any applicable service articles: TSB , GSB , SSM or FSA . If a service article exists for this concern, DISCONTINUE this test and FOLLOW the service article instructions. If no service articles address this concern, INSTALL a new camera.
REFER to: Rear Parking Aid Camera (413-13B Parking Aid - Vehicles With: Parking Aid Camera, Removal and Installation).
No The system is operating correctly at this time. The concern may have been caused by a loose or corroded connector. ADDRESS the root cause of any connector or pin issues.

PINPOINT TEST Y: THE LOWER CORNERS OF THE FRONT, REAR, OR SIDE CAMERA IMAGE IN THE 360 DEGREE CAMERA VIEW SHOW VERTICAL COLORED LINES OR APPEAR GREYED OUT

Refer to Wiring Diagrams Cell 145 for schematic and connector information.

Normal Operation and Fault Conditions

REFER to: Parking Aid - System Operation and Component Description (413-13B Parking Aid - Vehicles With: Parking Aid Camera, Description and Operation).

Possible Sources

  • Camera alignment
Y1 CARRY OUT THE 360 DEGREE CAMERA ALIGNMENT
  • Ignition ON.
  • Using the diagnostic scan tool, carry out the 360 degree view camera alignment procedure.
    REFER to: 360 Degree View Camera Alignment (413-13B Parking Aid - Vehicles With: Parking Aid Camera, General Procedures).

Is the concern resolved?
Yes The system is operating correctly at this time. The concern was caused by camera alignment.
No GO to Pinpoint Test I

PINPOINT TEST Z: FROZEN OR SLOW SCREEN TRANSITIONS BETWEEN CAMERA VIEWS

Refer to Wiring Diagrams Cell 145 for schematic and connector information.

Normal Operation and Fault Conditions

REFER to: Parking Aid - System Operation and Component Description (413-13B Parking Aid - Vehicles With: Parking Aid Camera, Description and Operation).

Possible Sources

  • IPMA
Z1 CHECK FOR CORRECT IPMA (IMAGE PROCESSING MODULE A) OPERATION
  • Ignition OFF.
  • Disconnect and inspect the IPMA connectors.
  • Repair:
    • corrosion (install new connector or terminals – clean module pins)
    • damaged or bent pins – install new terminals/pins
    • pushed-out pins – install new pins as necessary
  • Reconnect the IPMA connectors. Make sure they seat and latch correctly.
  • Operate the system and determine if the concern is still present.

Is the concern still present?
Yes CHECK OASIS for any applicable service articles: TSB , GSB , SSM or FSA . If a service article exists for this concern, DISCONTINUE this test and FOLLOW the service article instructions. If no service articles address this concern, INSTALL a new IPMA .
REFER to: Image Processing Module A (IPMA) (419-07 Lane Keeping System, Removal and Installation).
No The system is operating correctly at this time. The concern may have been caused by a loose or corroded connector. ADDRESS the root cause of any connector or pin issues.


    Parking Aid - System Operation and Component Description. Description and Operation
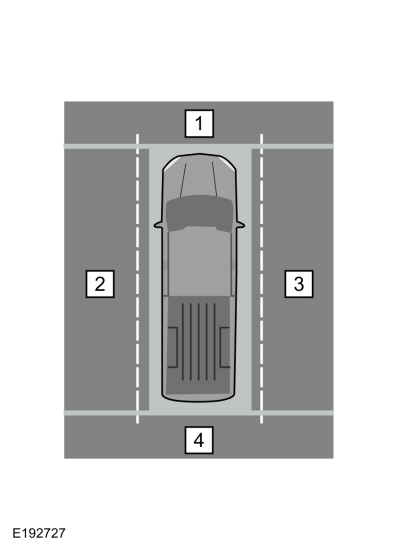
    System Operation Rear Only Parking Aid Camera System Diagram Analog Rear Parking Aid Camera *.sttxt { visibility: hidden; } *...

    360 Degree View Camera Alignment. General Procedures

    NOTE: On vehicles equipped with Trailer Reverse Guidance (TRG) complete this procedure and also perform the Trailer Reverse Guidance camera alignment...

    Other information:

    Lincoln Navigator 2018-2025 Workshop Manual: Side Parking Aid Camera. Removal and Installation


    Special Tool(s) / General Equipment Interior Trim Remover Removal Flush mounted camera Release the tab and lower the side parking aid camera housing. Use the General Equipment: Interior Trim Remover Disconnect the electrical connector and remove the camera and mounting plate as an assembly...

    Lincoln Navigator 2018-2025 Workshop Manual: In-Vehicle Temperature and Humidity Sensor. Removal and Installation


    Removal Release the clips and remove the trim panel. Release the tabs and remove the in-vehicle temperature and humidity sensor. Disconnect the electrical connector. Installation To install, reverse the removal procedure...

    Categories

    • Manuals Home
    • 4th Gen Lincoln Navigator Service Manual (2018 - 2025)
    • Front Bumper. Removal and Installation
    • Rear View Mirrors - System Operation and Component Description. Description and Operation
    • SYNC Module [APIM]. Removal and Installation
    • Head Up Display (HUD) Module Calibration. General Procedures
    • Remote Function Actuator (RFA) Module. Removal and Installation

    Rear Drive Halfshafts. Diagnosis and Testing

    Preliminary Inspection

    Visually inspect the CV joints, housing, boots, and clamps for obvious signs of mechanical damage.
    If an obvious cause for an observed or reported concern is found, correct the cause (if possible) before proceeding to the next step
    If the cause is not visually evident, verify the symptom and REFER to Symptom Chart: NVH.

    read more

    Copyright © 2025 www.linavigator4.com