Lincoln Navigator: Front Seats / Front Seat Cushion Cover. Removal and Installation
Special Tool(s) / General Equipment
| Interior Trim Remover |
Removal
Passenger seat
-
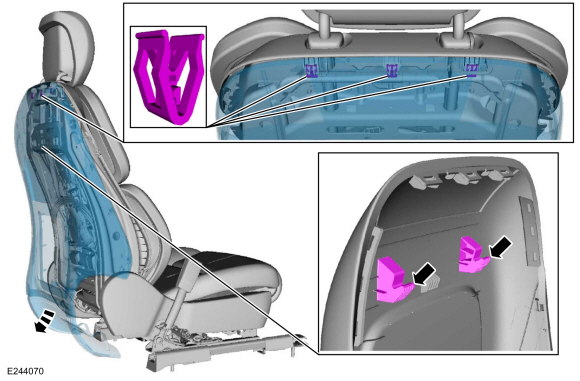
Remove the OCS .
Refer to: Occupant Classification System (OCS) Sensor (501-20B Supplemental Restraint System, Removal and Installation).
Driver seat
-
NOTE: Seat with power head restraint shown, seat without power head restraint similar.
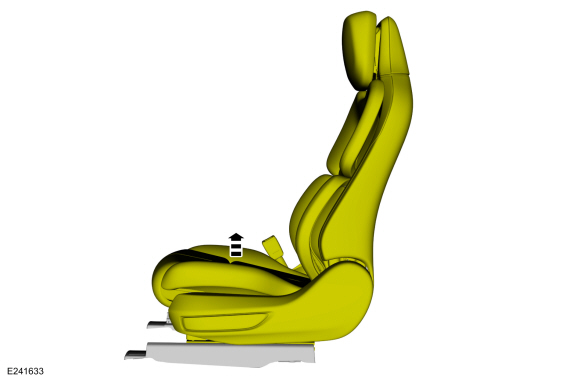
Raise the seat to the full up position.
 |
-
If equipped with a power leg extension.
Raise and extend the leg extensions to ease retainer access.
 |
-
Remove the front seat.
Refer to: Front Seat (501-10A Front Seats, Removal and Installation).
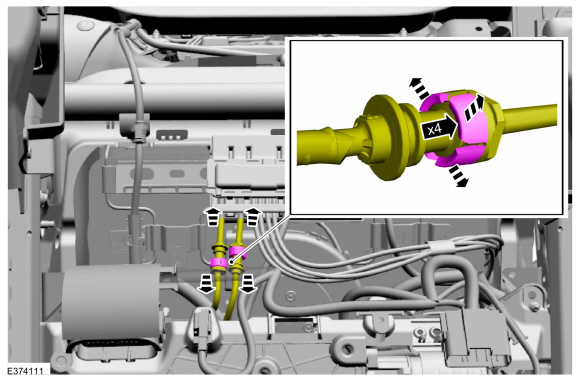
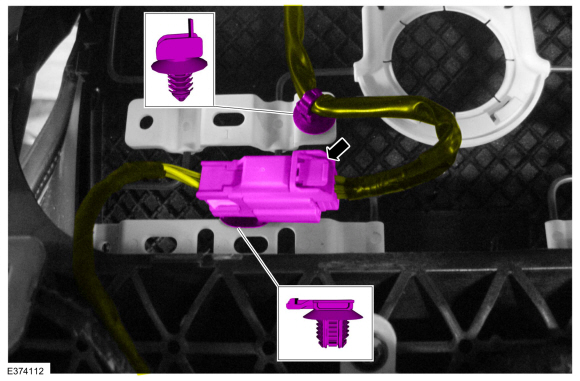
-
Release the front seat wiring harness and electrical
connector retainers and position the front seat wiring harnesses aside.
 |
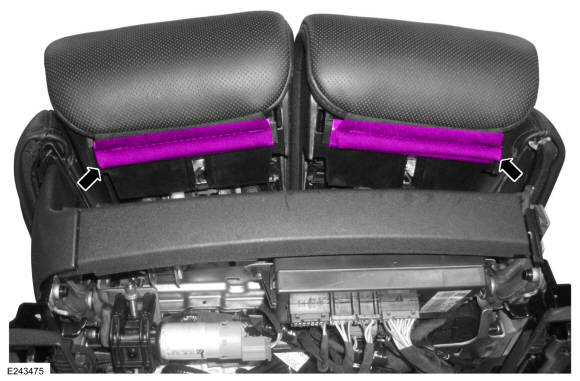
-
Release the front seat backrest back panel straps from the front seat track.
 |
-
If equipped with multi-contour seat.
Release the coupling retainers and front seat cushion bolster hoses from the SCMG .
 |
-
Detach the wiring harness retainers and disconnect the front seat cushion heater mat electrical connector.
 |
-
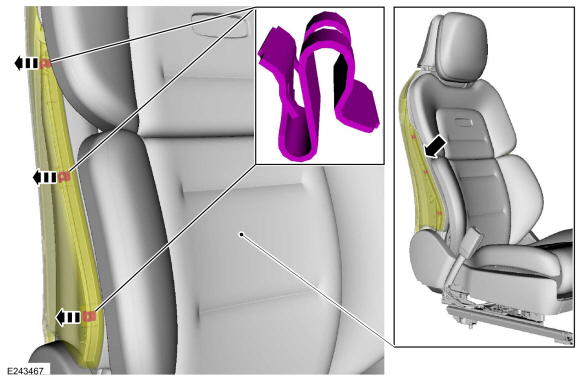
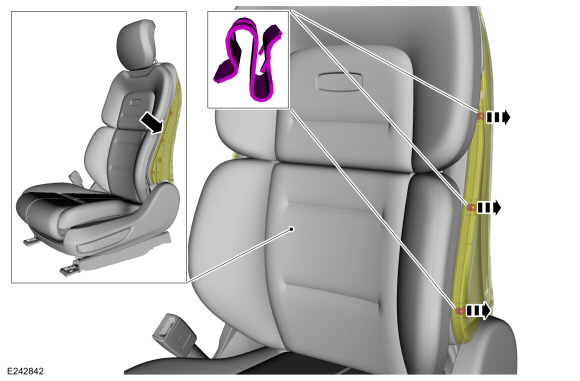
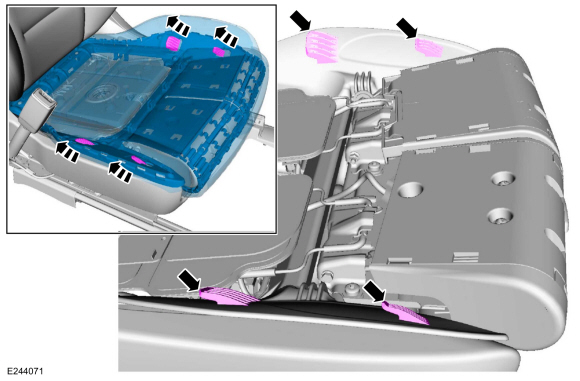
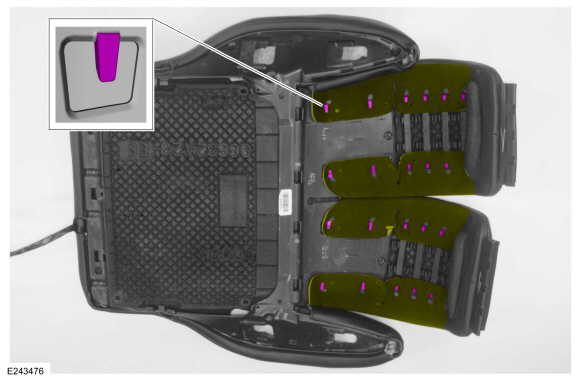
Detach the cushion cover J-clips from the seat cushion extensions.
 |
-
If equipped.
Remove the video display.
Refer to: Information and Entertainment System - Component Location (415-00 Information and Entertainment System - General Information - Vehicles With: SYNC 4, Description and Operation).
Driver seat with power head restraint
-
NOTICE: The back panel finish can be easily marred or torn, use care when working around it.
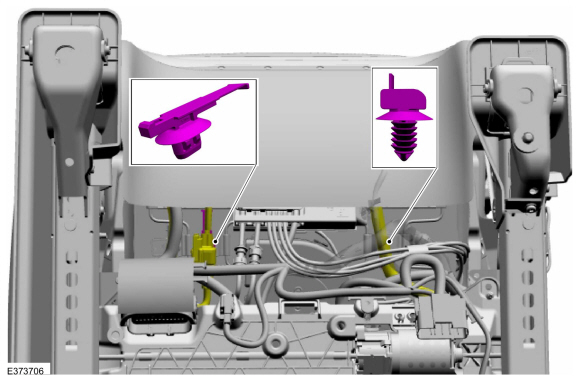
Raise and partially separate the head restraint rear cover enough to disengage the clips from the back panel.
Use the General Equipment: Interior Trim Remover
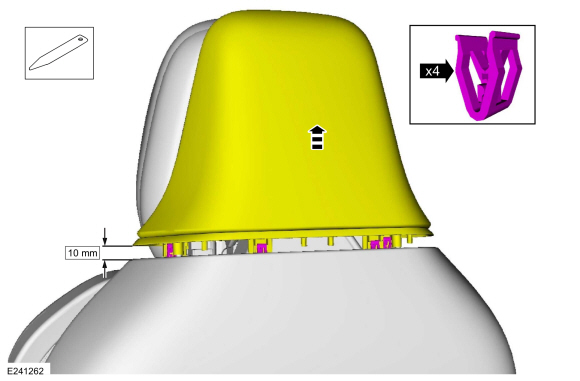 |
-
NOTICE: The back panel finish can be easily marred or torn, use care when working around it.
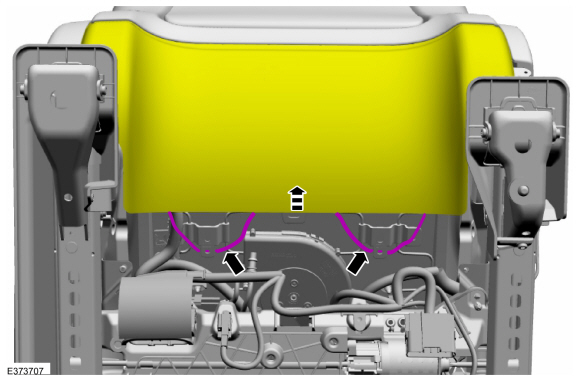
On both sides, grasp the back panel where it meets the module trim, pull to release the clips and separate the back panel from the module trim.
 |
-
NOTICE: The back panel finish can be easily marred or torn, use care when working around it.
On both sides, using the interior trim remover, place it in between the plastic substrate and the clip, pry and detach the module clips from the back panel windows.
Use the General Equipment: Interior Trim Remover
-
Pull out at the bottom, release the clips and detach the back panel from the backrest frame.
 |
-
Pull out at the sides of the back panel.
 |
-
Pull down and out and remove the back panel.
 |
Driver seat without power head restraint
-
NOTICE: The back panel finish can be easily marred or torn, use care when working around it.
On both sides, grasp the back panel where it meets the module trim, pull to release the clips and separate the back panel from the module trim.
 |
-
NOTICE: The back panel finish can be easily marred or torn, use care when working around it.
On both sides, using the interior trim remover, place it in between the plastic substrate and the clip, pry and detach the module clips from the back panel windows.
Use the General Equipment: Interior Trim Remover
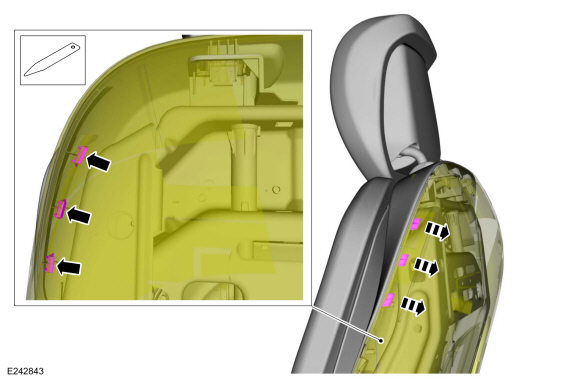 |
-
Pull out at the bottom, release the clips and detach the back panel from the backrest frame.
 |
-
Pull out at the sides of the back panel.
 |
-
Pull down and out and remove the back panel.
 |
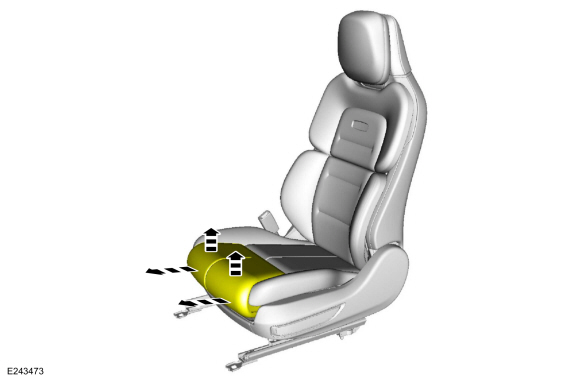
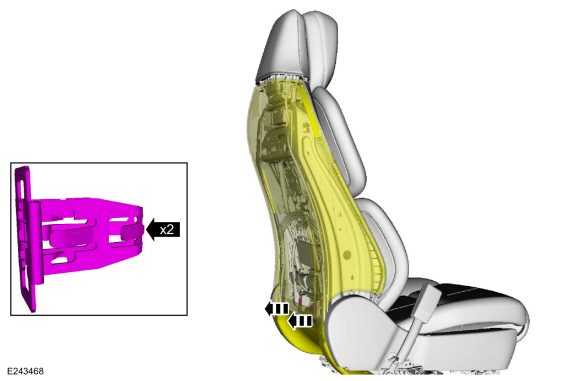
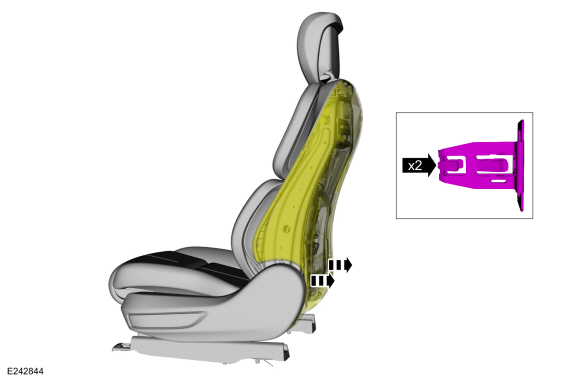
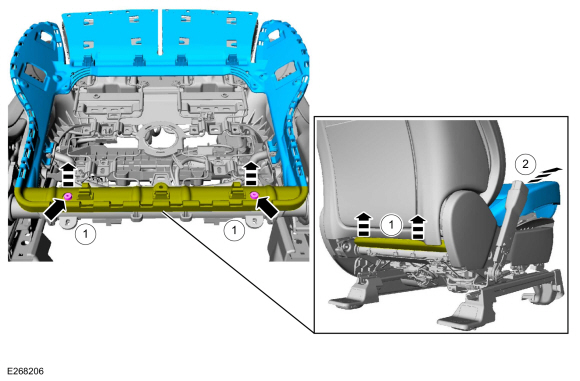
-
At the attachment points, slide the seat cushion
assembly rearward and upward, detaching the cushion assembly from the
cushion module.
 |
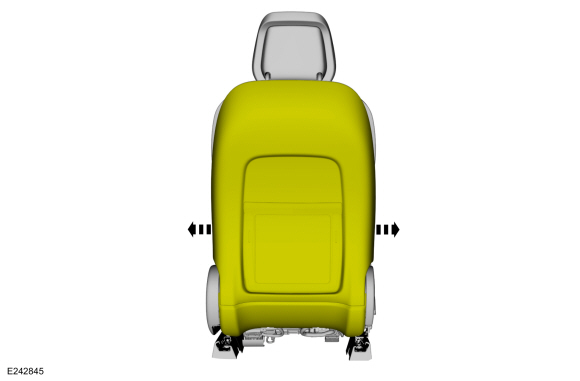
-
-
NOTE: Only the carrier portion of the seat cushion is shown.
Push the rear of the seat cushion up, disengaging the carrier from the locator pins.
-
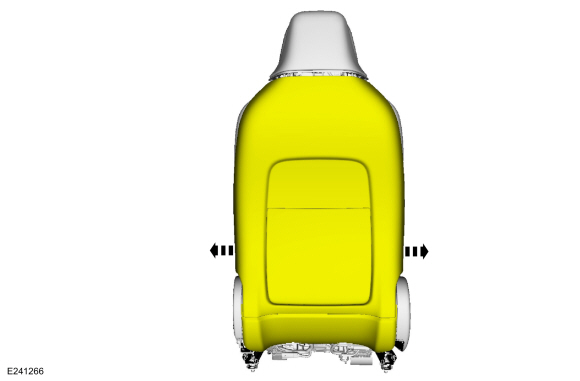
Pull the seat cushion and out from between the seat track and backrest.
-
 |
-
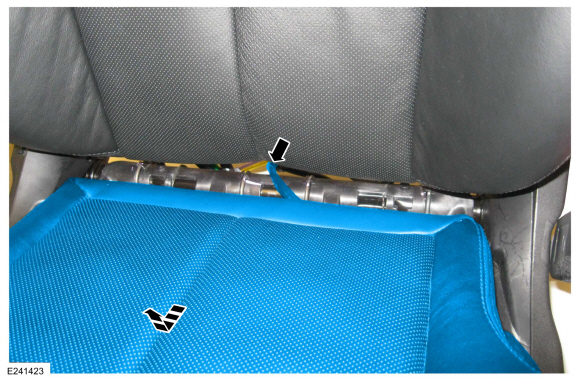
Route the cushion heater mat wiring harness pigtail out from between the seat cushion and backrest.
 |
All seats
-
NOTE: This step is only necessary when installing a new component.
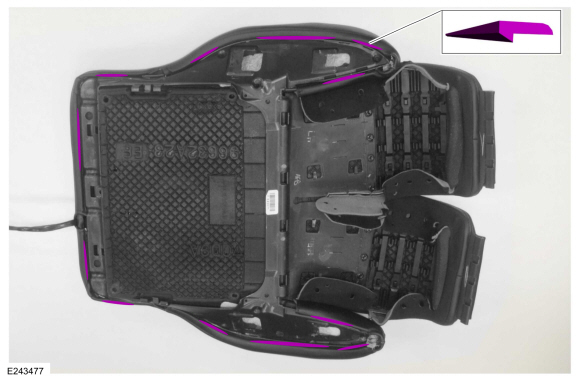
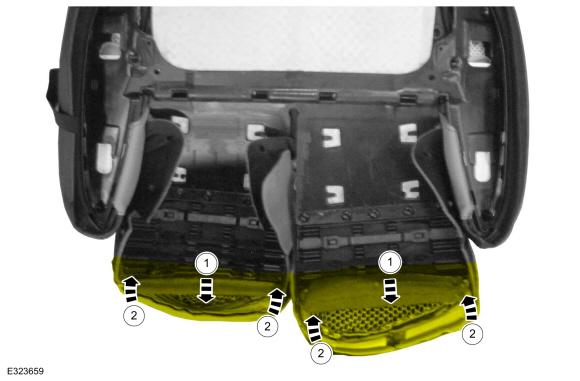
Release the front seat cushion cover from the retainers.
 |
-
NOTE: This step is only necessary when installing a new component.
Invert the cushion leg extension portions of the front seat cushion cover.
 |
-
NOTE: This step is only necessary when installing a new component.
Release the front seat backrest cover tabs.
 |
-
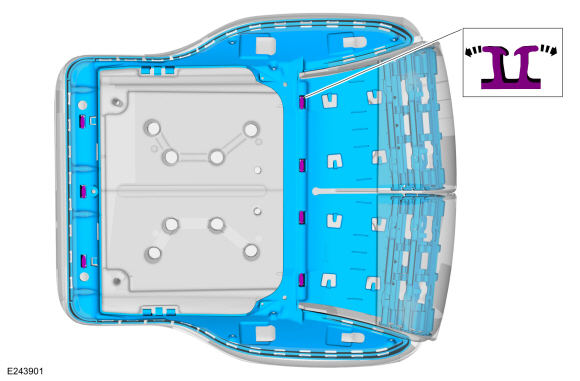
NOTE: This step is only necessary when installing a new component.
Release the hook-and-arrows and remove the front seat cushion cover carrier.
 |
-
NOTICE: Use care when separating the seat cushion cover from the hook-and-loop strips or the hook-and-loop strips may be torn from the seat cushion foam.
NOTE: This step is only necessary when installing a new component.
NOTE: Base seat shown, Black Label/Presidential seat similar.
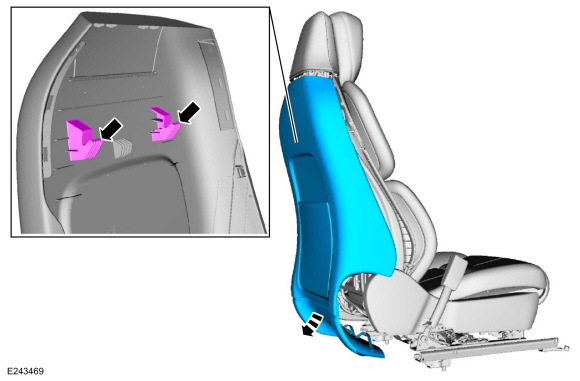
Remove the front seat cushion cover.
-
Invert the front seat cushion cover.
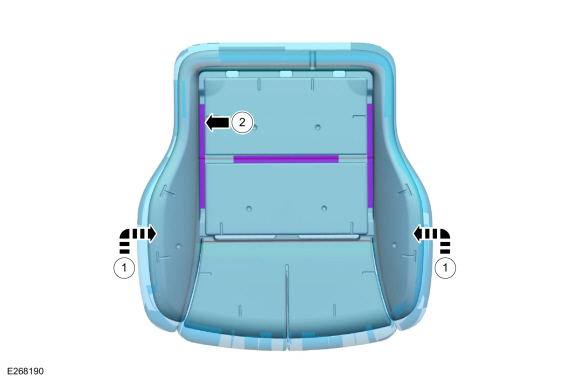
-
Release the hook-and-loop strips.
-
Invert the front seat cushion cover.
 |
Installation
-
To install, reverse the removal procedure.
-
NOTE: This step is only necessary when installing a new component.
-
Position the cushion leg extension portions of the front seat cushion foam and carrier down.
-
Roll the cushion leg extension portions of the front seat cushion cover over the foam and carrier..
-
Position the cushion leg extension portions of the front seat cushion foam and carrier down.
 |
 Front Seat Cushion Bolster - Vehicles With: Multi-Contour Seats. Removal and Installation
Removal
NOTE:
Driver seat shown, passenger seat similar.
Remove the front seat cushion cover.
Refer to: Front Seat Cushion Cover (501-10A Front Seats, Removal and Installation)...
 Front Seat Cushion Cover. Removal and Installation
Special Tool(s) /
General Equipment
Interior Trim Remover
Removal
Passenger seat
Remove the OCS .
Refer to: Occupant Classification System (OCS) Sensor (501-20B Supplemental Restraint System, Removal and Installation)...
Other information:
Lincoln Navigator 2018-2026 Workshop Manual: Floor Panel Section. Removal and Installation
Special Tool(s) / General Equipment 6.5 mm Drill Bit Scraper for Straight Edges Spherical Cutter Self-Piercing Rivet (SPR) Remover/Installer Belt Sander Blind Rivet Gun Hot Air Gun Air Body Saw Locking Pliers Materials Name Specification Metal Bonding AdhesiveTA-1, TA-1-B, 3M™ 08115, LORD Fusor® 108B..
Lincoln Navigator 2018-2026 Workshop Manual: Oil Pressure Test. General Procedures
Oil Pressure Test 2.7L EcoBoost & 3.3L Duratec & 5.0L Ti-VCT NOTE: It is necessary to disconnect the battery to avoid setting any DTCs that could cause the PCM to command the oil pressure to other than what should be observed from a correctly operating system during the oil pressure test. Disconnect the battery ground cable. For additional information, refer to: Ba..
Categories
- Manuals Home
- 4th Gen Lincoln Navigator Service Manual (2018 - 2026)
- Brake Service Mode Activation and Deactivation. General Procedures
- Front Seat. Removal and Installation
- Remote Function Actuator (RFA) Module. Removal and Installation
- Head Up Display (HUD) Module Calibration. General Procedures
- Body and Paint
Front Driveshaft. Removal and Installation
Special Tool(s) / General Equipment
Crimping ToolMaterials
Name Specification Motorcraft® Premium Long-Life GreaseXG-1-E1 ESA-M1C75-B
Removal
With the vehicle in NEUTRAL, position the vehicle on a hoist.Refer to: Jacking and Lifting (100-02 Jacking and Lifting, Description and Operation).
Remove the bolts and the transmission shield.