Lincoln Navigator: Front Drive Axle/Differential / Differential Fluid Level Check. General Procedures
Materials
| Name | Specification |
|---|---|
| Motorcraft® SAE 75W-85 Premium Synthetic Hypoid Gear Lubricant XY-75W85-QL |
WSS-M2C942-A |
Check
-
With the vehicle in NEUTRAL, position it on a hoist.
Refer to: Jacking and Lifting (100-02 Jacking and Lifting, Description and Operation).
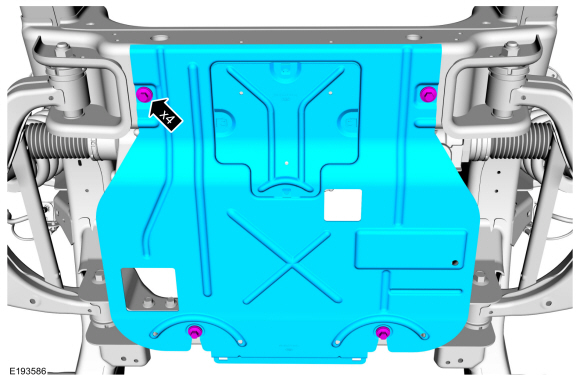
-
NOTE: If equipped.
Remove the bolts and remove the underbody shield.
 |
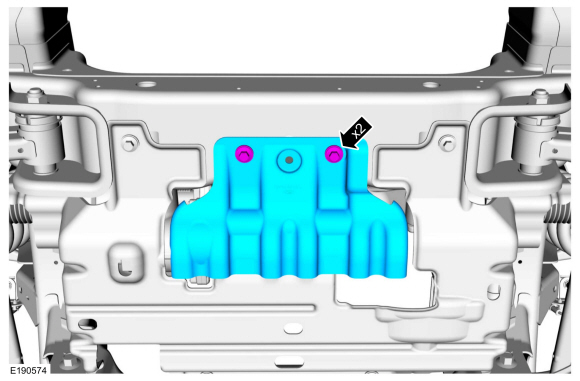
-
NOTE: If equipped.
Remove the bolts, and remove the underbody shield.
 |
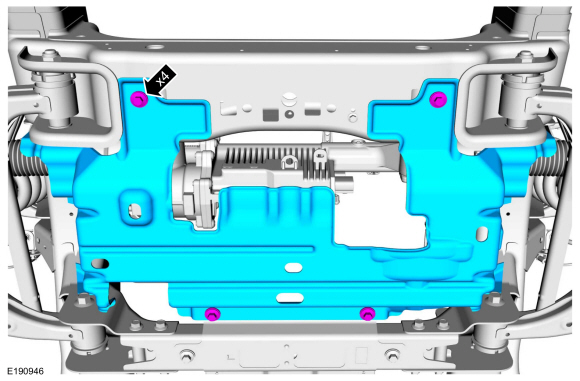
-
NOTE: If equipped.
Remove the bolts and remove the underbody shield.
 |
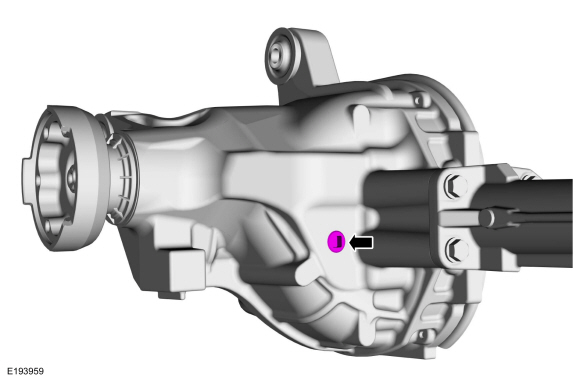
-
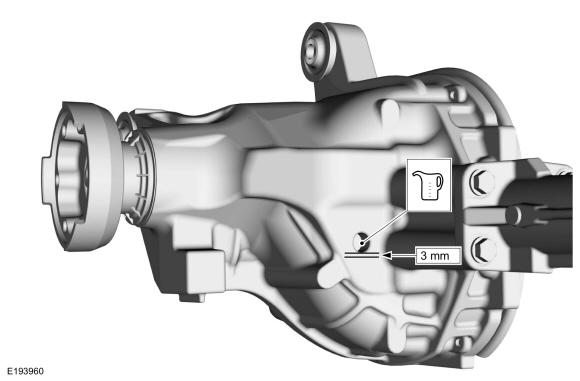
Remove the front differential fill plug.
 |
-
Check and top off the differential with clean
differential gear lubricant. The differential gear lubricant level
should be within 3mm (0.118 in.) from the fluid level fill plug opening.
Install the differential fill plug.
Material: Motorcraft® SAE 75W-85 Premium Synthetic Hypoid Gear Lubricant / XY-75W85-QL (WSS-M2C942-A)
 |
-
Install the front differential fill plug.
Torque: 18 lb.ft (25 Nm)
|
-
NOTE: If equipped.
Install the underbody shield and underbody shield bolts.
Torque: 71 lb.in (8 Nm)
|
-
NOTE: If equipped.
Install the underbody shield and the bolts.
Torque: 30 lb.ft (40 Nm)
|
-
NOTE: If equipped.
Install the underbody shield and the bolts.
Torque: 71 lb.in (8 Nm)
|
 Differential Case Runout Check. General Procedures
Special Tool(s) /
General Equipment
205-1016Installer, Differential BearingTKIT-2014D-ROW2TKIT-2014D-FL_ROW
205-153
(T80T-4000-W)
Handle
205-D061
(D83T-4205-C2)
Step Plate
Dial Indicator
Three Leg Puller
Punch
Copper Hammer
Check
Remove the differential...
 Axle Assembly. Removal and Installation
Special Tool(s) /
General Equipment
Transmission Jack
Removal
NOTE:
The removal steps may contain installation instructions.
Remove the front driveshaft...
Other information:
Lincoln Navigator 2018-2026 Workshop Manual: Brake Disc Shield. Removal and Installation
Removal NOTE: Removal steps in this procedure may contain installation details. Remove the brake disc. Refer to: Brake Disc (206-03 Front Disc Brake, Removal and Installation). Remove the bolts and the brake disc shield...
Lincoln Navigator 2018-2026 Workshop Manual: Desiccant Bag. Removal and Installation
Removal NOTICE: During the removal or installation of components, cap, tape or otherwise appropriately protect all openings and tubes/fittings to prevent the ingress of dirt or other contamination. Remove caps, tape and other protective materials prior to installation...
Categories
- Manuals Home
- 4th Gen Lincoln Navigator Service Manual (2018 - 2026)
- Rear Bumper. Removal and Installation
- Identification Codes. Description and Operation
- Brake Service Mode Activation and Deactivation. General Procedures
- Body Control Module (BCM). Removal and Installation
- Transmission Fluid Level Check. General Procedures
Wheel to Hub Runout Minimization. General Procedures
Check
NOTE: Wheel-to-hub optimization is important. Clearance between the wheel and hub can be used to offset or neutralize the Road Force® or run-out of the wheel and tire assembly. For every 0.001 inch of wheel-to-hub clearance, the Road Force® can be affected between 1 and 3 pounds depending on the tire stiffness.
NOTE: The example below illustrates how the clearance between the wheel and the hub can be used to offset the high spot of radial run-out or Road Force®. Following the procedure will make sure of the best optimization.
Position the wheel and tire assembly on the vehicle so that the high spot location of radial run-out or Road Force® is at the 6 o'clock position and