Lincoln Navigator: Handles, Locks, Latches and Entry Systems / Hood Latch Release Handle. Removal and Installation
Removal
NOTE: Removal steps in this procedure may contain installation details.
-
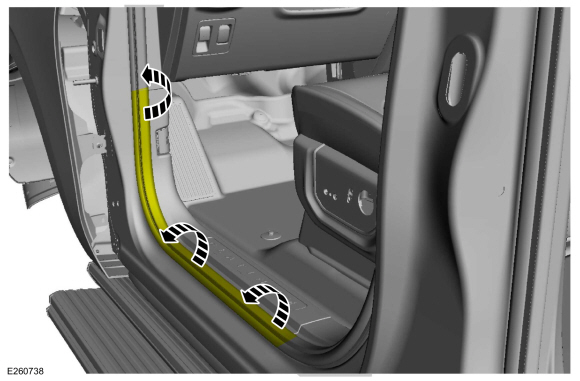
Position the front door weatherstrip aside.
 |
-
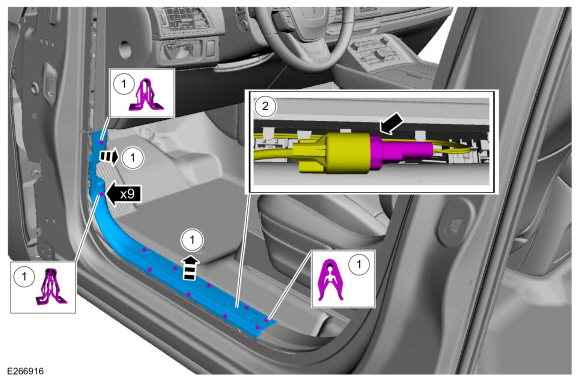
Remove the front door scuff plate trim panel.
-
Release the clips.
-
Disconnect the front door scuff plate trim panel electrical connector.
-
Release the clips.
 |
-
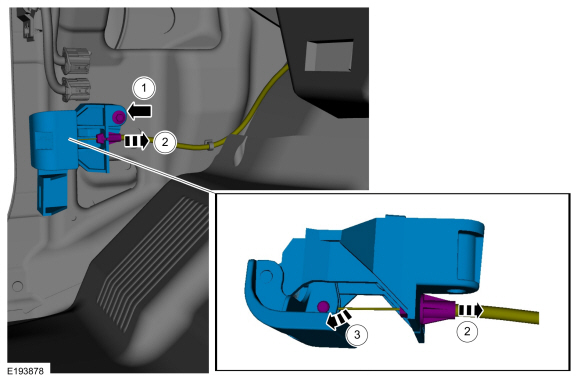
Remove the hood latch release handle.
-
Remove the bolt from the hood latch release handle.
Torque: 80 lb.in (9 Nm)
-
Release the hood latch release cable from the hood latch release handle retaining bracket.
-
Release the hood latch release handle from the hood latch release handle cable end.
-
Remove the bolt from the hood latch release handle.
 |
Installation
-
To install, reverse the removal procedure.
 Hood Latch Release Cable. Removal and Installation
Removal
Remove the hood latch release handle.
Refer to: Hood Latch Release Handle (501-14 Handles, Locks, Latches and Entry Systems, Removal and Installation)...
 Interior Front Door Handle. Removal and Installation
Removal
NOTE:
LH side shown, RH side similar.
Remove the front door trim panel.
Refer to: Front Door Trim Panel (501-05 Interior Trim and Ornamentation, Removal and Installation)...
Other information:
Lincoln Navigator 2018-2026 Workshop Manual: Information and Entertainment System - Component Location. Description and Operation
NOTE: The available speaker configurations are shown first. The remaining hidden audio and SYNC system components and various cable routings follow the speaker configurations. NOTE: Some vehicles may not be equipped with all the optional components shown...
Lincoln Navigator 2018-2026 Workshop Manual: Evaporative Emission Canister Ventilation Filter. Removal and Installation
Removal NOTE: Removal steps in this procedure may contain installation details. Remove the EVAP canister. Refer to: Evaporative Emission Canister (303-13 Evaporative Emissions - 3.5L EcoBoost (272kW/370PS), Removal and Installation)...
Categories
- Manuals Home
- 4th Gen Lincoln Navigator Service Manual (2018 - 2026)
- SYNC Module [APIM]. Removal and Installation
- Remote Function Actuator (RFA) Module. Removal and Installation
- Body and Paint
- Vehicle Dynamics Control Module (VDM). Removal and Installation
- Front Bumper Cover. Removal and Installation
Rear Stabilizer Bar Link. Removal and Installation
Removal
NOTE: Removal steps in this procedure may contain installation details.
With the vehicle in NEUTRAL, position it on a hoist.Refer to: Jacking and Lifting (100-02 Jacking and Lifting, Description and Operation).
NOTE: Use the hex-holding feature to prevent the stud from turning while removing the nut.
Remove and discard the 2 rear stabilizer bar link nuts and remove the rear stabilizer bar link.Torque: 46 lb.ft (63 Nm)
