Lincoln Navigator: Engine - 3.5L EcoBoost (272kW/370PS) / Exhaust Manifold RH. Removal and Installation
Materials
| Name | Specification |
|---|---|
| Motorcraft® Metal Surface Prep Wipes ZC-31-B |
- |
Removal
-
With the vehicle in NEUTRAL, position it on a hoist.
Refer to: Jacking and Lifting (100-02 Jacking and Lifting, Description and Operation).
-
NOTICE: The exhaust manifold heat shield provides critical protection for dual generator-equipped engines. If removed, it must be properly reinstalled.
Engines equipped with dual generators.
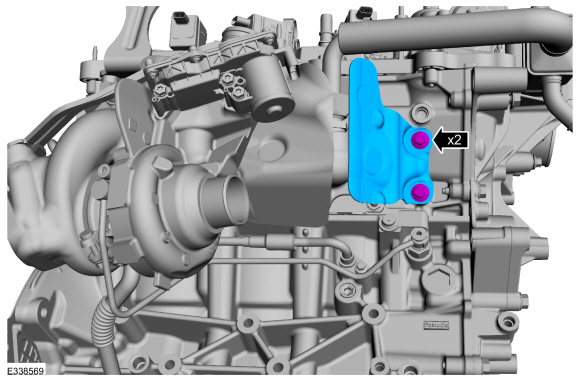
Remove the bolts and the exhaust manifold heat shield.
 |
-
Remove the EGR cooler exhaust tube from the exhaust.
 |
-
Remove the RH turbocharger.
Refer to: Turbocharger RH (303-04B Fuel Charging and Controls - Turbocharger - 3.5L EcoBoost (272kW/370PS), Removal and Installation).
-
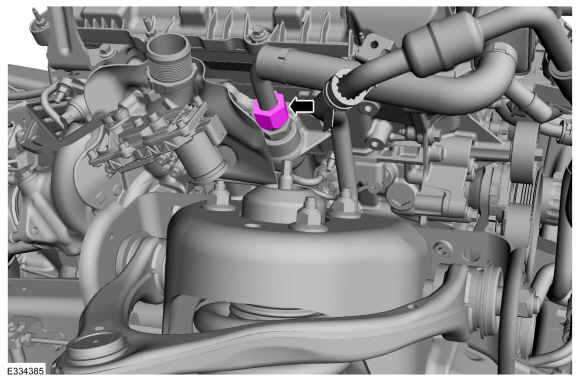
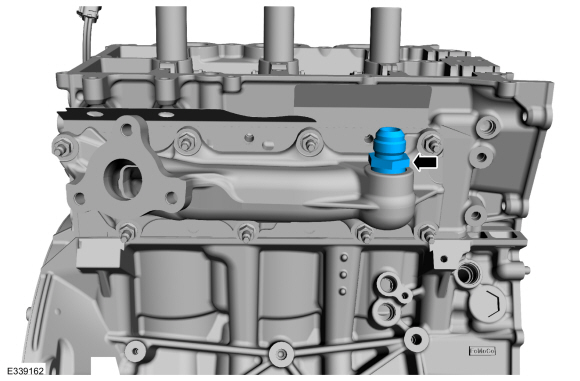
Remove and discard the EGR to exhaust manifold connector.
 |
-
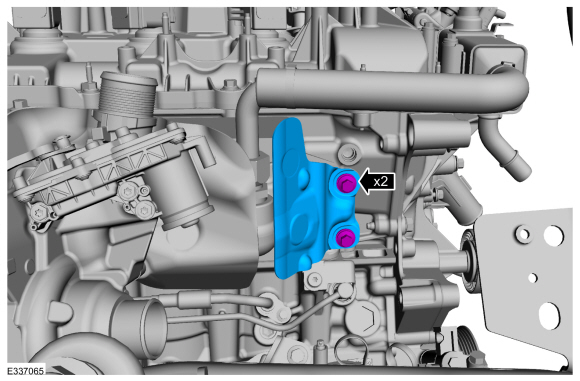
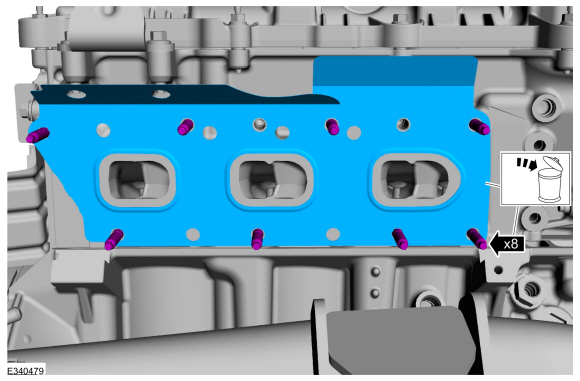
Remove the nuts and the RH exhaust manifold. Discard the nuts.
 |
-
Remove the nuts, the RH exhaust manifold gasket and discard.
 |
-
-
Clean and inspect the exhaust manifold.
Refer to: Exhaust Manifold Cleaning and Inspection (303-00 Engine System - General Information, General Procedures).
-
NOTICE: Do not use metal scrapers, wire brushes, power abrasive discs or other abrasive means to clean the sealing surfaces. These may cause scratches and gouges resulting in leak paths. Use a plastic scraper to clean the sealing surfaces.
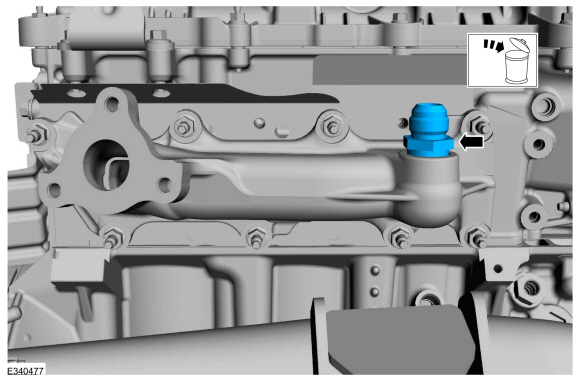
Clean the exhaust manifold mating surface of the cylinder head with metal surface prep wipes. Follow the directions on the packaging.
Material: Motorcraft® Metal Surface Prep Wipes / ZC-31-B
-
Clean and inspect the exhaust manifold.
 |
Installation
-
NOTE: Install short end of stud into cylinder head assembly.
-
Loosely install the new studs into the RH cylinder head.
-
Tighten the studs.
Torque: 115 lb.in (13 Nm)
-
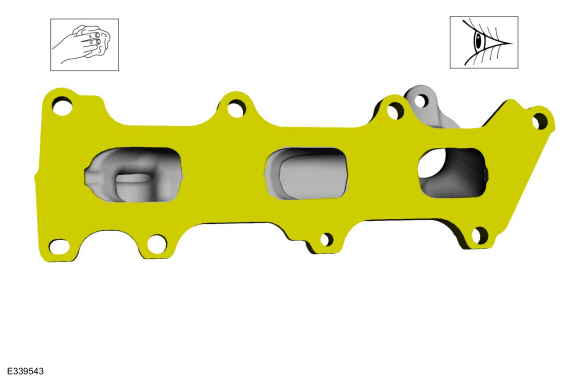
Install the new exhaust manifold gasket.
-
Loosely install the new studs into the RH cylinder head.
 |
-
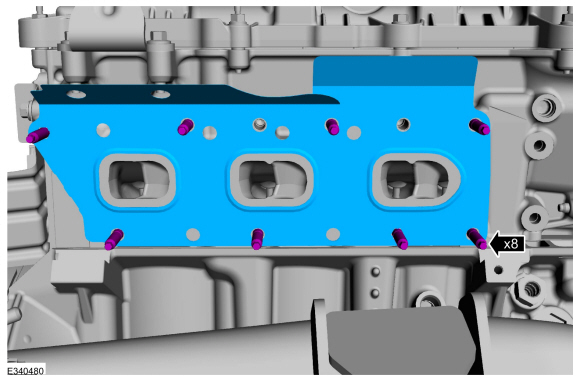
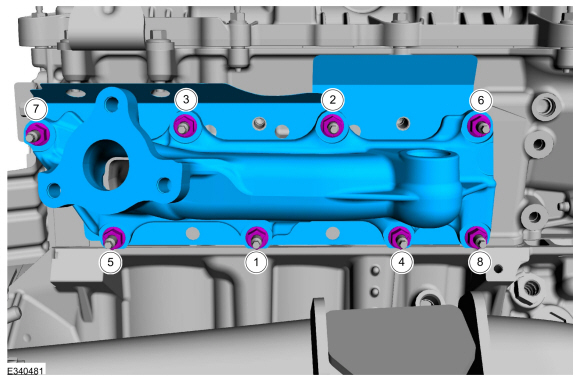
Install the RH exhaust manifold and the new nuts. Tighten the nuts in sequence shown in 2 stages.
Torque:
Stage 1: 142 lb.in (16 Nm)
Stage 2: 16 lb.ft (22 Nm)
 |
-
NOTE: The new EGR to exhaust manifold connector comes lubricated, no lubricant needs to be applied.
Install the new EGR to exhaust manifold connector.
Torque: 125 lb.ft (170 Nm)
 |
-
Install the RH turbocharger.
Refer to: Turbocharger RH (303-04B Fuel Charging and Controls - Turbocharger - 3.5L EcoBoost (272kW/370PS), Removal and Installation).
-
Engine equipped with dual generator.
Install the exhaust manifold heat shield and bolts.
Torque: 18 lb.ft (25 Nm)
 |
 Exhaust Manifold LH. Removal and Installation
Materials
Name
Specification
Motorcraft® Metal Surface Prep WipesZC-31-B
-
Removal
With the vehicle in NEUTRAL, position it on a hoist...
 Flexplate. Removal and Installation
Removal
Remove the transmission.
Refer to: Transmission (307-01 Automatic Transmission - 10-Speed Automatic Transmission – 10R80, Removal and Installation)...
Other information:
Lincoln Navigator 2018-2026 Workshop Manual: Ring Gear Backlash Adjustment - Vehicles With: Electronic Limited-Slip Differential. General Procedures
Special Tool(s) / General Equipment 205-220Installer, Differential ShimTKIT-1985-FH 307-003 (T57L-500-B) Holding Fixture, Transmission Dial Indicator Copper Hammer Adjustment Remove the rear axle assembly...
Lincoln Navigator 2018-2026 Workshop Manual: Front Seat Cushion Bolster - Vehicles With: Multi-Contour Seats. Removal and Installation
Removal NOTE: Driver seat shown, passenger seat similar. Remove the front seat cushion cover. Refer to: Front Seat Cushion Cover (501-10A Front Seats, Removal and Installation). Remove the pin-type retainers and the front seat cushion bolster(s)...
Categories
- Manuals Home
- 4th Gen Lincoln Navigator Service Manual (2018 - 2026)
- Neutral Flat Tow Activation and Deactivation. General Procedures
- Power Running Board (PRB). Diagnosis and Testing
- Identification Codes. Description and Operation
- Remote Function Actuator (RFA) Module. Removal and Installation
- Vehicle Dynamics Control Module (VDM). Removal and Installation
Rear Stabilizer Bar Link. Removal and Installation
Removal
NOTE: Removal steps in this procedure may contain installation details.
With the vehicle in NEUTRAL, position it on a hoist.Refer to: Jacking and Lifting (100-02 Jacking and Lifting, Description and Operation).
NOTE: Use the hex-holding feature to prevent the stud from turning while removing the nut.
Remove and discard the 2 rear stabilizer bar link nuts and remove the rear stabilizer bar link.Torque: 46 lb.ft (63 Nm)
