Lincoln Navigator: Transmission Cooling / Transmission Fluid Heat Exchanger. Removal and Installation
Special Tool(s) /
General Equipment
Materials
| Name |
Specification |
Motorcraft® MERCON® ULV Automatic Transmission Fluid
XT-12-QULV |
WSS-M2C949-A,
MERCON® ULV
|
Removal
-
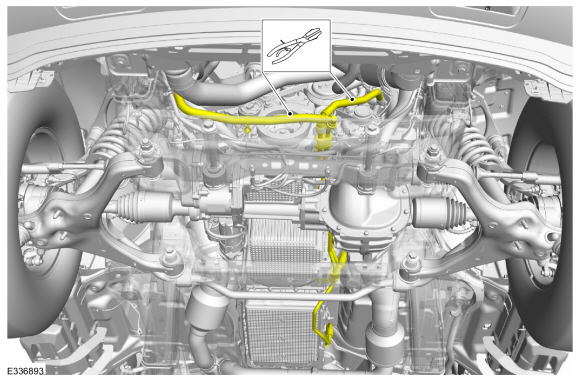
With the vehicle in N , position it on a hoist.
Refer to: Jacking and Lifting (100-02 Jacking and Lifting, Description and Operation).
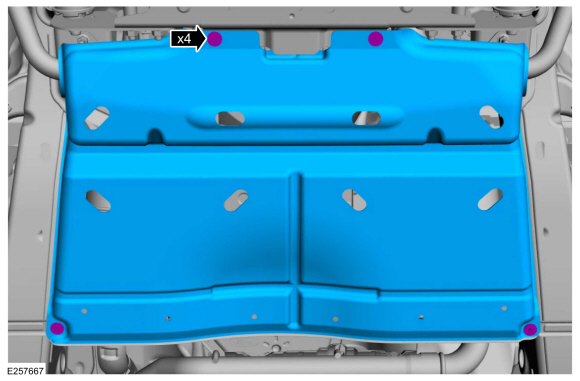
-
If equipped, remove the retainers and splash shield.
-
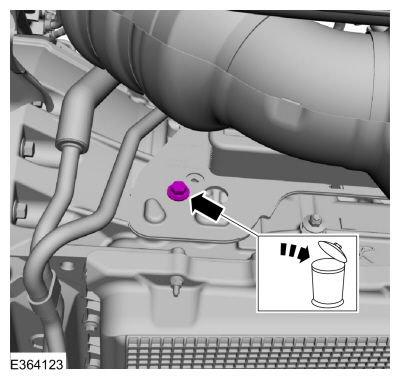
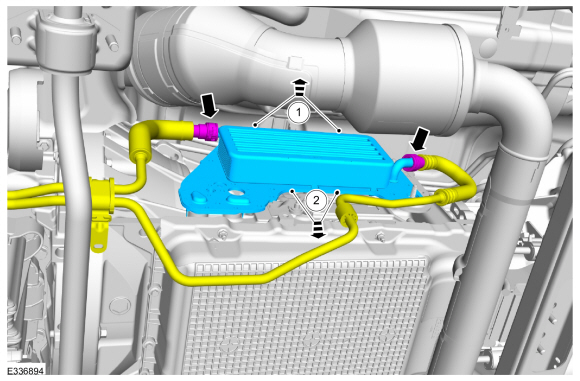
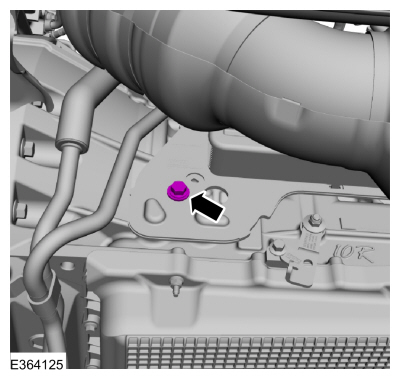
Remove and discard the transmission fluid heat exchanger bolt.
-
-
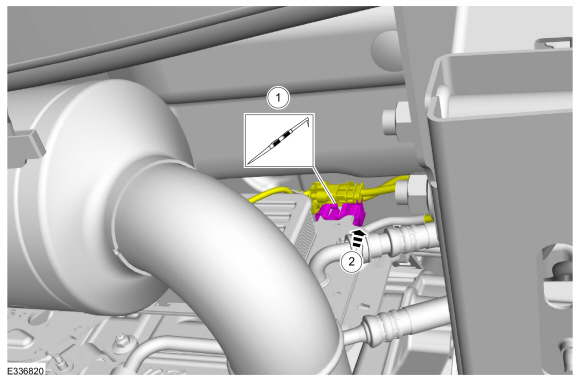
Release the harness retainer tab.
-
Slide the harness retainer off the fluid heat exchanger.
-
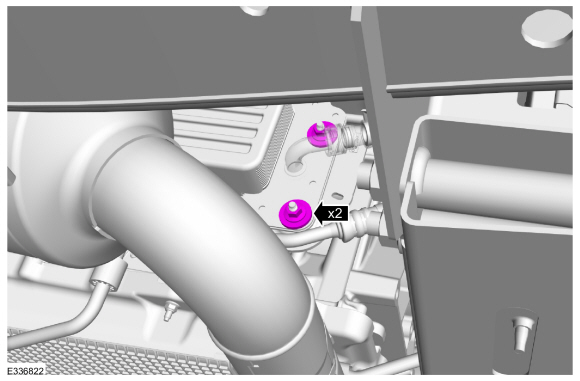
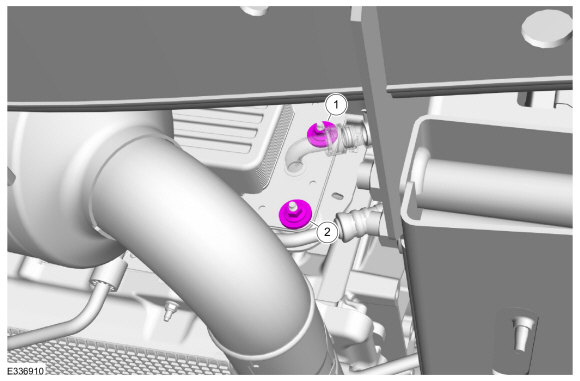
Remove the transmission fluid heat exchanger nuts.
-
Remove the coolant tube hanger nut and separate the hanger from the stud bolt.
-
Clamp the coolant inlet and outlet hoses at the front of the engine.
Use the General Equipment: Hose Clamp(s)
-
NOTE:
Be prepared to collect escaping fluid.
-
Separate the transmission fluid heat exchanger from the transmission case.
-
Lower the transmission fluid heat exchanger to disconnect the hoses and remove it from the vehicle.
Installation
-
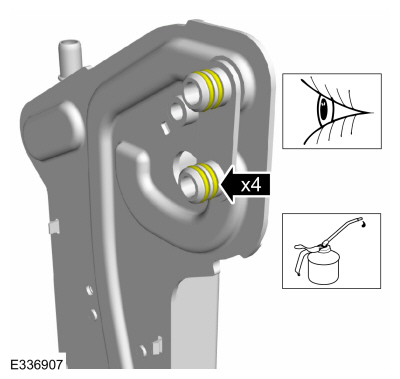
Inspect the O-ring seals and install new O-ring seals if
necessary. Lubricate the O-ring seals before installing the
transmission fluid heat exchanger.
Material: Motorcraft® MERCON® ULV Automatic Transmission Fluid
/ XT-12-QULV
(WSS-M2C949-A, )
(MERCON® ULV)
-
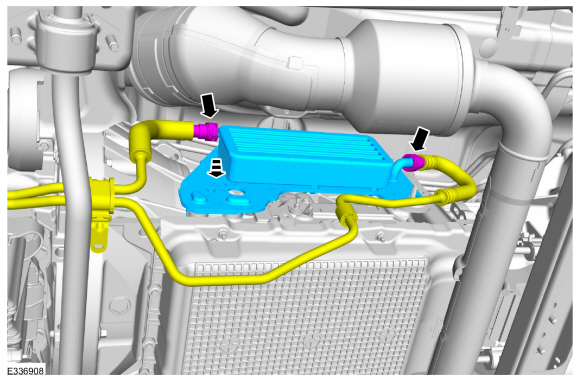
Install the transmission heat exchanger tubes completely into the transmission case and connect the hoses.
-
Remove the clamps at the front of the engine.
-
Install the coolant tube hanger nut on to the stud bolt.
Torque:
124 lb.in (14 Nm)
-
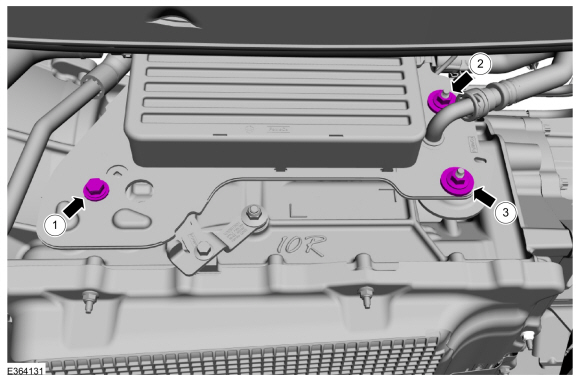
loosely install the transmission fluid heat exchanger bolt.
-
Loosely install the transmission fluid heat exchanger nuts in sequence shown.
-
Tighten the bolt and nuts in the sequence shown.
Torque:
177 lb.in (20 Nm)
-
Install the harness retainer on the transmission fluid heat exchanger.
-
Check and adjust the engine coolant level as necessary.
Refer to: Engine Cooling System Draining, Vacuum Filling and Bleeding
(303-03 Engine Cooling - 3.5L EcoBoost (272kW/370PS), General
Procedures).
-
Check and adjust the transmission fluid level as necessary.
Refer to: Transmission Fluid Level Check (307-01 Automatic Transmission
- 10-Speed Automatic Transmission – 10R80, General Procedures).
-
If equipped, install the splash shield and the retainers.
Torque:
71 lb.in (8 Nm)
Special Tool(s) /
General Equipment
Transmission Cooling System Heated Flusher
Materials
Name
Specification
Motorcraft® MERCON® ULV Automatic Transmission FluidXT-12-QULV
WSS-M2C949-A, MERCON® ULV
Flushing
NOTE:
Use transmission fluid specified for this
transmission...
Other information:
System Operation
System Diagram - Gauges
*.sttxt {
visibility: hidden;
}
*.stcallout {
visibility: visible;
}
1
PCM
2
GWM
3
Fuel Pump and
Sender Unit
4
IPC
5
Speedometer
6
Tachometer
7
Temperature
..
Special Tool(s) /
General Equipment
205-1049Socket, 9.75 Plenum 4 pin
205-153
(T80T-4000-W)
Handle
205-D044
(D81T-4221-A)
Installer, Differential Carrier Bearing
205-D061
(D83T-4205-C2)
Step Plate
205-D072
(D97L-4221-A)
2 Jaw Puller
307-003
(T57L-500-B)
Holding Fixture, Transmission
Cable Ties
..

 Transmission Fluid Cooler - Backflushing and Cleaning. General Procedures