Lincoln Navigator: Steering Column / Steering Column - Install after Access. Removal and Installation
-
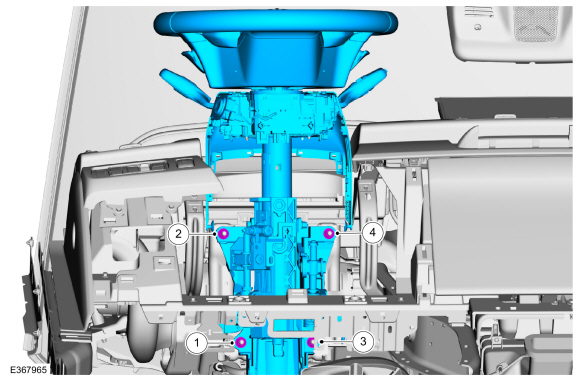
NOTE: Torque the steering column retainers following the sequence shown.
Install the steering column and the retainers.
Torque: 18 lb.ft (25 Nm)
 |
-
Connect the upper shaft to the steering column and install the new bolt. WARNING:
Do not reuse steering column shaft bolts. This may
result in fastener failure and steering column shaft detachment or loss
of steering control. Failure to follow this instruction may result in
serious injury to vehicle occupant(s).
WARNING:
Do not reuse steering column shaft bolts. This may
result in fastener failure and steering column shaft detachment or loss
of steering control. Failure to follow this instruction may result in
serious injury to vehicle occupant(s).
Torque: 22 lb.ft (30 Nm)
 |
-
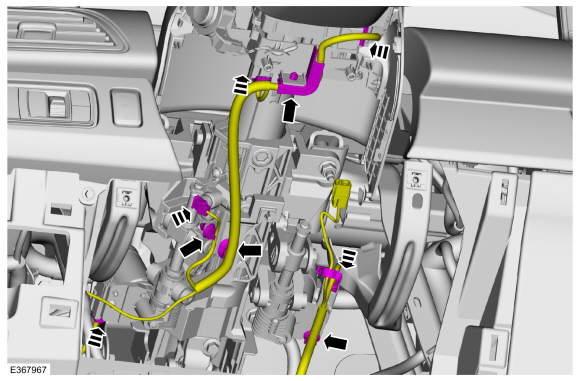
NOTE: Vehicle equipped with power adjustable steering column shown, others similar.
Position the steering column harness, attach the clips and connect the steering column harness electrical connectors.
 |
-
Install the lower steering column shroud.
 |
-
Install the lower steering column shroud bolts.
Torque: 22 lb.in (2.5 Nm)
 |
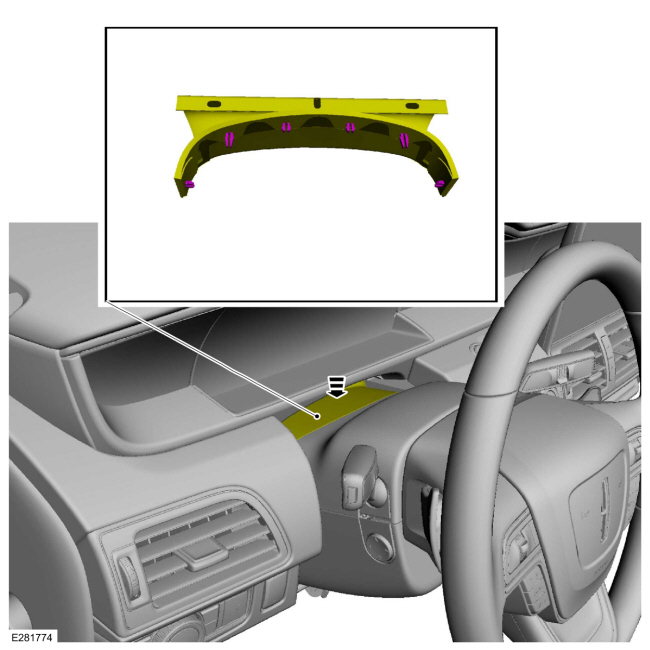
-
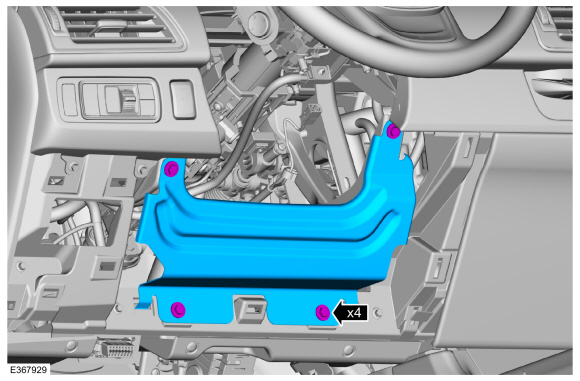
Position the steering column reinforcement panel and install the bolts.
Torque: 80 lb.in (9 Nm)
 |
-
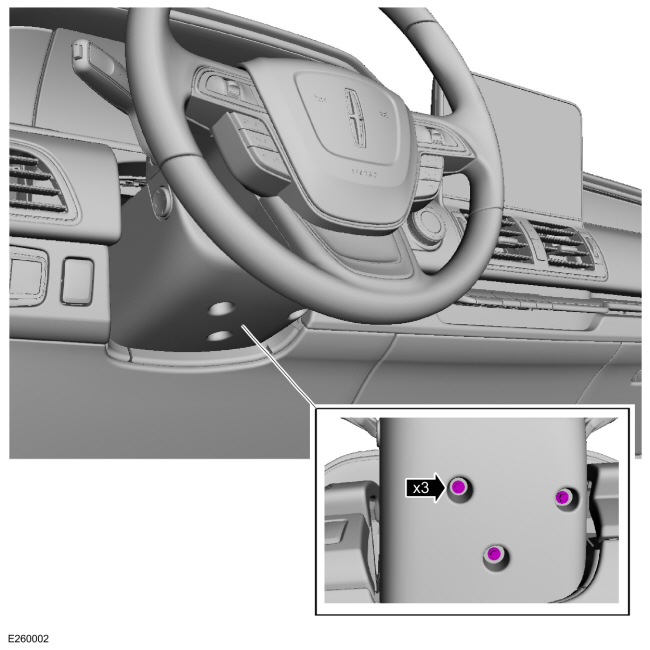
Install the steering column opening trim panel.
 |
-
Install the gap hider.
 |
-
Repower the SRS .
Refer to: Supplemental Restraint System (SRS) Repowering (501-20B Supplemental Restraint System, General Procedures).
 Steering Column. Removal and Installation
Removal
NOTE:
Power adjustable column shown, manual column similar.
NOTE:
Removal steps in this procedure may contain installation details...
 Steering Column Lower Shaft. Removal and Installation
Removal
NOTE:
Removal steps in this procedure may contain installation details.
NOTE:
Do not allow the steering column to rotate while the
steering column shaft is disconnected or damage to the steering column
internal sensor may result...
Other information:
Lincoln Navigator 2018-2026 Workshop Manual: Windshield Wiper Motor. Removal and Installation
Removal NOTE: Removal steps in this procedure may contain installation details. NOTE: The hood is removed in this procedure for clarity. Remove the cowl panel grill. Refer to: Cowl Panel Grille (501-02 Front End Body Panels, Removal and Installation)...
Lincoln Navigator 2018-2026 Workshop Manual: Tire Pressure Monitoring System (TPMS) - Component Location. Description and Operation
Item Description 1 RTM 2 BCM 3 TPMS sensor assembly (4 required) ..
Categories
- Manuals Home
- 4th Gen Lincoln Navigator Service Manual (2018 - 2026)
- Body and Paint
- Remote Function Actuator (RFA) Module. Removal and Installation
- Body Control Module (BCM). Removal and Installation
- Transmission Fluid Level Check. General Procedures
- Transmission Fluid Drain and Refill. General Procedures
Rear Stabilizer Bar Link. Removal and Installation
Removal
NOTE: Removal steps in this procedure may contain installation details.
With the vehicle in NEUTRAL, position it on a hoist.Refer to: Jacking and Lifting (100-02 Jacking and Lifting, Description and Operation).
NOTE: Use the hex-holding feature to prevent the stud from turning while removing the nut.
Remove and discard the 2 rear stabilizer bar link nuts and remove the rear stabilizer bar link.Torque: 46 lb.ft (63 Nm)
